Learn Angular by building a Web Application – TUTORIAL
Angular is a front-end framework powered by Google used for making Web Applications in a much faster & modular way than simply using plain JavaScript.
The apps we make using angular are mostly Single Page Applications. If you have never heard about Single Page Applications, they work by Dynamically Reloading & Generating content of the web page without refreshing the page on the browser. This improves the performance of the app and also increases the quality of the User Experience
Table of Contents
What Exactly is Angular?
Now that we’ve had a brief overview of what angular does. Let’s dive a little deeper into the things that Angular accomplishes and how it accomplishes them
Before doing that, however, it’s important to know that unlike many front-end frameworks like React.js or Vue.js. Angular uses TypeScript by default instead of JavaScript. Don’t worry if you have never learned javascript before as we can still manage by typing JavaScript code in our .ts files
The main thing that makes Angular useful is that it separates all the elements on our webpage into small little pieces called Components. These Components can freely interact and share data. They make our code very modular and easy to read. This also makes debugging easier since we can point out which component is buggy and fix only that component
Angular vs Angular.js

Angular has ( or rather used to have ) a confusing versioning system. AngularJS is nothing but version 1.0 of Angular. Since Angular 2.0 was released, it had so many changes that they are now considered to be entirely different frameworks. The thing you want to learn whenever someone refers to Angular is the latest version ( 14.0.4 as of writing this ) and not Angular.js as Angular.js is pretty much obsolete and irrelevant for us right now.
Before moving ahead let’s have a look at the main differences between Angular and AngularJS
- Angular is meant to be written in TypeScript whereas AngularJS is written in JavaScript
- Angular has its own Command Line Tool to build the projects whereas AngularJS is simply a JavaScript library that we include in our HTML by adding <script> tags
- Angular is much faster and more modular than its predecessor AngularJS
- Angular has support for mobile app development whereas AngularJS does not support it
Angular vs Other Frameworks
Let’s now have a comparison between Angular and other popular frameworks on the market ( like React.js, Vue.js, etc ) and see what exactly makes Angular special
- Firstly, compared to all three frameworks, Angular is the oldest and most mature framework and is backed by Google. React and Vue on the other hand are relatively new
- Angular provides a more complete framework when compared to React.js ( for eg. React has no default router for navigation between pages and to achieve that you have to install a separate package react-router-dom )
- One disadvantage of Angular when compared to other popular frameworks is its steep learning curve. Angular requires you to know topics such as TypeScript and MVC beforehand whereas React and Vue can mostly be learned within a day or two. However, this is not to say that it’s not worth learning Angular, as once understood it can pay huge dividends in your future projects
What will we build in the Tutorial?
To make learning Angular more fun and interesting, we’ll be building a mini-project that covers almost all of the essentials of Angular.
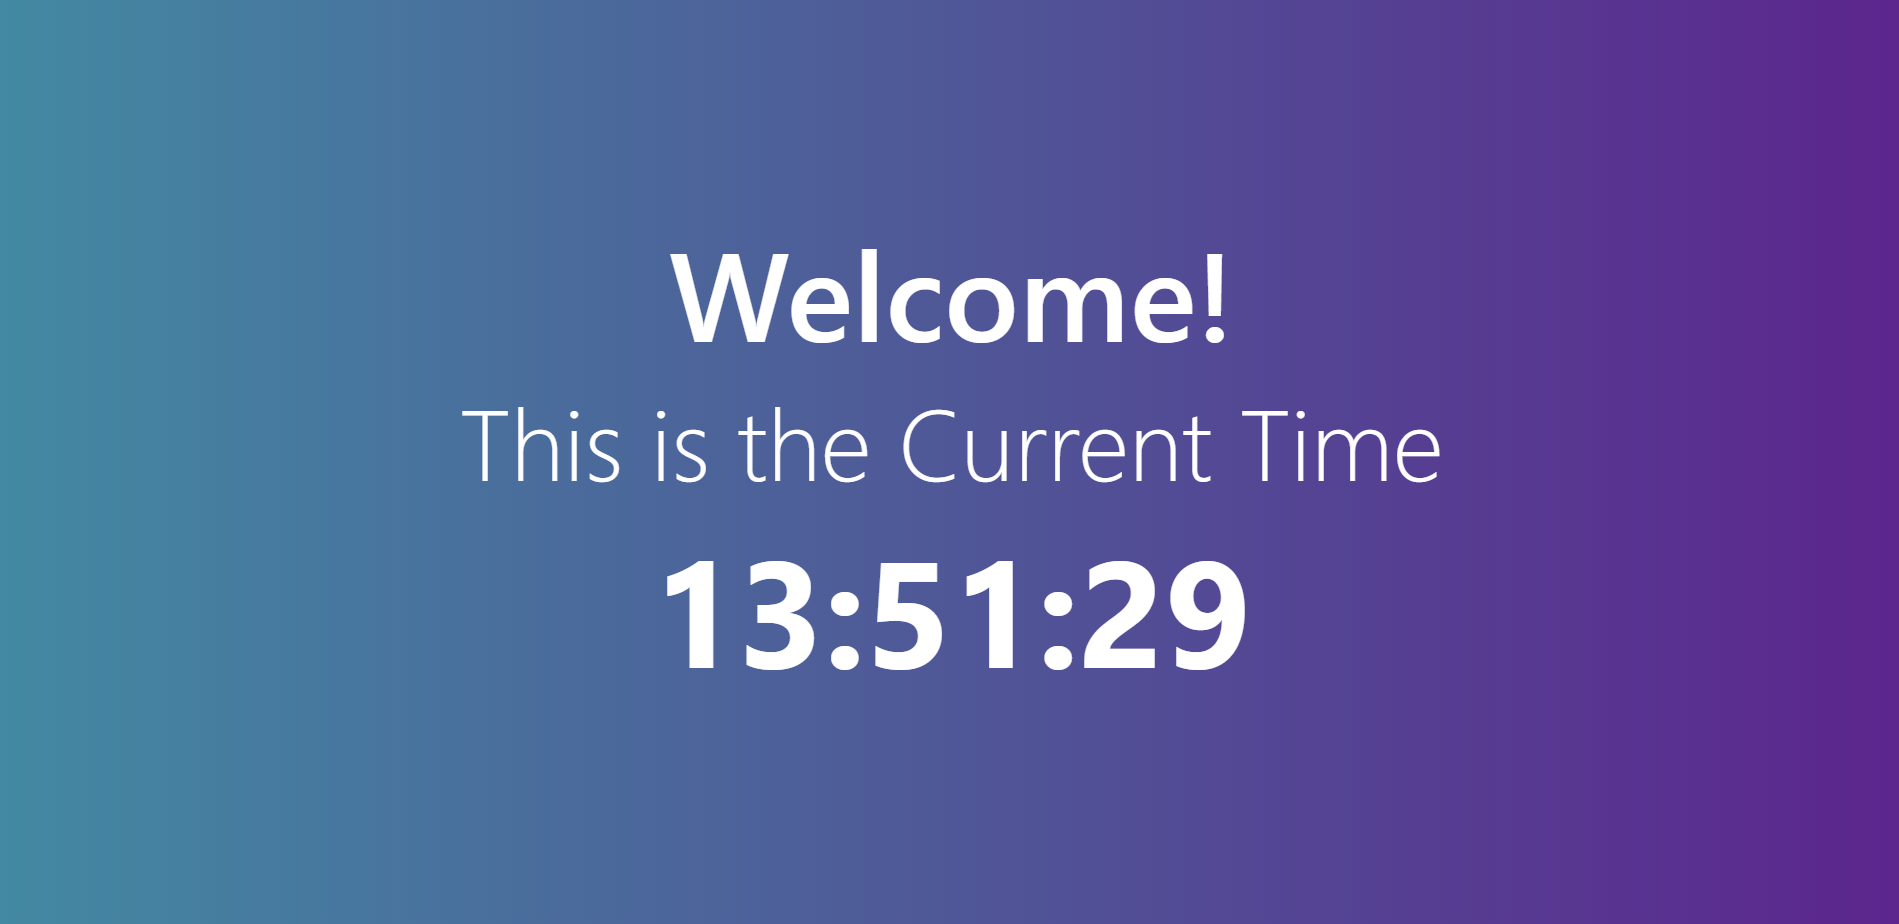
To keep it simple but complete, we’ll be building a website that shows a Digital Clock
Here’s a glimpse of the final project to keep you excited :
Part 1: Getting The Required Tools
-
Node.js & NPM
Angular is not available as a directly downloadable exe. Instead, it runs on a runtime called Node.js.
Angular is only available as a package on the Node Package Manager ( NPM ). So before installing Angular, we first have to install Node.js & NPM
To install Node.js
- Go to their official website https://www.nodejs.org
- Download the latest LTS version available ( 16.16.0 LTS ) as of writing this article
- Follow the on-screen instructions for installing
And voila! Node.js is successfully installed on your computer
-
Angular

Now that we have installed NPM & Node.js we can install Angular by running the following command
npm install -g @angular/cliTip: If you get any error while executing the following command on a Windows CMD or Powershell instance, try running the program by selecting “Run As Administrator” as we are asking npm to install the program globally by using the -g flag
-
Visual Studio Code (Optional)
This part is completely optional as you can use any favorite IDE of yours. If you don’t know what an IDE is, it’s simply a program/software which makes writing code easier by providing advanced features such as Syntax Highlighting, detecting our errors before we even execute the program, etc. If you haven’t used an IDE before I’d recommend you install Visual Studio Code as that’s what most people prefer and that’s what we’ll be using in this tutorial as well.
Part 2: Setting up the Angular Project
Creating the Project Folder
Now that we have gathered all of the required tools we can start making our Angular App!
To create a new Angular Project simply run the following command in the Parent Directory where you want to store the project files ( eg. if you want to store the project in the Desktop folder then the Parent Directory would simply be C:/Users/UserName/Desktop
ng new <app name>Here <app name> simply refers to the name of the Angular Application
In our case, the command would be
ng new DigitalClockYou might get a few prompts asking you to add additional features such as Angular Routing. Press N because for this project we won’t be needing them.
Depending on your computer this process might take a few minutes, after which you should see a new folder called DigitalClock created. Open that folder in Visual Studio Code
Understanding The File Structure of the Angular Project
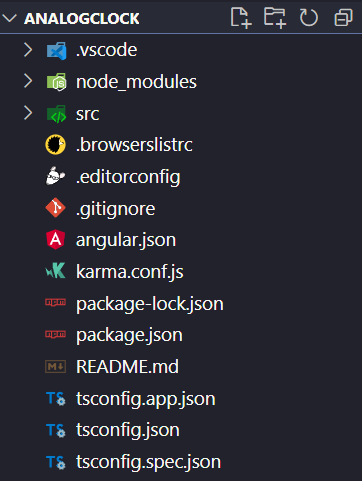
After opening the Project Folder you might have seen tons of files and folders already created. Angular is quite popular for having generally more number of files/folders when compared to other frameworks
But do not worry, as we have dedicated an entire sub-section just to understanding the File Structure of a basic Angular Application
Configuration Files
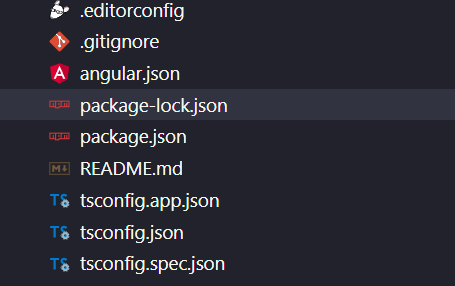
- .editorconfig: This file contains the configuration for the editor we are using ( VSCode in our case ). This file might or might not be present depending on the code editor you are using. We will not be using this file for the most part
- angular.json: As the name says, this file contains the configuration details of our Angular app, such as our App Name
- package.json: This file is not related to angular but to NPM, this stores all of the packages we installed using NPM for our project
- tsconfig.json: As we already know that Angular web apps are mainly written in TypeScript, so we by default have a file created for adding additional options to the TypeScript for our app
SRC folder
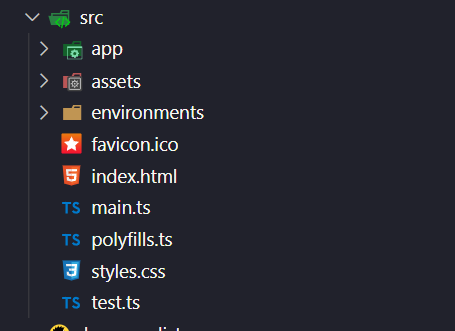
If you open the src/ folder of your application, you will find even more files as shown below. Let’s try to understand their
- assets/: As the name suggests, this is for storing all of the images, videos, or any other assets you might need for your app
- / This folder has the main App component inside it. For now, App is the only component in our project
- index.html The main entry point for your application, is the part that is run whenever someone visits your website, for the most part, we don’t have to make any changes here and Angular automatically injects our Components, Javascript, CSS files to index.html
- main.ts This file is the first to run whenever we compile our app, it is responsible for initialization of the main module which in-turn initializes the App component ( the only component in our app, for now )
Running the Angular App
Now that we have had a basic understanding of the File Structure. It’s time for us to Run the app on our browser and see it for ourselves.
To run the Angular App in Browser, run the following command
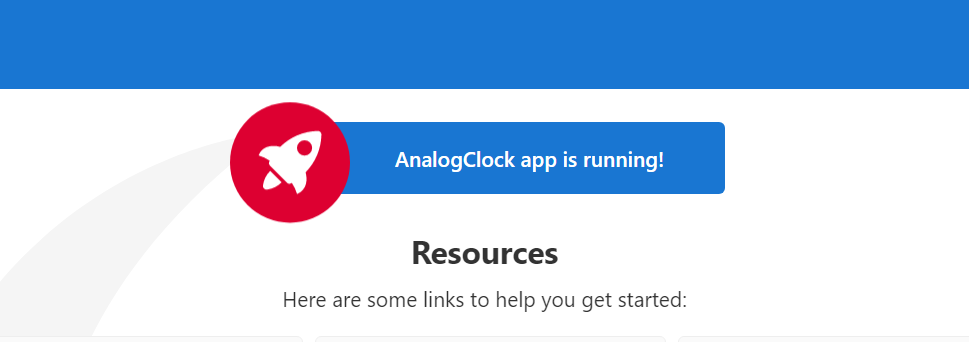
ng serve --openIf everything went alright you should get the following output on the Browser saying that the app is running!
Part 3: Building the Angular App
We’ll be building the app inside the App Component. Before diving in, let’s try to understand what Angular Components are
Understanding Angular.js Components
A Component is a Building Block of our application, websites usually have all sorts of Components that are connected, share data, and all in all Complete the application.
An Angular Component has 4 files primarily
- .component.HTML
This is the HTML part of the component that is rendered on the page, this does not have any component logic and its sole purpose is to display the content onto the page
- .component.CSS
This is the styling part of the page, it contains styles only for this particular component ( To add styles globally use the styles.css file )
- .component.ts
This is the part where we handle Component Logic, such as the Data that the component holds, how it interacts with other Components, how to modify the UI, etc.
- .component.spec.ts
This file is used for testing our Component, we won’t be diving much into this area as it is out of the scope of this article
Working on the HTML of App Component in Angular
You might already see some HTML present inside the app.component.html file, delete all of that as we’ll start from scratch to get a better understanding of how it works
Let’s start with some basic HTML code, and simply put in the <title> of our website as Digital Clock
<!DOCTYPE html>
<html lang="en">
  <head>
    <title>Digital Clock</title>
  </head>
  <body>

<!-- Website content goes here -->

  </body>
</html>
Then let’s put in a good heading or a welcome message to display on top of the digital clock, to do that add the following <div> to your HTML
 <div class="main">
      <div class="heading">Welcome!</div>
      <div class="sub-heading">This is the Current Time</div>
    </div>
Notice that we are adding classes to almost all of our elements, and this is not because we want Angular or any javascript to be able to access our element later on. It’s simply for styling the website using our .component.CSS file
Then, we add a section that displays the time in hh:mm: ss format as follows:
<div class="time">
        <div class="time-content">{{ hours }}</div>
        <div class="time-content">{{ minutes }}</div>
        <div class="time-content">{{ seconds }}</div>
      </div>
You might see something new here – The Curly Brackets, they are used when we want something in our HTML to be dynamic and something that is not fixed or constant. As we know that time keeps changing so reasonably we want our HTML to also change whenever there is a change in time.
To do that, we wrap the dynamic content, inside double curly brackets {{}} and inside it put the name of the dynamic content, and then we’ll handle its value in the .component.ts file later on as needed
In this scenario, we created 3 dynamic variables, hours, minutes, and seconds. We’ll handle them later in our .component.ts file
Handling The TypeScript Of Our App
Now we do have a working HTML file but it’s still not functional & interactive because we didn’t add any TypeScript to it.
Recall the three dynamic variables we used in the previous section, hours:minutes: seconds
Let’s first start by declaring those variables inside our .component.ts file
export class AppComponent {
  title = 'DigitalClock';
  hours = 0;
  minutes = 0;
  seconds = 0;
}
For now, let’s assume that they are all set to zero
Ideally what we want is, that every second the current time should be retrieved and the variables should then be updated
This can be achieved using an in-built javascript function called setInterval()
SetInterval takes in a callback function and repeatedly executes the code inside that function for a defined interval ( in our case that would be 1000ms or 1 second)
The above-described SetInterval should look something like this
 setInterval(() => {
      let date = new Date();
      this.hours = date.getHours();
      this.minutes = date.getMinutes();
      this.seconds = date.getSeconds();
    },1000);
Now we want this setInterval should be registered as soon as our Component is loaded and initialized. To do that we simply put the above code inside a function called ngOnInit()
ngOnInit() – or aNGular On Initialise is a function provided to every component which is executed as soon as the Component is done initializing
Now the AppComponent class should look something like this
export class AppComponent {
  title = 'DigitalClock';
  hours = 0;
  minutes = 0;
  seconds = 0;
  ngOnInit() {
    setInterval(() => {
      let date = new Date();
      this.hours = date.getHours();
      this.minutes = date.getMinutes();
      this.seconds = date.getSeconds();
    },1000);
  }
}
Adding CSS Styles to the Website
Now if you run the website, it should look something like this
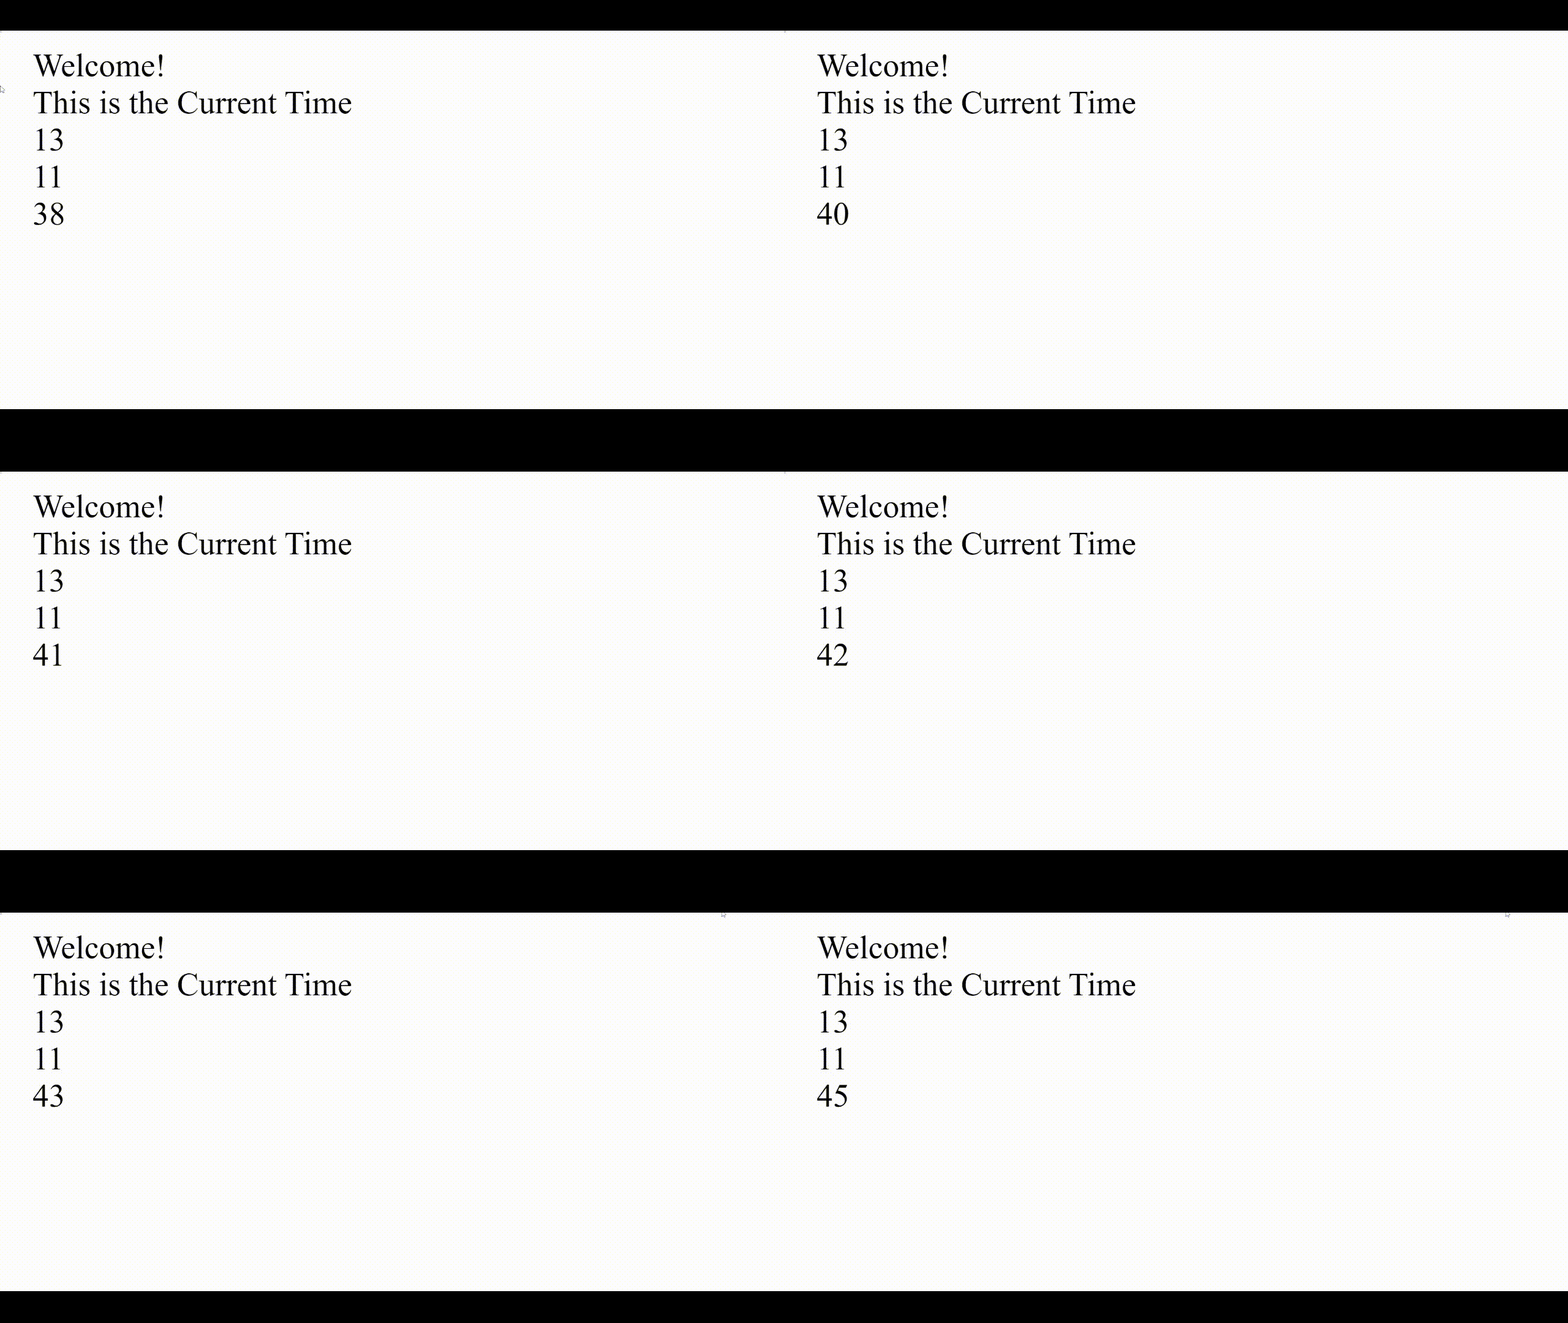
It is totally functional but right now, it doesn’t look like an app that someone would want to use, so let’s give it a brand-new look by adding the following CSS in the styles.css file
/* You can add global styles to this file, and also import other style files */
body {
  background: #5c258d; /* fallback for old browsers */
  background: -webkit-linear-gradient(
    to right,
    #4389a2,
    #5c258d
  ); /* Chrome 10-25, Safari 5.1-6 */
  background: linear-gradient(
    to right,
    #4389a2,
    #5c258d
  ); /* W3C, IE 10+/ Edge, Firefox 16+, Chrome 26+, Opera 12+, Safari 7+ */

  height: 100vh;
  display: flex;
  flex-direction: column;
  justify-content: center;
  align-items: center;
}
.main {
  display: flex;
  flex-direction: column;
  justify-items: center;
  align-items: center;
}
.heading {
  color: white;
  font-weight: 600;
  font-family: "Segoe UI", Tahoma, Geneva, Verdana, sans-serif;
  font-size: 125px;
}
.sub-heading {
  text-align: center;
  color: white;
  font-weight: 100;
  font-family: "Segoe UI", Tahoma, Geneva, Verdana, sans-serif;
  font-size: 100px;
}

.time {
  display: flex;
  color: white;
  font-weight: bolder;
  font-family: "Segoe UI", Tahoma, Geneva, Verdana, sans-serif;
  font-size: 150px;
}
Applying the CSS, the website should now be much more presentable

Congratulations!
Congrats on coming this far and completing the tutorial. A good step forward would be to try and build an AnalogClock or maybe add support for Multiple Time Zones. To expand your knowledge about Angular you can always visit their official website and learn more from their Documentation. If you liked this article and learned something valuable today, do share it with your friends!
