Quickly Learn Backbone.js by building a sample application – TUTORIAL

In this article, we will learn Backbone.js by building a sample application with a tutorial
Table of Contents
What will we build in the Tutorial?
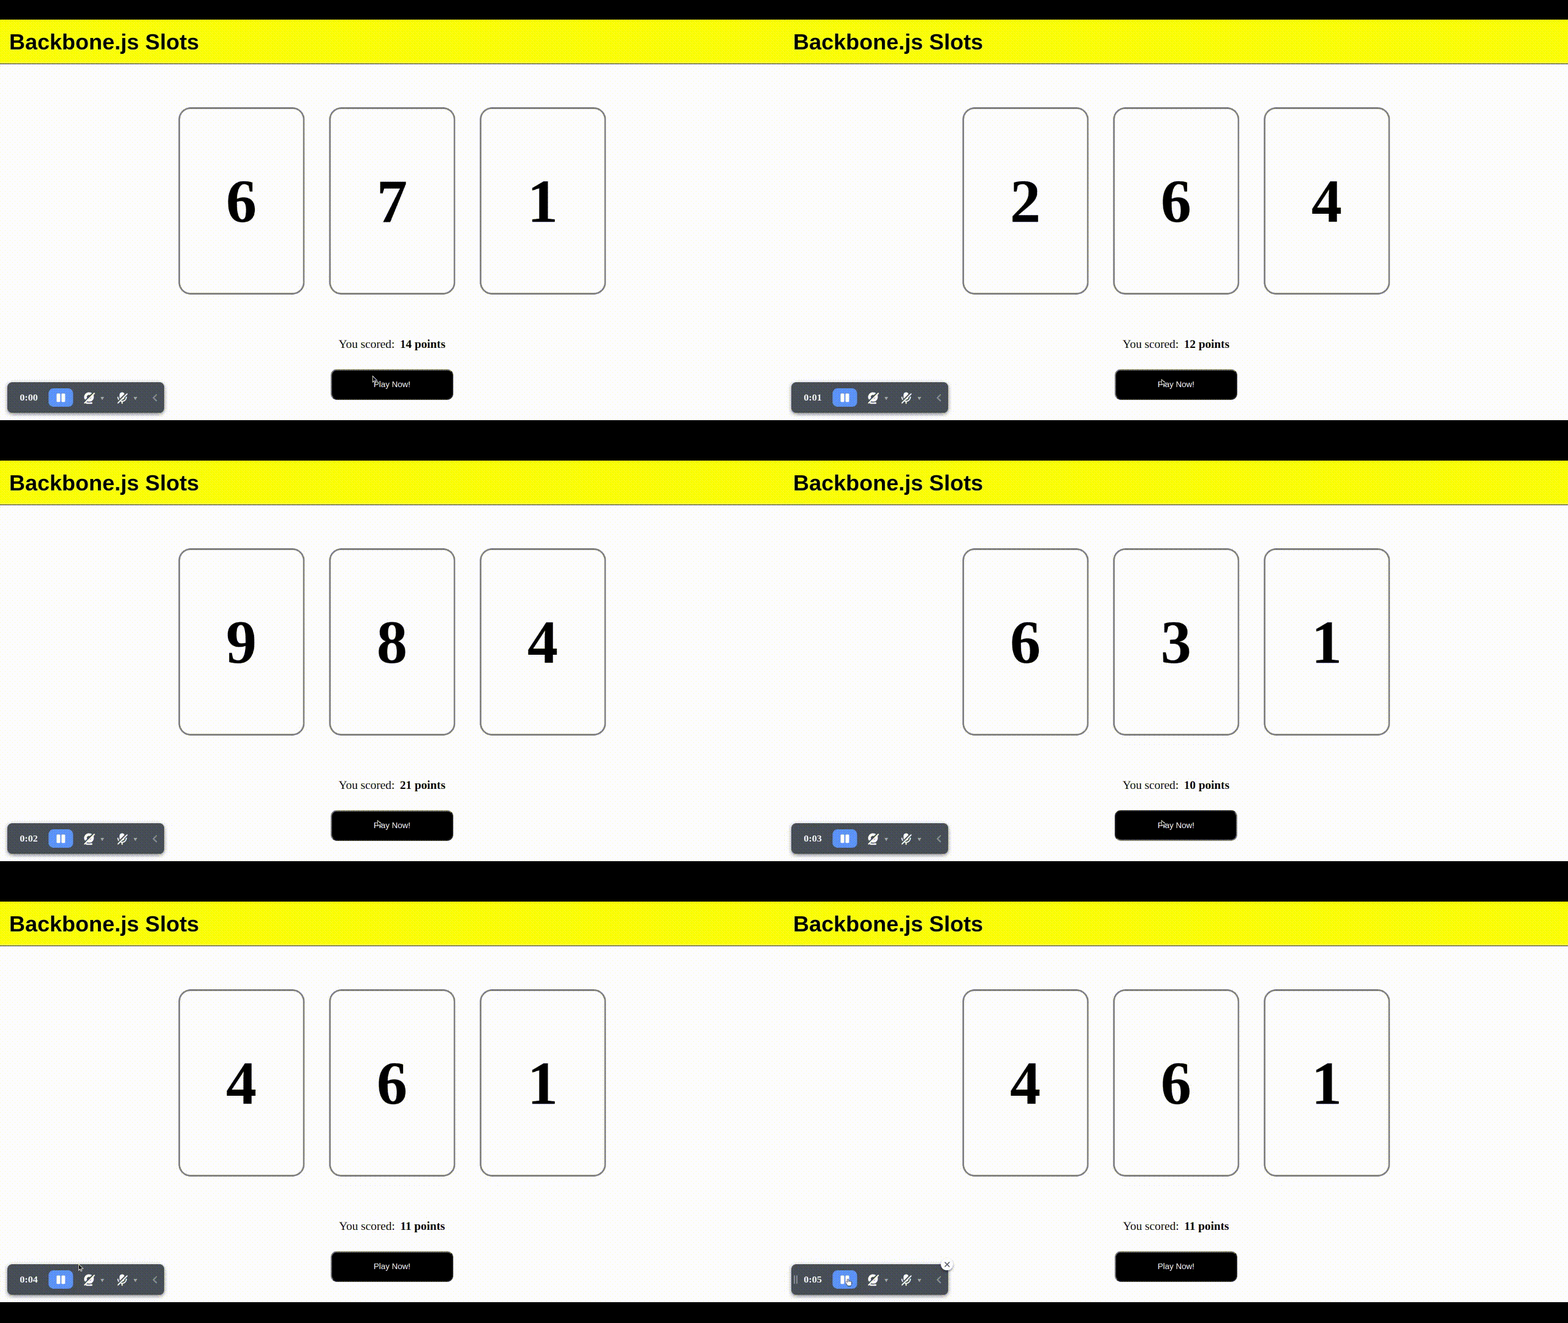
Today, we’ll be working on a simple slots application. If you don’t know what slots are, it’s a traditional casino game in which there is a 3-digit random number generated every time you spin it!
But instead of following the mechanism of the traditional slot, we’ll just put the total score as the sum of all 3 digits to keep things simple, meaning 999 would be the highest score

What is backbone.js?

“Backbone.js is a Frontend framework which helps us in building web apps in a more structured way and helps us in writing cleaner and bug-free code.”
Don’t worry if you do not understand what I just said, let’s first try to understand what a Frontend framework is, so basically to build a Web application, we need three things, an HTML file, a Javascript file, and something called a CSS file. I won’t go into too much detail about it but a simple way to break it down would be to think of HTML as something that describes WHAT elements are present on a page, and obviously if there are several elements present on the page, we would need to make sure that they are positioned in the right place and look the way we want them to.
That’s where CSS comes in, it tells about HOW the elements are aligned and displayed, and the last but one of the most important parts of a website is how it interacts with the users, that’s the job of Javascript, it tells the page how to respond to user events(clicking, hovering, etc..) and makes the page much more interactive.
But Where does backbone.js fit in all of this?
Web development is an industry that has been around for years and years, overtime software developers made tools that made their job much easier by providing a simpler way to do something than the original “vanilla” language would’ve provided, these tools are nothing but frameworks, as you’ll see further in this article you’ll realize how simple it is to make a website using a well-tested and documented framework.
If you’ve worked on vanilla Javascript websites before, you know how hard it is to handle all the events, the elements in the DOM tree, updating the DOM, etc. Taking care of all of the above while writing clean and understandable code almost seems an impossible task. That’s where Backbone.js comes in. The main purpose of backbone.js is to segregate any web application into three manageable parts: Models, Views, and Collections. So that they can separately be worked upon and makes stuff like debugging a lot easier for the developer.
How to learn Backbone.js?
The best way to learn anything – not just Backbone.js is a mantra that almost all developers believe in which is to “Learn by doing”. So, let’s get started on this tutorial!
Tools Required
- An IDE( Integrated development environment) :
An IDE is a tool where we write and edit our code, of course, you could very well write your code on something like Notepad but then you won’t get some of the most awesome features which an IDE would provide, such as an IDE will automatically highlight your code, warn you about the errors, allows you to view your project in a neat structure of files, etc and you can even add additional functionality by using extensions, there are plenty of them available on the internet (Atom, Notepad++, Sublime text, etc) the one which I use is Visual Studio Code which is what most of the people use these days, so let’s get started with that
- A browser to test your work
- Patience!
Part 1: The Basics – Setting up the HTML, CSS, and Javascript
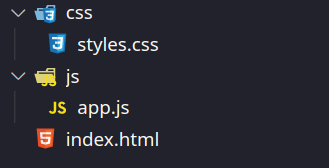
Let’s start by creating the basic structure of our website, for the simplicity of this article let’s just consider 3 files: index.html, style.css, and our app.js, you can create these files by clicking on the new file button inside your VS Code Workspace.

Tip: Even if we have only 3 files here, it’s always a good idea to place them in separate folders to keep the code modular, and help us in the future when our code gets more complicated.
Now, let’s have a look at the initial setup we need to do in all 3 of the files:
Index.html
Any webpage by default has an index.html which refers to the homepage, you can create one now and to open the file as a web page, you have to right-click on it and select Open With Google Chrome or whatever browser you use.
<!DOCTYPE html>
<html lang="en">
 <head>

   <title>Slots</title>
 </head>
 <body>

 </body>
</html>
Here, you might see some tags like <head> <title> <body>, most of the tags in HTML are pretty easy to understand just by their name for eg, the title means the title of the webpage, and the body means the content that is displayed on our screen
Now obviously our HTML page is how we access our site, but how does our HTML know about the existence of CSS and Javascript files that we created earlier, to do that we have to Link them in our HTML file, we can do that as follows:
<!DOCTYPE html>
<html lang="en">
 <head>
     <link rel="stylesheet" href="/css/styles.css" />
   <title>Slots</title>
 </head>
 <body>
    <script src="/js/app.js"></script>
 </body>
</html>
The next thing we need to do is to add our necessary scripts: (jQuery, underscore.js, backbone.js ) in that specific order as they are dependent on each other. They are external javascript files that have the framework in them for us to use.
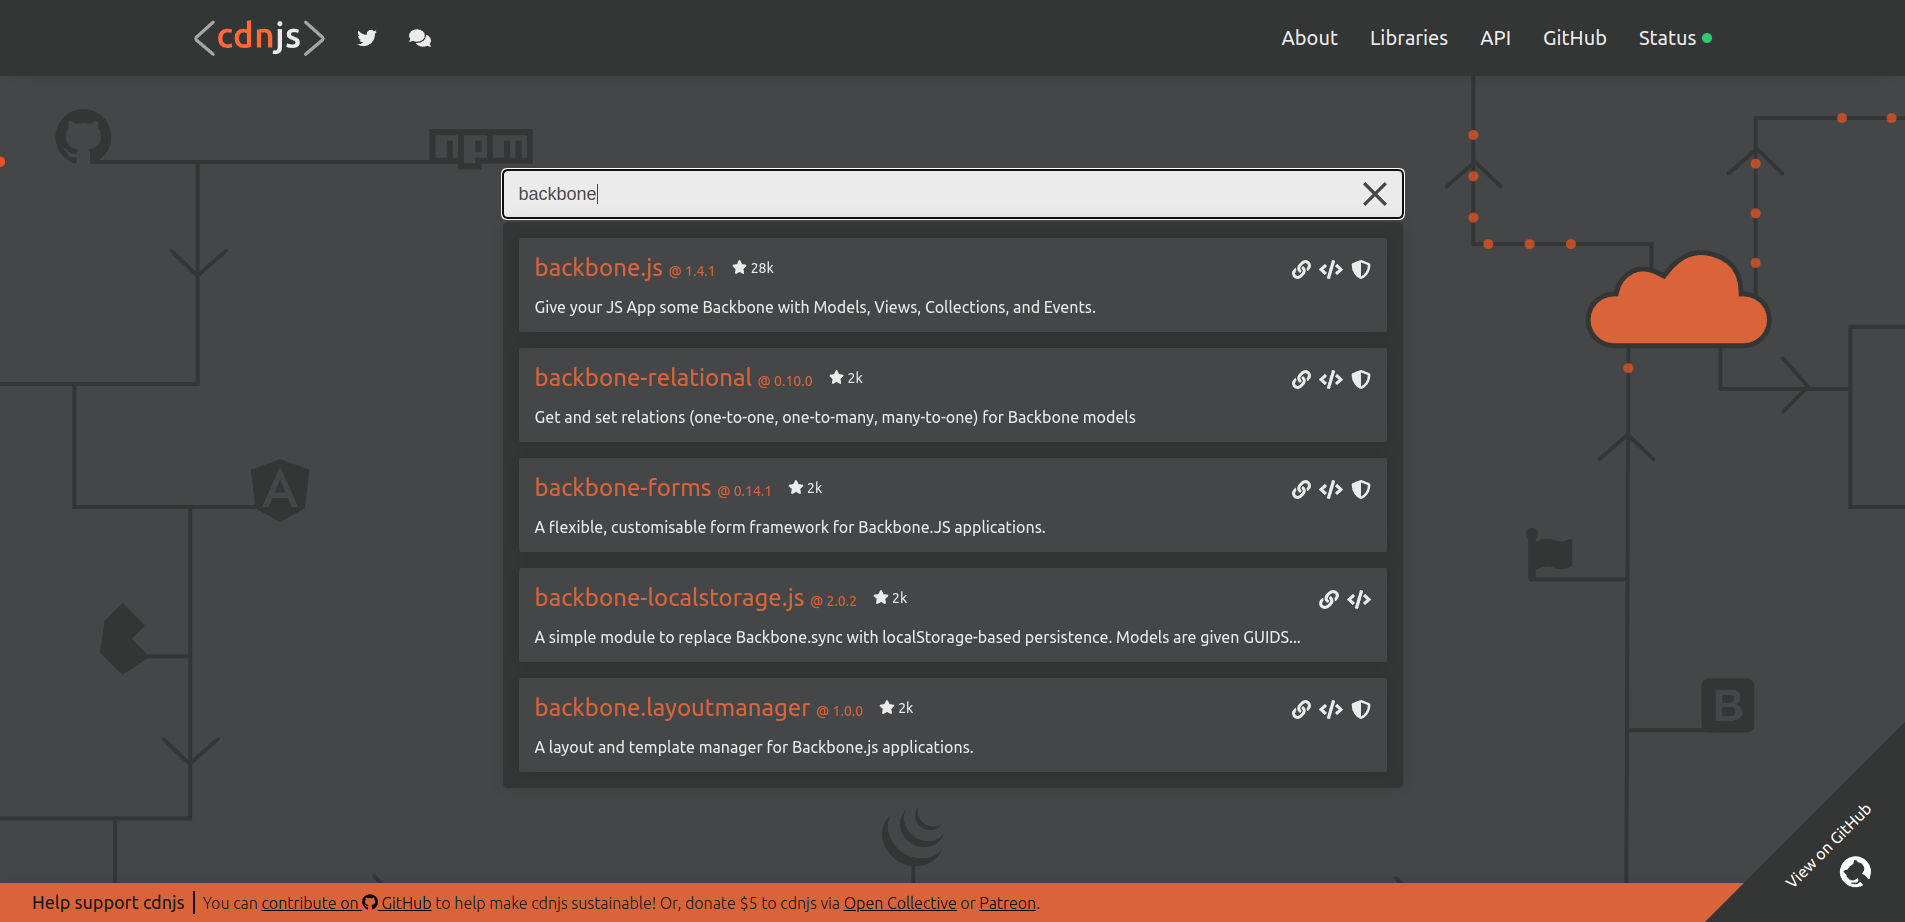
The fastest and easiest way to add these external libraries into our HTML is to use a service called cdnjs

To add a script to your website simply go to cdnjs.com and search for the required scripts mentioned above and simply copy the <script> tag which should look like this:
<script src="https://cdnjs.cloudflare.com/ajax/libs/jquery/3.6.0/jquery.min.js" referrerpolicy="no-referrer" ></script>


<script   src="https://cdnjs.cloudflare.com/ajax/libs/underscore.js/1.13.4/underscore-min.js" integrity="sha512-uLKRd6hCNYAENFn2h7w0p5hrUAz21bAu/85eqSqmQ1Y565lFInwRga9Lgk+QAAR9QvNfSlZjnEb+HHfzkAC/8Q==" crossorigin="anonymous" referrerpolicy="no-referrer" ></script>


<script src="https://cdnjs.cloudflare.com/ajax/libs/backbone.js/1.4.1/backbone-min.js" integrity="sha512-TztyCWDNoN0YKl30gDCMKsiWs35juID+W7ZM2uvPeLLmiNvZg789SglgB/QeUbewqIF2Z4mVq3PyIEa+YXXADQ==" crossorigin="anonymous" referrerpolicy="no-referrer" ></script>


 <script src="/js/app.js"></script>
Tip: It’s generally a good idea to place these script files at the end of the <body> tag as it allows for the page content to be loaded first and allows for the scripts to load lazily in the background.
styles.css & app.js will remain empty for now
Part 2: Setting up the Models
A Model in backbone.js is a way to store & access data, an easy way to think of Models would be to think of real-life objects and the properties which they have, for example: let’s consider a box, it has certain attributes such as color, shape, width, height, etc. An exercise for you now would be to figure out the type of model which we will need for our Slots application.
Yep, That’s right! We’ll need The SlotTile Model which will contain the following attributes:
- Value: The Number to be displayed on the slot tile
- settle value(Val): A helper method to set the value of the tile to a particular number, in javascript a method is something that executes a few particular lines of code, and sometimes returns a value for us to use, try to get a grasp of what method means as we’ll be using that term a lot in the article.
- getTileValue(): another helper method that returns the value of the tile at the current moment.
We’ll now look at how to implement the attributes above in Backbone.js by adding the following code in our app.js file
let SlotTileModel = Backbone.Model.extend({
 setTileValue(val) {
   this.set("value", val);
 },
 getTileValue() {
   return this.get("value");
 },
});
Let’s try to understand what’s happening in the code above:
- Firstly, we make a new Model by “extending” the Backbone.Model(in javascript extending means to get all of the properties of the thing we’re trying to extend from, we do this so that we can have access to all of the methods ( such as set() and get() ) which Backbone. The model provides for us to use.
- Then, we make our two helper functions settle value(Val) and getTileValue()
- Looking inside settle value() we are using this.set(“value”, value) which is a function that Backbone. The model provided us that sets the property “value” to the variable Val
- Similarly, we can use something called this. get() to get the value of that particular property
As we all are familiar with, a traditional slots game has 3 slot tiles, so let’s create them:
let tile1 = new SlotTileModel();
let tile2 = new SlotTileModel();
let tile3 = new SlotTileModel();
Pay attention to the new keyword here it says that we are creating a new instance of our SlotTileModel(), you can learn more about the new keyword in javascript here
Part 3: Putting the Models into a Collection
In the previous section, we created 3 models by using 3 variables, and if Collections did not exist in Backbone.js we would have had to manage all of the three tiles individually, which would, in turn, led to tons of repetitive code, which is considered to be a bad coding practice, the ideal principle would be to make the code DRY ( “Don’t Repeat Yourself” )
Let’s see how Collections can help us in doing that,
In Backbone.js Collections are just what they sound like – a Collection of Models, they help us in managing multiple models at once without worrying about writing repetitive code for each of them.
Let’s start by using them to create a collection of our 3 Tiles as follows:
let SlotTileCollection = Backbone.Collection.extend({
  model: SlotTileModel
 });

let slotTileCollection = new SlotTileCollection([tile1, tile2, tile3]);
Let’s have a look at the code:
- The first line helps us in creating the SlotTileCollection, notice that here we are again extending the Backbone. Collection to get all of the properties it has, now to create it the only information we need to provide is the type of the model we’ll be using in this collection
- While creating the collection for the first time, we need to specify the list of Models we’ll be storing inside the collection, we do that by specifying them inside square brackets as [tile1, tile2, tile3..]
Part 4: Views
Let’s have a look at how displaying data works in Backbone.js and how it “connects” to our HTML
- Just like models and Collections, backbone.js has something called “Views” which interact with the Page and help in showing data
- Each View is linked to an element present in the HTML(usually called the root of the view) which allows it to modify/update the HTML under its root.
- Views can respond to user actions ( click, hover, etc) and can be re-rendered whenever there is a change in the data of the model it’s depending upon
Models vs Views
An easy way to think about them is to look at
- Models as something which store data and update the view whenever there is a change in its data
- Views as something which is displayed on the screen and sends its interactions(click, hover.. etc) to models so that they can update their data accordingly
As you can see this forms the following chain :
User Interacts with a view -> Model is updated -> Views are re-rendered because the model was updated
Now let’s put what we’ve learned into action
Part 5: Displaying the data
Looking at the above image of the finished application, it’s pretty clear that we need two views, one is the GameView to display the 3 slot tiles and the other is the ResultView to display the resulting score
Recalling what we have learned about views, the only thing we need to do is to set up a view in such a way that it takes in data and renders the output
Let’s start by setting up the root element for all of our views
<div id="root">
     <div id="navbar">
       <h1>Backbone.js Slots</h1>
     </div>
     <div id="game"></div>
     <div id="result"> </div>
</div>
Notice that here, we have added something called id= to a few HTML tags, they are just a way to uniquely identify them inside our javascript code. Now that we have the root elements setup let’s create the GameView:
let GameView = Backbone.View.extend({
 initialize() {
   this.render([tile1, tile2, tile3]);
 },
 render(slotTiles) {
   this.$el.html("");
   for (let i = 0; i < slotTiles.length; i++) {
     this.$el.append(tileTemplate({ value: slotTiles[i].getTileValue() }));
   }
 },
});


let gameView = new GameView({ el: $("#game") });
This might be daunting to look at first, but don’t worry we’ll break it down into small easy-to-understand steps
- initialize(): this method is called as soon as the view is created, in our case the thing we want to do as soon as the view is created is to render it with initial tiles: tile1, tile2, and tile3, and we do so by calling this. render(), and pass it to the three tiles inside square brackets.
- render(): this is the most important function in a view, it takes in some optional data (in our case: slotTiles), and using that data sets the HTML of the root element
- new GameView(): While creating our game view we have to let the view know the HTML element it’s being linked to, we do so by passing $(“#game”) to el, which means to select an element of id=” game”, (here # represents id) and then set it as the root for the view.
Now let’s have a deeper look at the render() function:
- The first thing we need to do is to clear the root element’s HTML by setting it to “so that we clear the HTML set by the previous render, we do so by setting this.$el.html(“), here this.$el represents the root element which we passed while creating the view.
- Now we iterate through the slot titles Provided to us using a for loop and then append the HTML of the tile to our root element, you might notice that there’s something called a file template that we are calling, for now, let’s just assume that it’s something which takes in some input and magically generates the HTML for that particular input.
Now let’s do a similar thing for ResultView:
let resultTemplate = _.template(`
<span> You scored:  </span>
<span class="bold"> <%= points %> points </span>
`);
let ResultView = Backbone.View.extend({
initialize() {
this.render(0);
},
render(points) {
this.$el.html(resultTemplate({ points }));
},
});
let resultView = new ResultView({ el: $("#result") });Understanding Templates
To keep it simple, templates are just a way of dynamically generating new HTML Strings depending on the data we pass to it, templates are generated by a templating engine which for our purposes is the templating engine provided by Underscore.js, you can learn more about it here
Now let’s have a look at the result template and tileTemplates we’ve used above :
let tileTemplate = _.template(`
<div class="tile"><%= value %></div>
`);
let resultTemplate = _.template(`
<span> You scored:  </span>
<span class="bold"> <%= points %> points </span>
`);You might notice that there isn’t much difference between template string and just plain HTML, but if you look closely you’ll find something called <%= %>, this looks weird but it’s just a way of letting _.template() know that we want to put the value of that variable (for eg points) here.
Part 6: Putting it all together
Now we’re done with one part of the chain, which is to render the view based on the data given, Now we have to make sure all of these components are connected by making sure that the view is re-rendered whenever there is a change in the Model/Collection
To do that, we need to add a method in our collection, that changes the data in the models and re-renders the views:
setSlotValue(valuesArray) {
   for (let i = 0; i < 3; i++) {
     let tile = this.at(i);
     tile.setTileValue(valuesArray[i]);
   }
   gameView.render(this.models);
   resultView.render(valuesArray.reduce((accum, curr) => (accum += curr), 0));
 },
You might see some new methods/values here such as this. at(), this. models, they are just methods provided by Backbone. Collection to get the Model at a particular index and to get the model’s array respectively.
Let’s have a quick run-through of the code above,
Firstly we run a for loop over all the tiles and access the tile by using this.at(index) then we run the settled value() method that we defined earlier on the new value.
After updating the tiles, we just call the render functions of both the views, providing the tiles to the first view, and providing the total score to the second view, which will re-render the data onto the screen tying it all together.
But wait! There are no slots without random numbers, so we need to create another method that generates an array of 3 random numbers and passes it to setSlotValue so that we update the views accordingly.
setRandomSlotValue() {
   let valuesArray = [];
   for (let i = 0; i < 3; i++) {
     valuesArray.push(Math.floor(Math.random() * 10));
   }
   this.setSlotValue(valuesArray);
 },
To generate an array or a list of 3 random Numbers we use Math. random() which is a function that javascript provides us with( it provides a decimal number between 0 to 1) by using a few little tricks we can make it so that we get a random number between 0 to 9, which is what we did above.
Now, whenever the user clicks the Play Now Button we need to call
slotTileCollection.setRandomSlotValue();So that the three random numbers are generated, and the models are updated accordingly, which immediately renders the Views and hence makes our app completely functional.
Let’s wrap it up in a neat play() function so that we can access it easily
function play() {
  slotTileCollection.setRandomSlotValue();
}
Now let’s just add the button to our HTML which would call this play() function whenever it’s clicked on
<div id="play">
      <button class="roll" onclick="play()">Play Now!</button>
   </div>
To make the button call the function play() whenever we click it, we add an attribute to it, called on click which does just what the name says, calls that function whenever the user clicks on it.
Let’s add some CSS to spice up the styling for our website!
* {
  margin: 0;
  padding: 0;
}

#navbar {
  padding: 15px;
  font-size: large;
  background-color: yellow;
  border-bottom: 2px solid grey;
  font-family: Verdana, Geneva, Tahoma, sans-serif;
}
#game {
  display: flex;
  justify-content: center;
  align-items: center;
  padding: 50px;
}
.tile {
  height: 300px;
  width: 200px;
  border-radius: 20px;
  border: 3px solid grey;
  display: flex;
  justify-content: center;
  align-items: center;
  margin: 20px;
  font-size: 100px;
  font-weight: bolder;
}
#result {
  display: flex;
  justify-content: center;
}
#result span {
  font-size: larger
}
.bold {
  font-weight: bold;
}
.roll {
  color: white;
  background-color: black;
  border-radius: 10px;
  width: 200px;
  height: 50px;
  margin: 30px;
}


#play {
  display: flex;
  justify-content: center;
}
Don’t worry if you do not understand the CSS above as it only adds to the decoration of the website, and the main purpose of this tutorial was to introduce to you how you can flawlessly use Backbone.js to make your first web application! You can learn more about how to write good CSS here.
Congratulations!
Congrats on coming this far and finishing this tutorial. By now you are guaranteed to have fully understood the basics which are needed to get you up and running with backbone.js, I highly recommend you try out some projects of your own and as required use backbone.js documentation to add to your knowledge of this awesome framework!
