Build Robust Mobile Applications Using Ionic & Angular – TUTORIAL
Ionic framework is “An open source mobile toolkit for building high quality, cross-platform native and web app experiences”. If you’re reading this you probably might be familiar with many such frameworks that develop Hybrid Apps which can run on iOS, Android, etc all with the same codebase.
Some of the popular ones would be React Native, Cordova, etc. But the thing that sets ionic apart is that it doesn’t just support one framework ( for eg. React Native apps can be built only on top of React Web Apps ), but Ionic apps can be built upon all the three major web frameworks ( React.js, Angular.js, and Vue.js ).
This allows developers to all build the same app using the web framework of their preference. Also, not to mention Ionic apps are superfast and have support for all core mobile features ( Camera, GPS, Sensors, etc ).
Table of Contents
What will we build in the Tutorial?
After discussing what sets ionic apart from other multi-platform frameworks, you must be excited to get started with it and build your very own application!
For today’s tutorial, we’ll be building a Jokes App. The main purpose of this app would be to Randomly Generate Jokes and show them to the user. The final product will look something like this

Part 1: Installing the required tools for Ionic/AngularJS
Before we get started on building the application, we will need to install a few essential tools
Node.js & NPM

Since ionic is a javascript framework, to install it, we have to first install Node.js and the Node Package Manager ( NPM ) That comes with it. Although this article assumes basic familiarity with Javascript, if you don’t know what Node.js is, to simply put it it’s a javascript runtime which means all of the javascript code we write is run on Node.js. And that we install Ionic using the Node Package Manager that comes with Node.js
- To install Node.js simply visit their homepage https://nodejs.org/en/
- Download the installer for the latest stable version ( 16.16.0 LTS as of writing this article )
- Follow the on-screen installer and you should have Node.js installed on your computer
Ionic

Now that we have NPM & Node.js installed, we can install ionic by simply running the following command in CMD or Powershell
| npm install -g @ionic/CLI |
This should install Ionic globally on your machine ( The -g flag in the command above specifies to install ionic globally )
Tip: If you get any sort of Permission Denied error while running the above command, this means that npm does not have enough permissions to install ionic, in that case, you should try restarting your CMD or Powershell by choosing the Run As Administrator option
Android Studio
Ionic can build both iOS & Android apps, but building iOS apps requires you to have iOS SDK which is only available on macOS. Since most theaters would be using Windows/Linux we’ll mainly focus on building Android apps, and for that ionic requires that we have Android Studio installed.
But the best part about it is while building android apps in ionic, we don’t need a lot of setup in Android Studio as we might have needed if we were to work on some other framework.
- To install Android Studio, visit their official website, https://developer.android.com/studio
- Click on the Download Android Studio button and wait for the installer to finish downloading
- Once the installer is downloaded, open it and choose all the default options that Android Studio provides
Visual Studio Code (Optional)

As we’ll be writing tons of code in this tutorial, we’ll need a good Code Editor / IDE. If you’ve never worked with an IDE ( Integrated development environment ) before, you’ll be surprised to know how much it helps us to quickly write code by providing advanced features such as Syntax Highlighting, Auto Completion, and Error detection, etc to name a few. There are many popular IDEs on the market, but for our tutorial, we’ll be using Visual Studio Code, which is what most people seem to prefer these days
Part 2: Setting up our Ionic Project
Now that we have all of the necessary tools installed, we can get started by creating our Ionic App
First, open your terminal and navigate to the folder where you want to create your project, ( Let’s say you want to make the project in the Desktop folder )
Basics of Command Line Navigation
In a windows terminal, to navigate between folders, we only use 3 main commands :
- cd <directory name>: Here, cd means “Change Directory” If you want to go “inside” a folder of the current directory you are in, simply type cd <space> and then the name of the folder
cd Desktop\- To Navigate to the Parent folder of the current directory Simple use the following command, where .. refers to the parent folder/directory
cd ..- Lastly, to list all of the files/folders in your current directory, we use the following command
dirCreating the app
Now that we are in the correct folder, to create the ionic app we simply run the following command
ionic start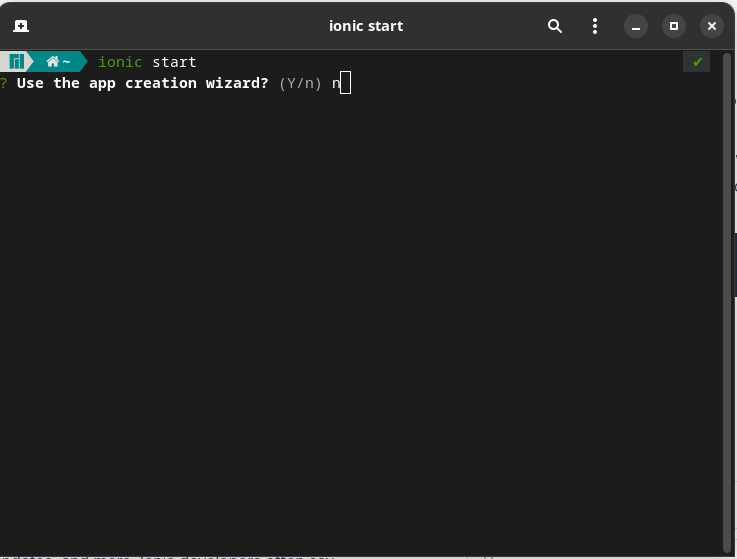
Here the App Creation Wizard refers to the website interface that will help us set up the project by using drag and drop & click functions. But since we want to learn more in-depth information about ionic, simply press n to reject the option
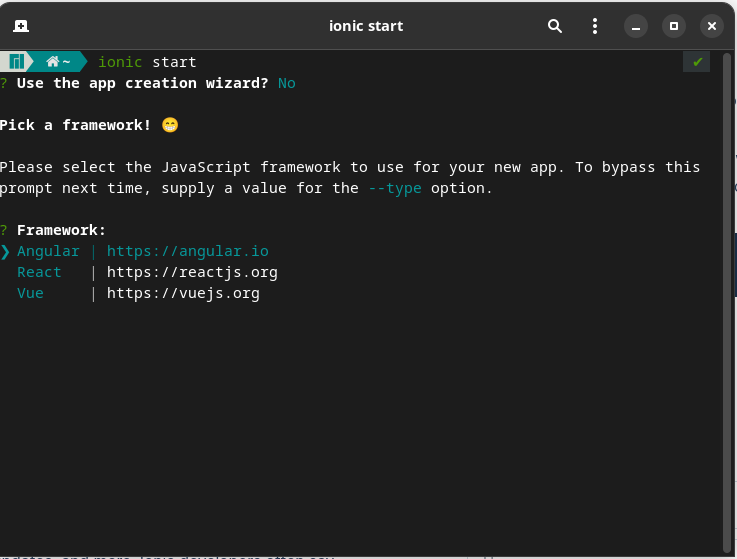
Since we’ll be using Angular.js, select that option by using the Top & Bottom arrow keys, and press enter on the framework.
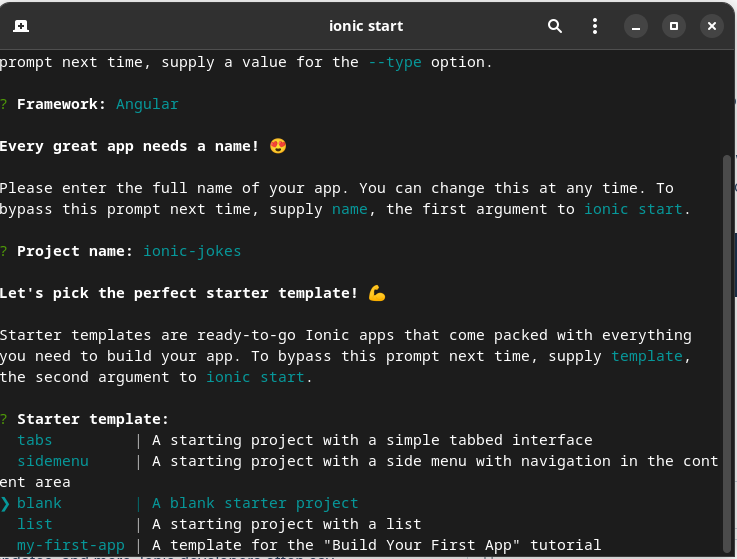
Now you’ll be offered several Starter Templates to choose from, since we are looking to learn more, simply choose the blank template, that will allow us to build the app entirely from the ground up
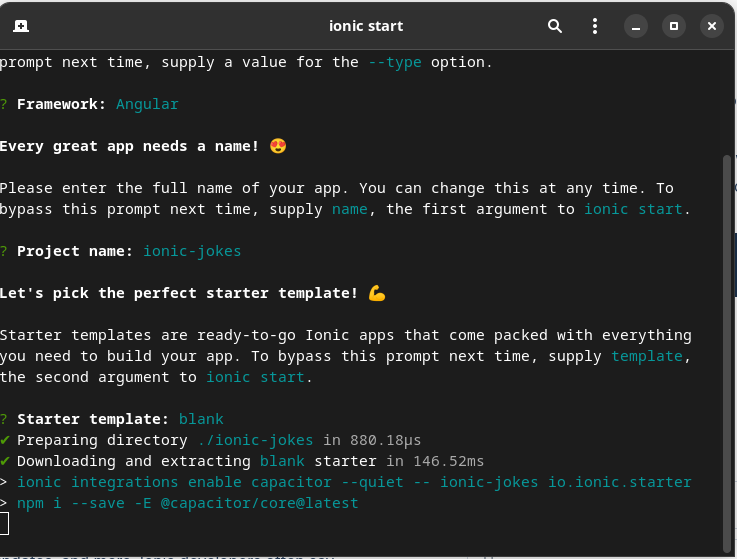
The installation procedure can take anywhere from 10-15 minutes depending on your internet speed, once done you’ll notice that a new folder is created with the name of ionic-jokes ( or whatever you named your app )
Part 3: Understanding the File Structure for the Ionic/AngularJS Project
Open the newly created folder in Visual Studio Code or any other IDE and you should see the following structure
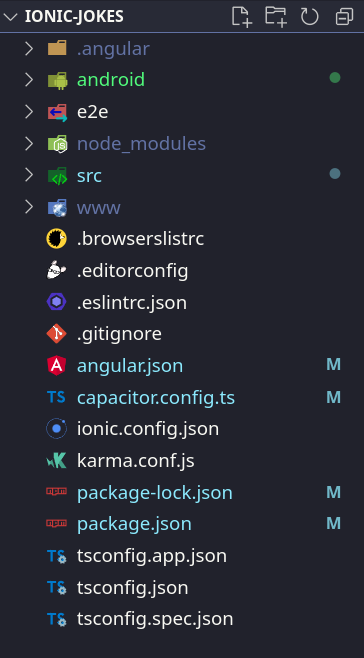
It’s easy to get overwhelmed looking at the huge amount of files and folders present, but once we start to break them down into categories, it’ll be easier to make sense of them
Configuration files
These are the first things you’ll notice in your project folder, there are many configuration files, but let’s have a look at the most important ones
- ionic.config.json this file contains important information about our ionic projects such as the project name and the web framework used for the project
- capacitor.config.ts Capacitor is the plugin that ionic uses to build the android apps, this file contains specific configuration such as the location of our android studio program, etc
- tsconfig.json The typescript configuration file. Ionic uses typescript by default instead of javascript. If you have never heard of typescript before, it’s just a typed version of Javascript, ( which means, that a variable can be of only one type ( string, number, etc ), unlike javascript where we can put the value of any type into any variable )
Source files
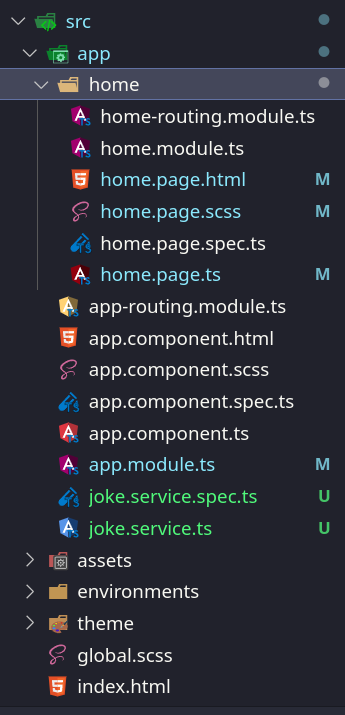
To understand these source files we first have to understand the main parts of an Angular Project
Any Angular Project is made up of small components that all interact with each other and make up our Application. Modules describe a collection of Components that are closely related and form a particular app. For a simple application, we usually require only one module, the root module
By default, we get the root module in the form of app.module.ts and whenever the app is launched, the thing that runs first is the App Component provided by angular.
You might also notice the folder home, which has the Home Component, this is where we’ll be building our Ionic App and we can almost ignore other folders/files for now
Ionic has already done most of the setup for us, by launching the Ionic Home Component as soon as the App Component is run. So the only thing we need to do now is to edit the files inside the Home Component to build our app
Part 4: Running the Ionic/AngularJS App
Now that we have understood the structure of a basic Ionic app. Let’s see how we’ll be running and testing our application.
To run any ionic app, we have to execute the following command in the terminal
| ionic serve |
Tip: VS Code has a fully-featured built-in terminal which can be accessed by the following shortcut ctrl + shift + ~
This should open a new browser window with your app running. Since we’re building for Mobile, we can access Mobile View in Chrome by
- Right-clicking on the page, and selecting Inspect to open developer tools
- Using the shortcut Ctrl + Shift + I
Once you’re inside Chrome Developer Tools, you simply have to press the little Mobile button in the top bar, to Toggle Device View

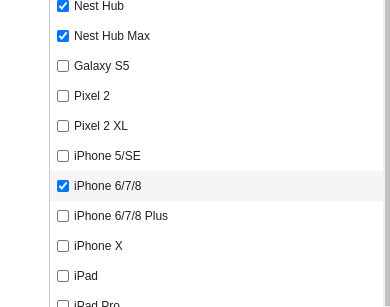
After selecting the Mobile button, you can select a Mobile Device of your choice from the given list
Your page should now look something like this
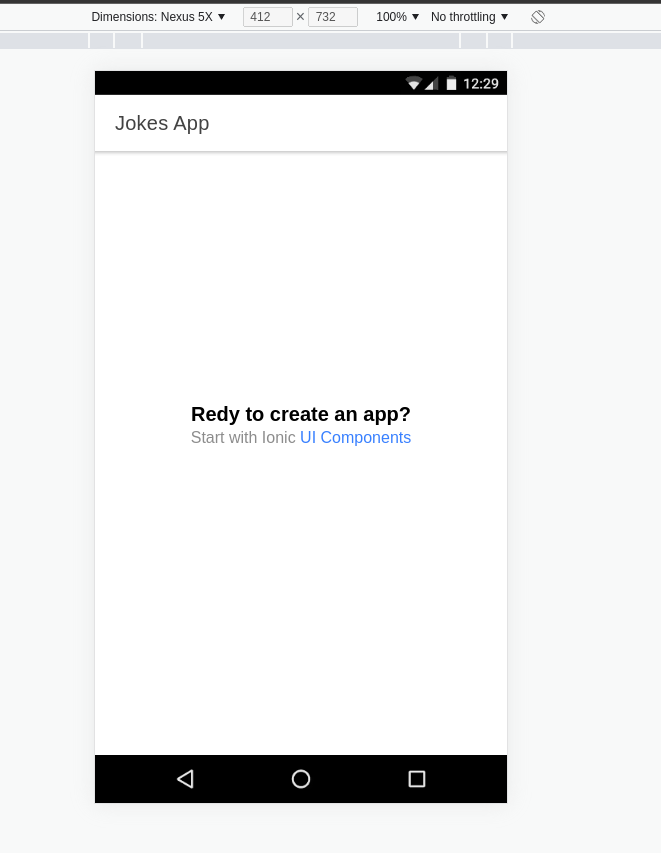
What we just did, is one of the core advantages of the ionic framework. We can test how apps will look on mobile devices without having to compile them to Android APKs every time that we need to test.
Part 5: Building the UI for Ionic/AngularJS
The part which is visible on our screen is the Home Component, so to build our UI we have to modify it. Before modifying the Home Component. Let’s try to understand what a Component is and the files that make up a component
A Component is a small building block of an Ionic Application, we can think of it as a section of our app that displays and performs a certain functionality.
To keep our app simple, we will only be using the Home Component, which represents the only screen our app has. Looking at the final product it’s clear that the Home Screen does only 2 things, displays the joke, and provides a button to refresh the joke. Therefore it makes sense to only have one component
Any Angular Component mainly has 4 files
- <name>.component.ts The Javascript part ( or Typescript to be more precise ) of the web component, adds interactivity to our component or defines how the elements interact within & outside the component
- <name>.component.html The HTML part of our component defines the basic structure of our component or what elements are present in our component
- <name>.component.CSS The Styling of the component defines how the elements are positioned and styled
- <name>.component.spec.ts The Testing Specification for our component, discussing this would be out of the scope of this article
You can find all these files for the Home Component inside the home folder, as we want to learn from the basics, I advise you to delete all of the contents in these 4 files for the time being
Constructing the HTML
Let’s begin by constructing the HTML part
<ion-header [translucent]="true">
  <ion-toolbar>
    <ion-title> Jokes App </ion-title>
  </ion-toolbar>
</ion-header>

<ion-content [fullscreen]="true">

</ion-content>
Looking at the code above, it’s pretty obvious that our HTML has 2 sections
- <ion-header> This is the part, that represents the Top Bar of our app, inside which we can write the title of our application, that is Jokes App
- <ion-content> This part represents the main content of our home screen. Since we want the HomeScreen to take up the whole page, we also add the [fullscreen]=” true” property
Then, let’s add the Quote by Charlie Chaplin, saying that “A day without laughter is a day wasted”
<div id="quote">
    <h1>A day without laughter is a day wasted!</h1>
    <p>- Charlie Chaplin</p>
  </div>
As we go along, it’s important to write appropriate ID for our HTML Elements as it will help us in styling these elements later on in our CSS
Looking at the final product, you can see that we have to add 3 more things, Randomly Selected Joke Heading, The Joke, And a Button
Let’s add those now
<h2>Randomly Selected Joke:</h2>
  <div id="joke">
    <h3 id="setup">{{setup}}</h3>
    <h3 id="punchline">{{punchline}}</h3>
  </div>
  <div id="get-another">
    <button id="get-another-btn">
      Get Another One! 🤣
    </button>
  </div>
If you look closely, you might find something unfamiliar above, those two curly brackets {{ }}. They are nothing but interpolations in angular.
Let’s try to understand what interpolation means, if something is put inside {{ }} it means that, it should not be treated as normal HTML code, instead it should be treated as a Javascript/TypeScript Expression and the value of that expression will be substituted in place of the {{ }}
Note: A Javascript expression can be a variable or anything that returns a value ( eg, {{1+2}} is also a valid expression as it returns 3 )
Looking at our situation, the joke we want to display has 2 parts, the setup, and its punchline. By putting them as {{setup}} and {{punchline}} what we are trying to “tell” the HTML is that our .component.ts file will have the variables setup and punchline and to substitute those values wherever we have {{ }}
Note: An interesting thing to note would be that, if the setup and punchline values are modified inside our .component.ts file. Then the HTML will also change to reflect the latest changes.
Styling the UI
If you run the app now, you will notice that it looks nothing like the final product we planned. That’s because we didn’t style it yet.
To do the styling of the component, we need to move to the .component.scss folder ( People who already know a little about CSS may be confused about the file extension .scss, do not worry about it, as scss is just an advanced version of CSS that has modern features such as variables ).
The good thing about it is that we can still write traditional CSS inside an scss file and it would work fine
Note: This is not an in-depth guide on the CSS being used, this is just an optional step for people wanting to exactly mimic the look and feel of the final product shown above.
For our styling we’ll be using custom fonts, to download a custom font, go to https://fonts.google.com and copy the @import tag of the font and paste it into the scss file
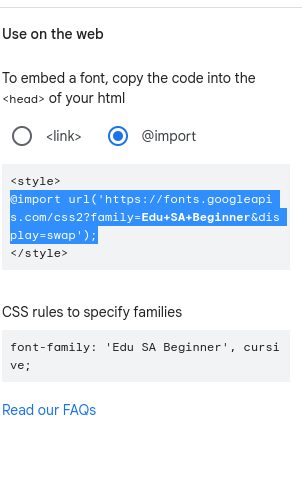
You can use any font according to your preference, for our purposes we’ll use the following fonts
@import url("https://fonts.googleapis.com/css2?family=Edu+SA+Beginner&display=swap");
@import url("https://fonts.googleapis.com/css2?family=Cormorant+SC&display=swap");
Then we’ll style the Quote by using the first font, and by making changes to its alignment
#quote {
  padding: 30px;
  display: flex;
  flex-direction: column;
  align-items: center;
  font-family: "Edu SA Beginner", cursive;
}
#quote p {
  align-self: flex-end;
  font-weight: 100;
  color: grey;
}
Do not worry if you don’t understand how we are styling the elements as CSS is not at all the focus of this tutorial. You could even skip this section if you wanted to.
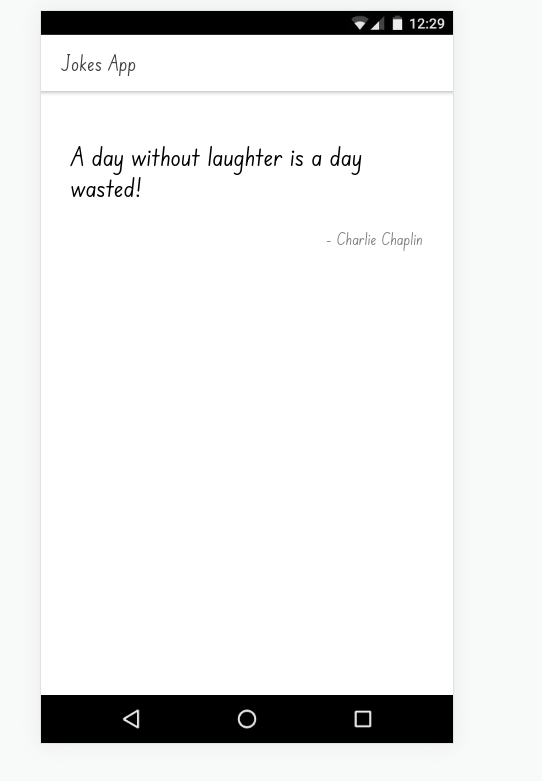
This looks somewhat better, now similarly let’s style the Joke part and the Button using the following CSS
h2 {
  font-family: "Cormorant SC", serif;
  text-align: center;
}

#joke {
  display: flex;
  flex-direction: column;
  font-family: "Courier New", Courier, monospace;
  padding: 30px;
}

#punchline {
  color: grey;
}

#get-another {
  display: flex;
  justify-content: center;
}
#get-another-btn {
  padding: 15px;
  background-color: #cff632;
  border-radius: 10px;
}

ion-toolbar {
  --color: #000000;
  --background: #cff632;
}
The above CSS should now result in a much more improved look for our app
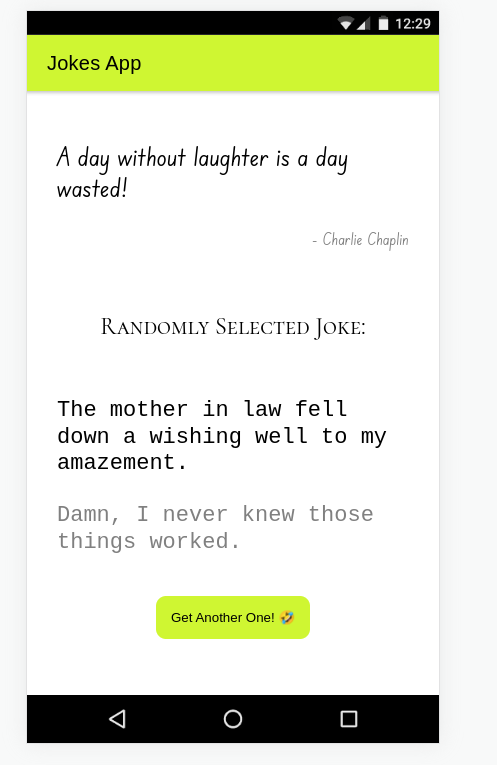
Part 6: Angular Services
Angular Services can be thought of as Helper Functions or Helpers, they only do one job (eg. retrieving some data, or sending some data ), and they can be used in multiple components. Most of the helpers we use in real life do only one thing, take a particular input to perform some action and if required give some output
Now try to guess where we can make use of Angular Services.
Good use of Angular Services would be to create a Joke Service that only 1 job, to get a Joke and return that Joke, as simple as that.
To create a Service, simply run the following command ( recall that you can always use the VSCode built-in terminal by using the following shortcut Ctrl + Shift + ~ )

This will now create 2 files, joke.service,.ts, and joke.service.spec.ts, the .spec file can be ignored as it is only for testing purposes
Let’s have a look at the joke.service.ts file, and add a function for our service, let’s name it getJoke()
import { Injectable } from '@angular/core';

@Injectable({
  providedIn: 'root',
})
export class JokeService {
  constructor() {}

  getJoke() {
return {setup: "Joke Setup", the punchline: "Joke Punchline"}
    }
}
For now, we will only return some sample data for getJoke()
Now let’s have a look at the API we’ll get the Jokes from, if you don’t know what an API is, think of it as an independent service that has a website urlF And on visiting/sending an HTTP request to that URL we are sent the data in JSON format ( or a Javascript Object to put it simply )
Setting up The API
For this tutorial, we’ll be using the following API https://rapidapi.com/KegenGuyll/api/dad-jokes/
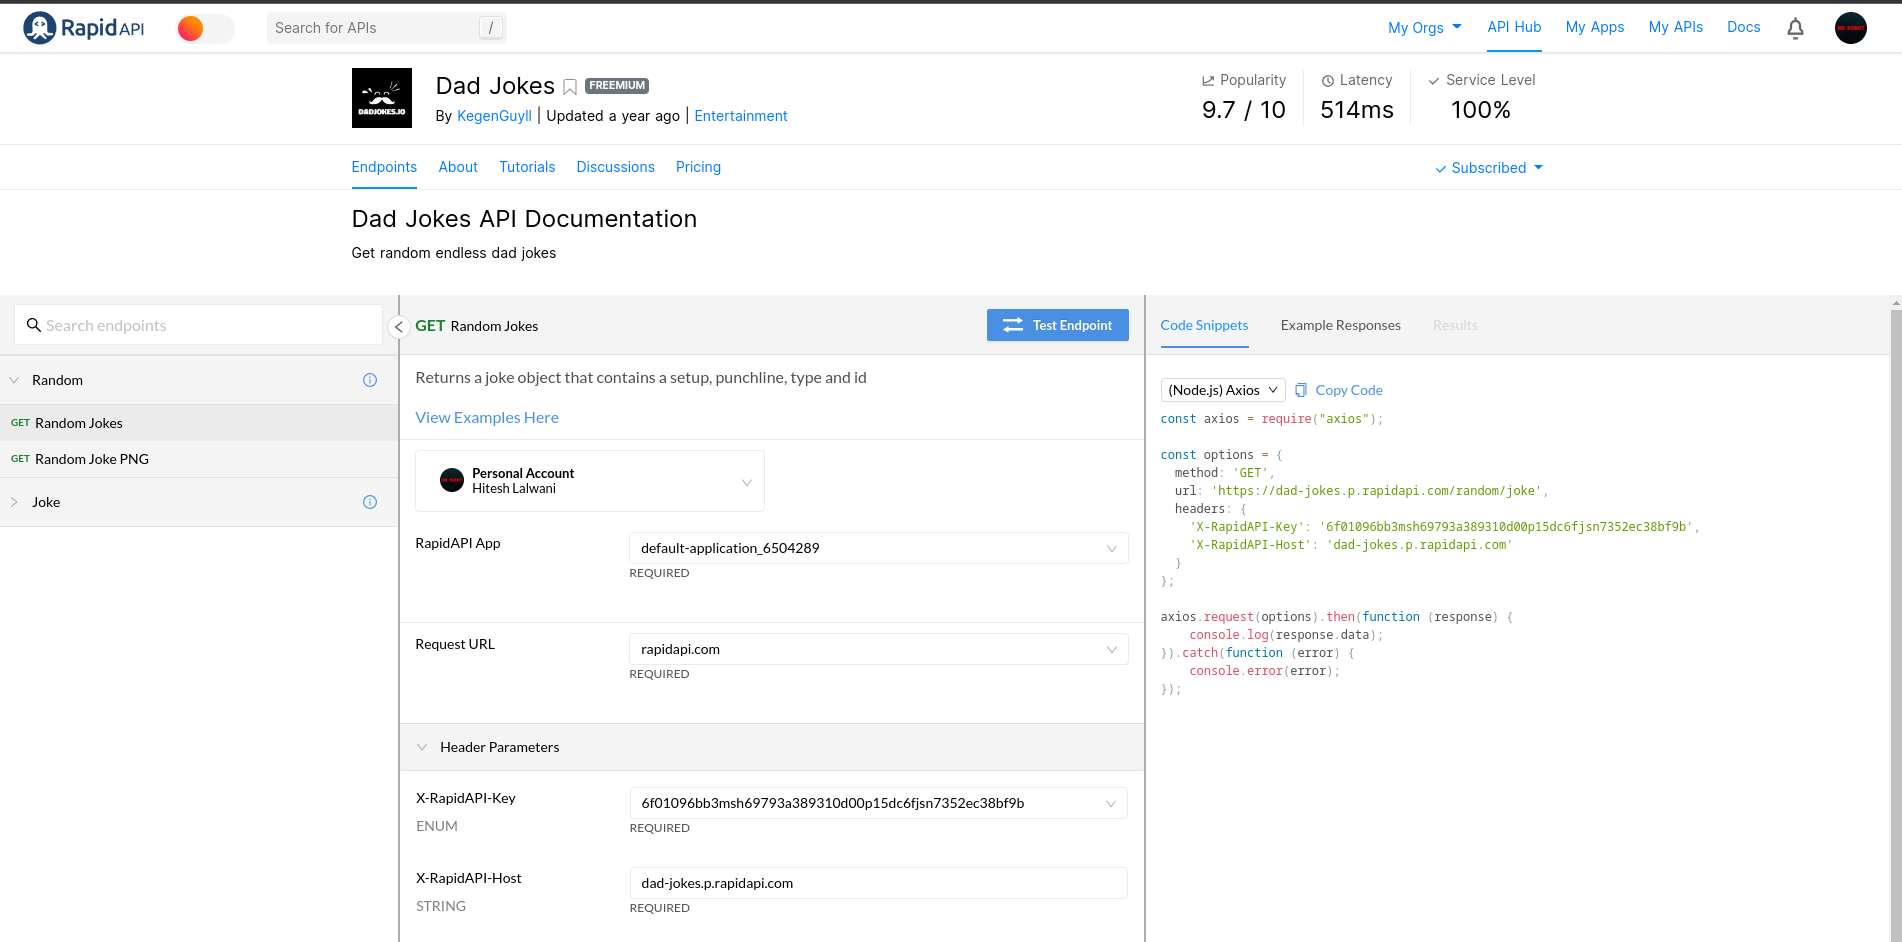
To use this API we’ll have to Subscribe to it first, as these kinds of services are not entirely free and have a limit on them
Click on the Subscribe button and register an account. You should then be prompted to choose a plan
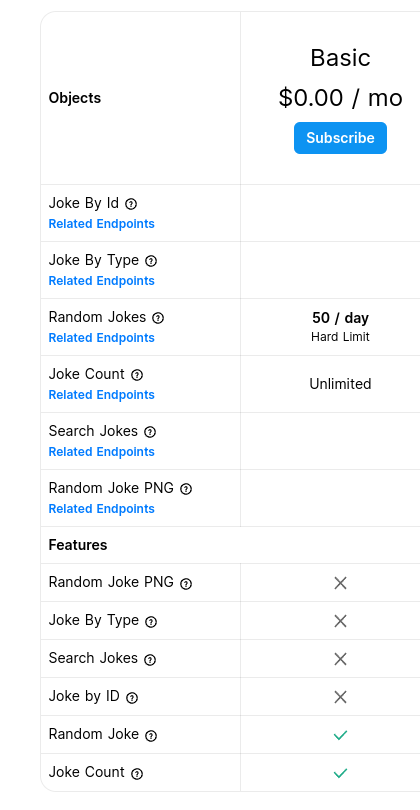
As we’ll be only using it for learning purposes, it’d be best to stick with the Basic Plan which is free of cost
After Subscribing to the plan, you have to take note of 3 things
- The API URL
- The API KEY
- The API HOST
These 3 things can be located on the right side of the API page

Using the API
To use the API, we first have to import the HTTP module, so that we can send HTTP requests to our API to get the data
To import HTTP add the following line to our app. module, as it will provide HTTP to the whole module
import {HttpClientModule} from '@angular/common/http';Then we just need to add the imported HttpClientModule to the imports array
In the end, your app. module should look something like this

Now we can use the HTTP module inside our Service by importing the HttpClient and passing it to our service
import { Injectable } from '@angular/core';
import { HttpClient } from '@angular/common/http';
@Injectable({
  providedIn: 'root',
})
export class JokeService {
  constructor(private http: HttpClient) {}

  getJoke() {
....
    }
}
Here private is used because we do not want any other classes having access to the HTTP module we imported, and to keep it private to the JokeService class only
Now to send the HTTP request to the API, recall the 3 things we talked about previously and just substitute those in the following code
getJoke() {
    let url = 'https://dad-jokes.p.rapidapi.com/random/joke';
    let headers = {
      'X-RapidAPI-Key': '6f01096bb3msh69793a389310d00p15dc6fjsn7352ec38bf9b',
      'X-RapidAPI-Host': 'dad-jokes.p.rapidapi.com',
    };
    return this.http.get(url, { headers });
  }
These Headers are used by the API to identify us and the type of plan we are subscribed to. So that it can provide the services accordingly
If you are curious and want to see the output of HTTP. get would be after the request is complete, you can try so by using console.log()
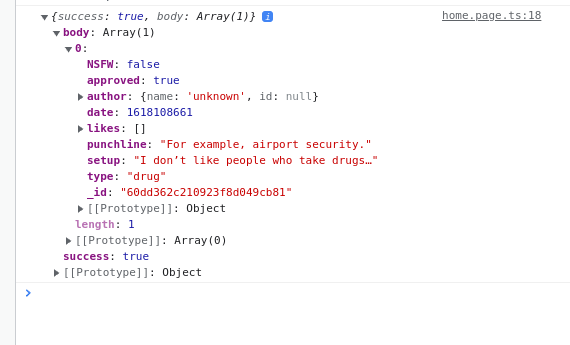
You can see that the output of the service has both punchline and set up for us to use!
Using the services
Now that we have the services setup, let’s now use them in our .component.ts to update the setup and punchline variables accordingly
The first step would be to import the JokeService by running the following command
import { JokeService } from '../joke.service';Let’s then create a buttonClickHandler() function, that is called whenever the button is clicked
  buttonClickHandler() {
    this.setup = '';
    this.punchline = 'Loading...';
    this.jokeService
      .getJoke()
      .toPromise()
      .then((jokeData) => {
        this.setup = jokeData['body'][0]['setup'];
        this.punchline = jokeData['body'][0]['punchline'];
      });
  }
Let’s try to understand step-by-step what the code does,
- Firstly, as soon as the button is clicked, it removes the previous joke and replaces it with a Loading Message
- Then, it creates a Promise from our JokeService, and that promise on resolution updates our this. setup and this. punchline
Note: As we already discussed, we don’t have to worry about updating our HTML as Angular.js automatically does that for us whenever we update the variable in the .component.ts file
The only thing left now is to make sure that button click handler() is called whenever the button is clicked, we can do so by simply adding (click)=” button click handler()” to our <button> in the HTML
 <button id="get-another-btn" (click)="buttonClickHandler()">
      Get Another One! 🤣
    </button>
And voila! Your app should be functioning as intended now.
Part 7: Generating the APK for the Ionic/AngularJs project
To export the apk in ionic, we only need to follow 2 steps
Run the following command
ionic capacitor build androidThis should take a few minutes and should open Android Studio
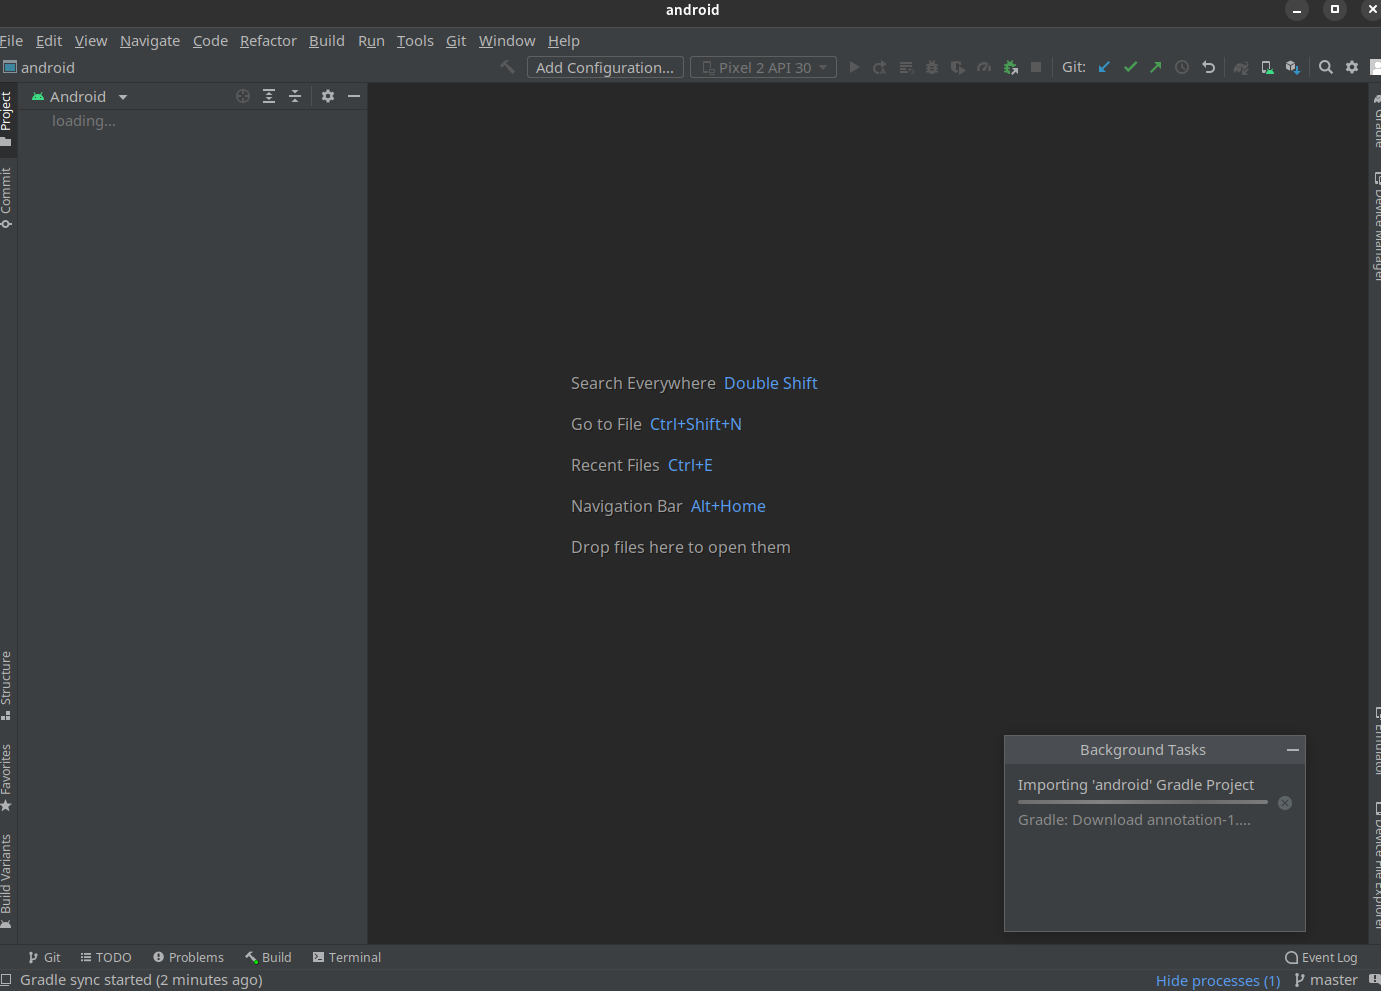
Wait for a few minutes till the project is imported
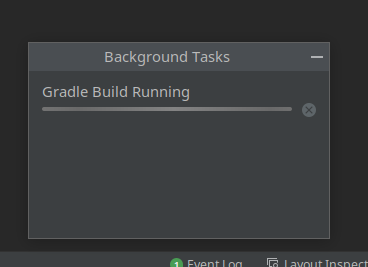
Then in the toolbar, go to Build -> Build Apks and you should see the following progress bar
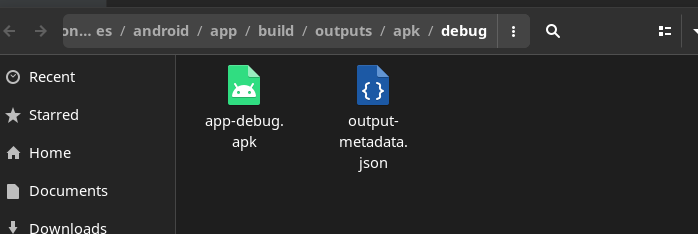
Then click on Locate Built Apk and you will find the final .apk file that you can install on your smartphone!
Part 8: Generating the IPA for iOS
If you are running macOS and have the iOS SDK installed, you can build the same project for iOS without making any changes in the code
ios
To build the project as an iOS .ipa file, run the following command inside the Cordova Project folder
ionic capacitor build iosWithin a few minutes, the .ipa file should be generated which you can share with your friends and even Publish to the App Store!
Conclusion
Congrats on finishing your very first android application using ionic. Hopefully, you were able to appreciate the platform of Hybrid App Development. However this is not it, there’s still much more to learn and explore within Android Development and also in Angular. I’d recommend you visit the official website of angular and try to learn in-depth about stuff such as Routers, Pipes, and a lot more advanced topics which we weren’t able to cover in this article. If you found it valuable and learned something new, do share it with your friends!
