Animated Page Transitions with React.js and Framer Motion – TUTORIAL

Since React.js is a framework that builds Single Page Applications, it’s possible to Navigate to different pages within the application without having to reload the page/redirect to a different page on the browser. This allows React.js to have control over the transitions and animations that take place when a new page is visited. These transitions/animations are called Animated Page Transitions and they make the User Experience feel a lot more fun, and enjoyable and add tons of interactivity to the web application.
There are loads of websites and apps that already use Animated Web Transitions, such as Apple, Nike, and a lot more. If you’ve visited any of these websites, you must know that they breathe a new life into the web experience.
And today, we will be learning all that you need to know to get started on adding Animated Page Transitions to your website to make it more lively, interactive, and impressive.
Table of Contents
What are the Prerequisites to build Animated Page Transitions?
Since learning to Add Animated Page Transitions in React is considered to be an intermediate topic, there are a few recommended prerequisites
-
Basic Knowledge of React.js
The only thing you need to know about React.js is how Components work together and pass data around. You do not need to know anything about Framer Motion or React Router as we will be covering that from scratch
-
An IDE ( Integrated Development Environment ):
If you don’t know what an IDE is, most of the IDEs on the market today can be considered Advanced Code Editors. They speed up development by providing the user with advanced features such as Syntax Highlighting, Code Autocompletion, Error Detection, and a lot more. For this tutorial, we will be using Visual Studio Code which is quite popular & beginner friendly
-
Web Browser

Any modern web browser, such as Google Chrome or Firefox to test the React.js application
Final Result: Animated Page Transitions
Before moving ahead, let’s have a look at the final product, i.e, the Animated Page Transitions that we shall be building
Fade In – Fade Out Transition
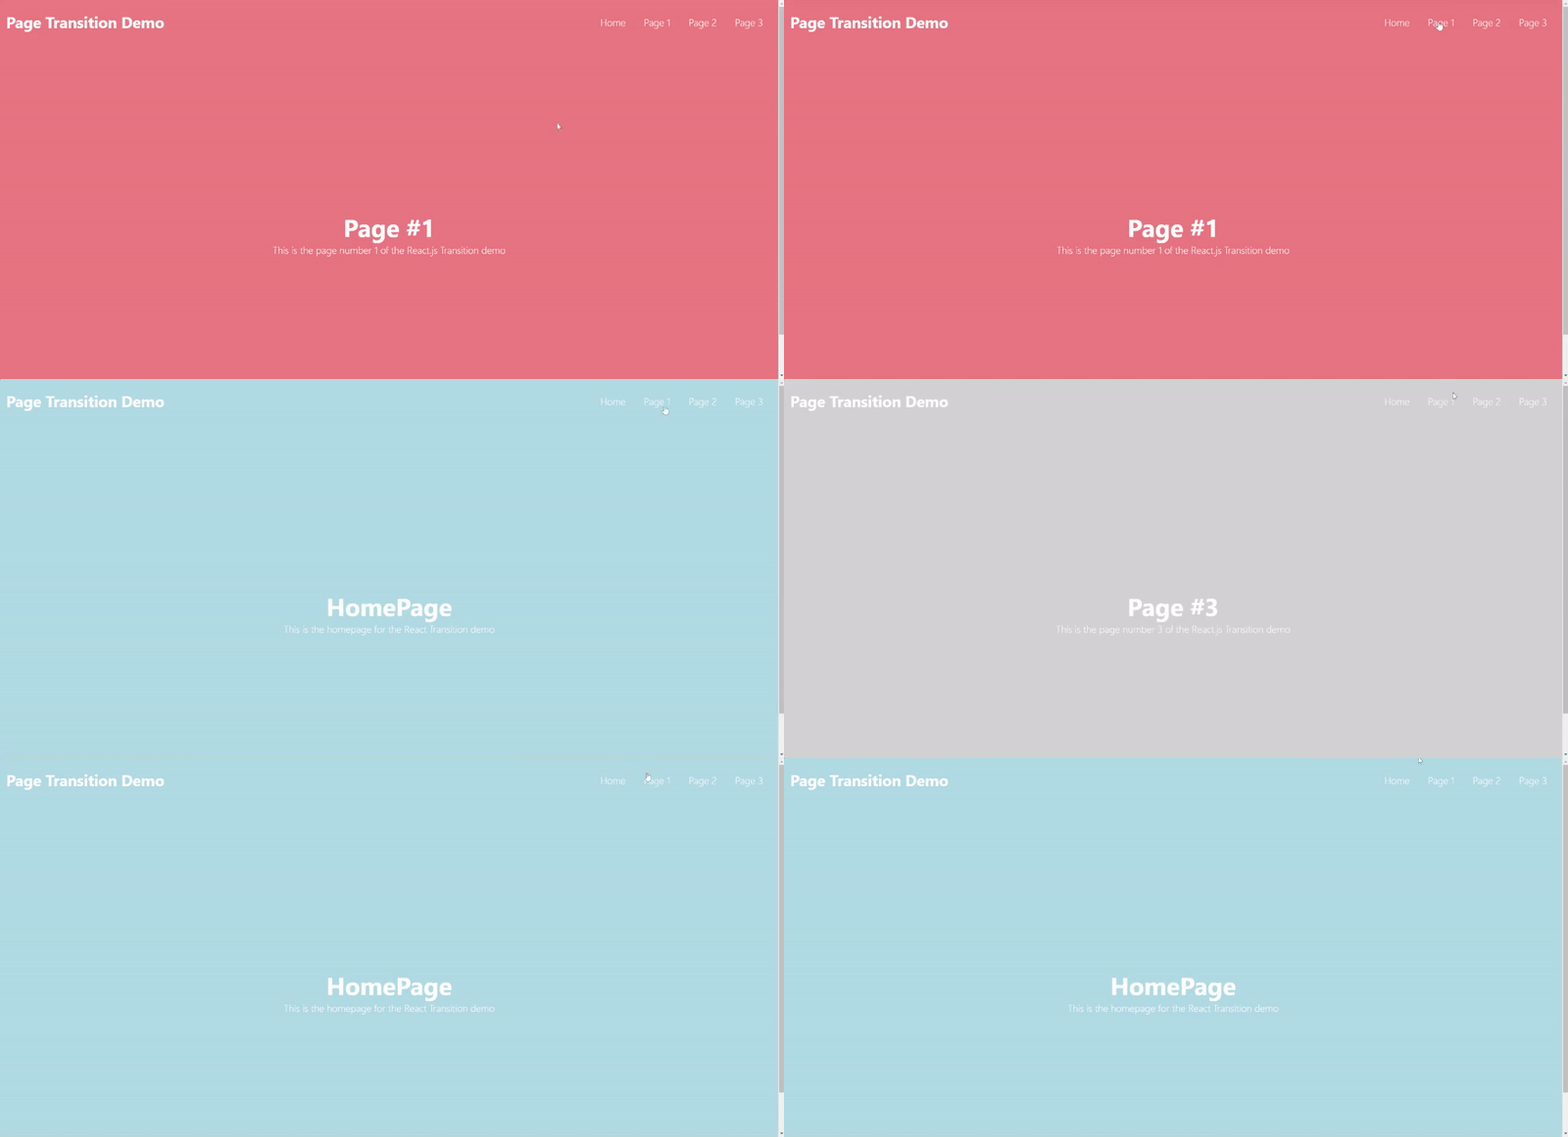
Content Dropping Animation
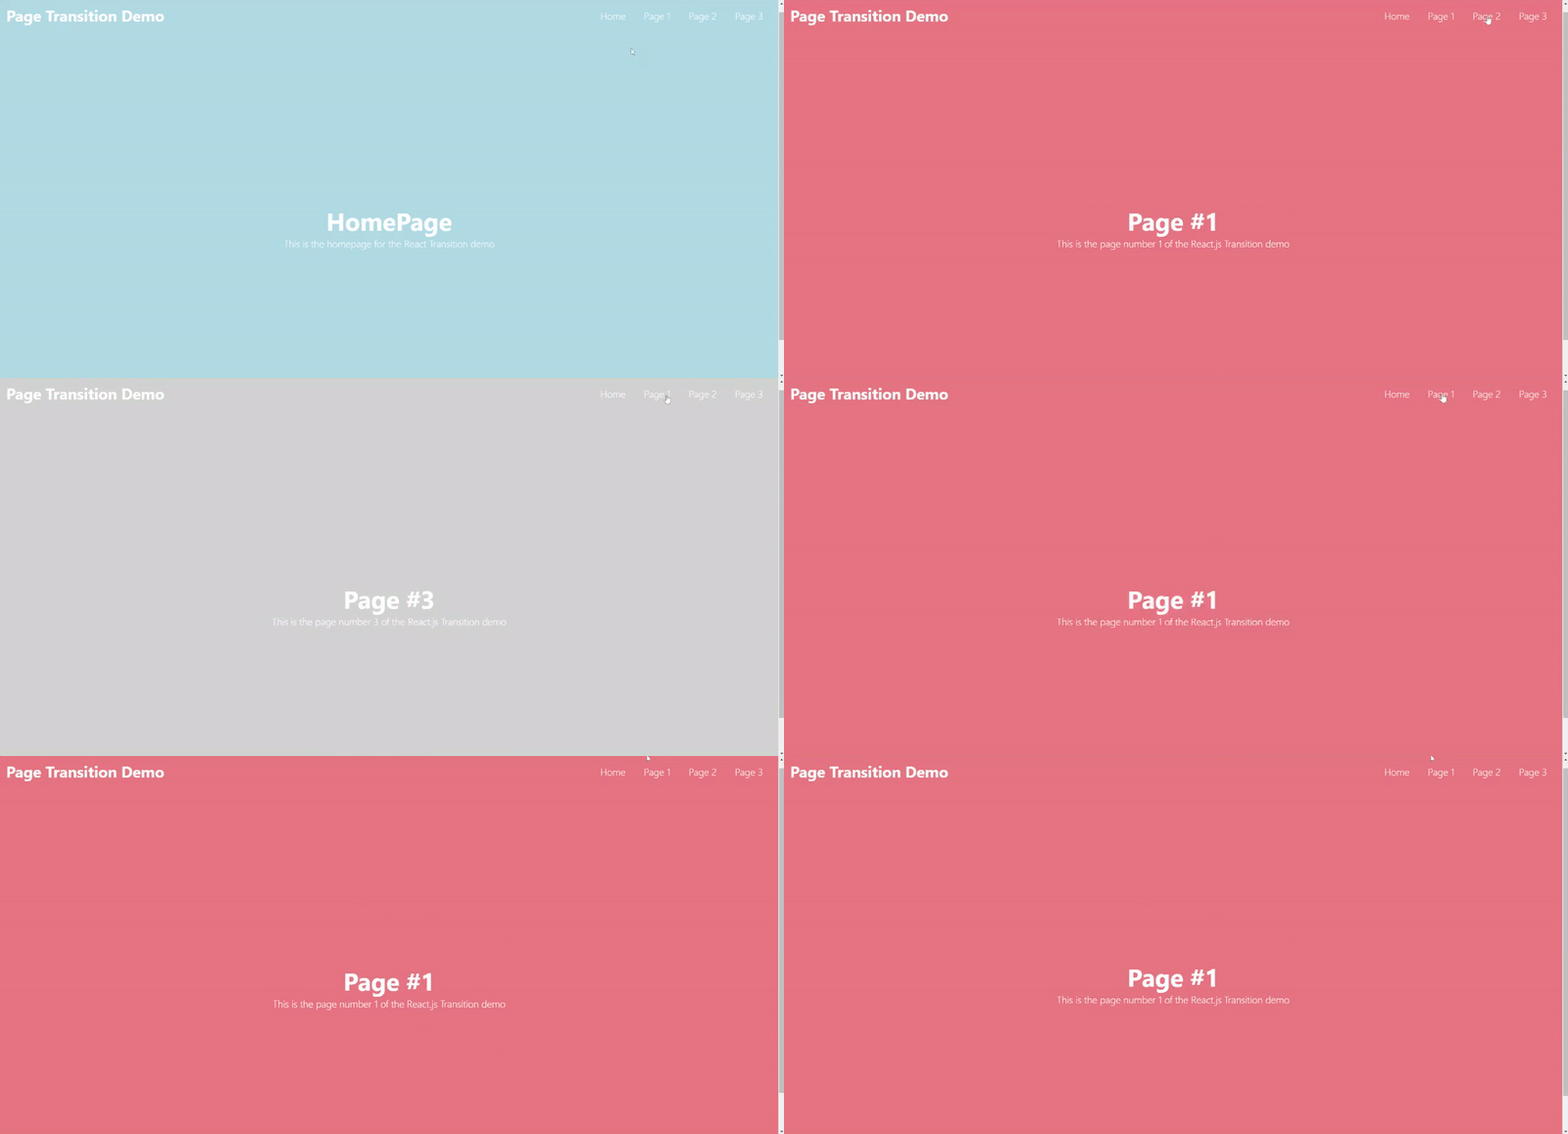
Slide Animation
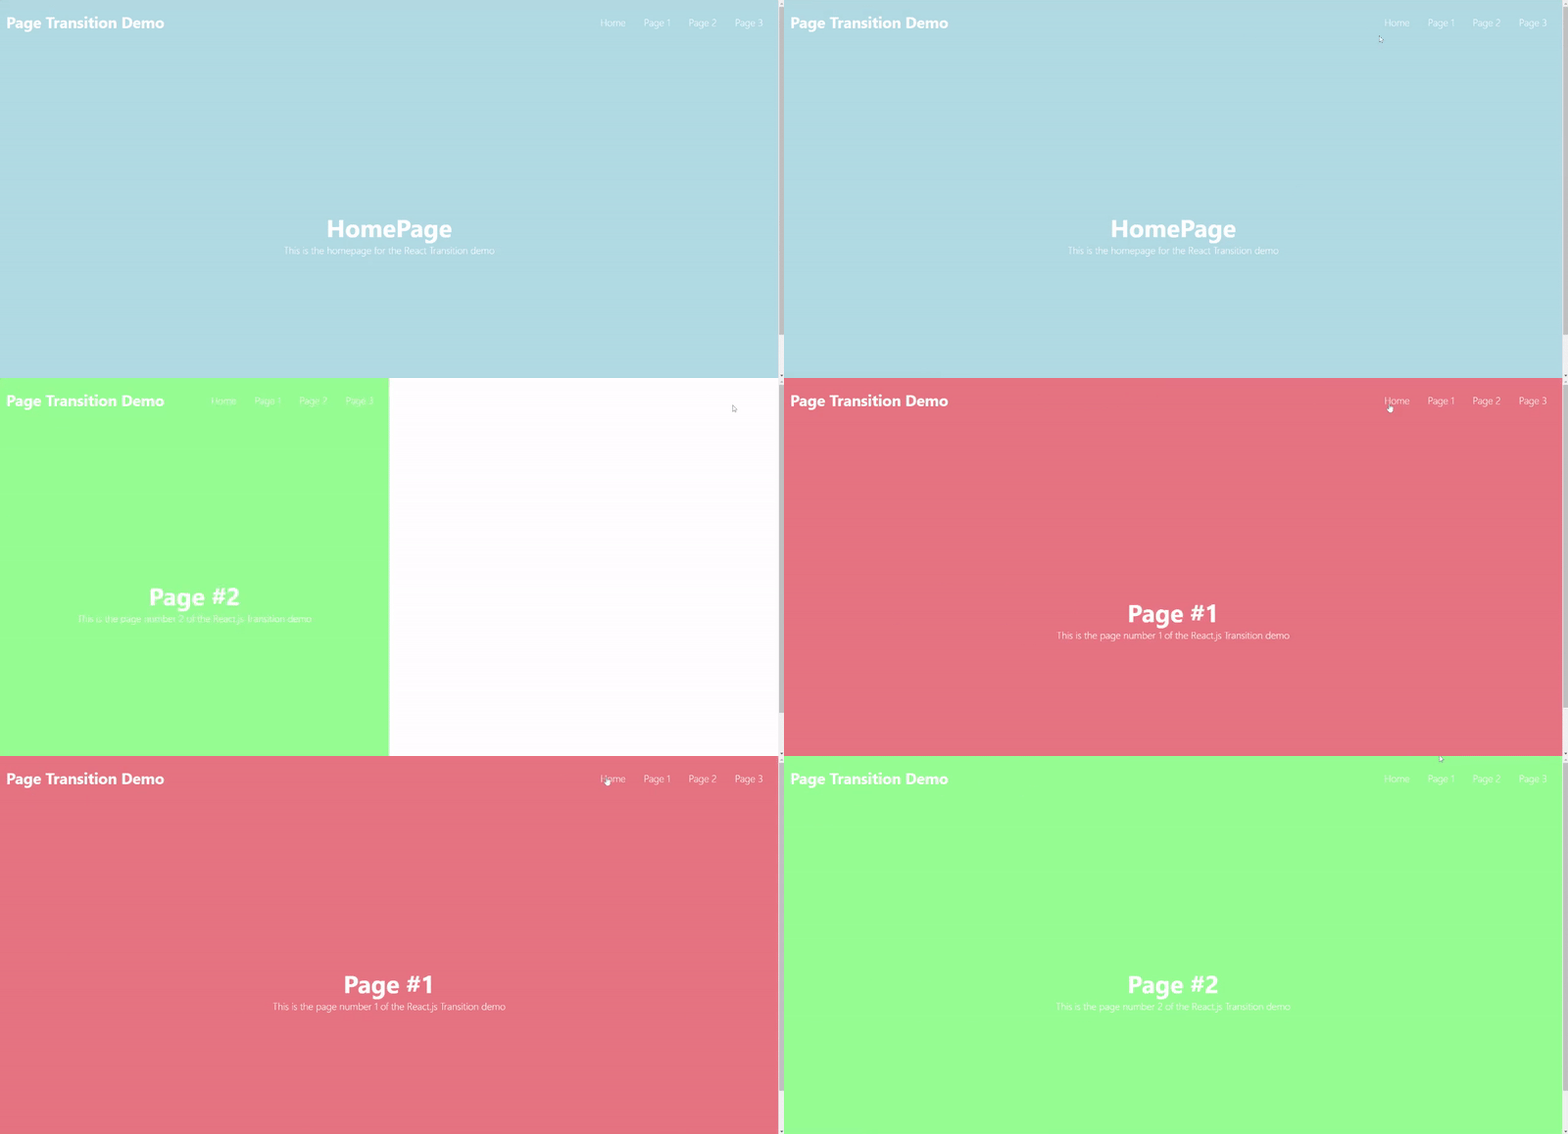
Flip Animation
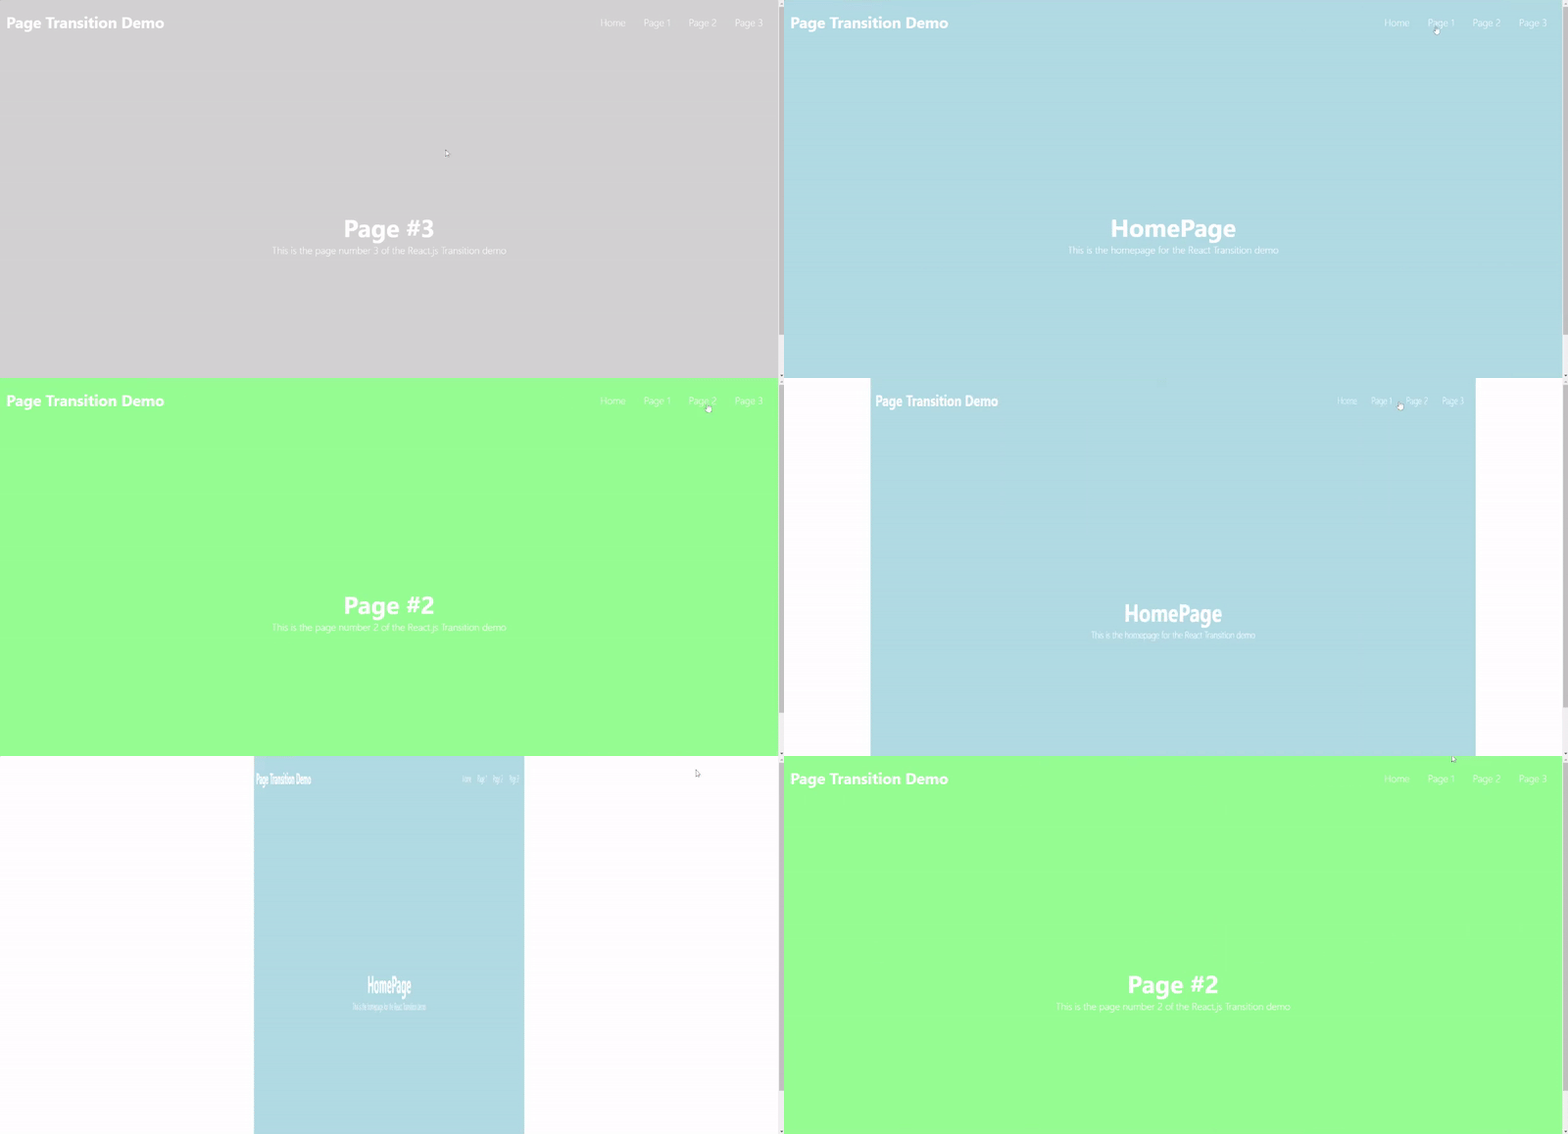
Part 1: Installing the required tools for React.js Page Transitions
Now that we had a look at the final page transitions that we will be working on, it’s time to get to work!
Let’s get started by installing the required tools for building this application.
NPM & Node.js

For the React.js project that we will be working on, we require a package manager that will help us in installing & managing the required plugins. There are several such package managers available on the market such as NPM, Yarn, etc. But for this tutorial, we will be using NPM or Node Package Manager
To install NPM & Node.js
- Visit the official website of Node.js https://www.nodejs.org
- Download the latest stable version of Node.js available ( 16.16.0 LTS ) as of writing this article
- Follow the on-screen instructions while running the Node.js & NPM installer
React.js

There are mainly two ways to add React.js to a Node.js project
- Installing React.js manually and adding it to the project ( complicated & time taking )
- Create a new react.js project with a default starter template ( easy & most preferred )
The second way is the most popular & preferred way of adding React.js to your project, so we will be going ahead with that
To create a new react js project with a starter template, we run the following command
npx create-react-app <app name>
This will create a new folder called <app name> which will have the React.js project
In our case, the command will be
npx create-react-app react-page-transitionsReact Router & Framer Motion

These are the 2 additional npm packages that we require to add routes and add transitions to the React.js application.
Do not worry about them just yet, as of now we are just going to focus on installing these packages for later usage
To install these packages, we run the following command
npm install react-router-dom@6 framer-motion

Part 2: Setting up non-animated React.js Pages
It’s finally time to get started on writing the code for the React.js application, let’s open the react-page-transitions folder which contains the project files
Understanding the File Structure for a React.js Project
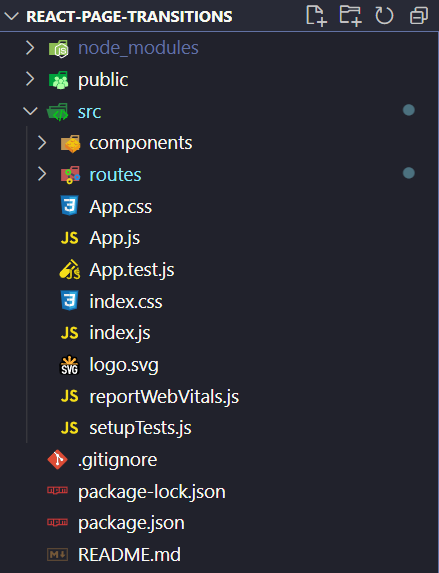
The above folder structure might be a little confusing at first, but don’t worry as we’ll be discussing each file & folder in a step-by-step manner
Node_modules Folder:
This folder contains all of the files related to Node Package Manager that we used for installing the application, we don’t need to know a lot about this while working on the React.js application as we rarely even open it in the first place
Public Folder:
This contains all of the Static Content ( Images, Video, Audio, etc ) for the website. If we want to insert an Image to our website, we can simply copy it into the public folder and then use it wherever required
Src Folder:
As the name suggests, this folder contains the Source Code for the React.js application, it mainly consists of
- Component file ( each component is mostly stored in a JavaScript file, for eg: App.js )
- Stylesheet: React.js by default provides us with an index.css file that contains the global styling for the entire page, ( we can also use Component based styling where we create a new CSS file for every single component that we make )
Package.json & Package-lock.json
They are also NPM Specific files, they contain information about packages installed using NPM, they also store the Version Numbers of the packages ( React, React dom, etc ) that are currently being used in the package. For the most part, we won’t be interacting with these files in the tutorial
Running & Testing a React.js Project
After understanding the files & folders that make up a React.js project, it’s time for us to Run the React.js application on the browser
To run a React.js application on the browser, we execute the following command
npm run startThis should open a new browser tab and show a Demo React Application
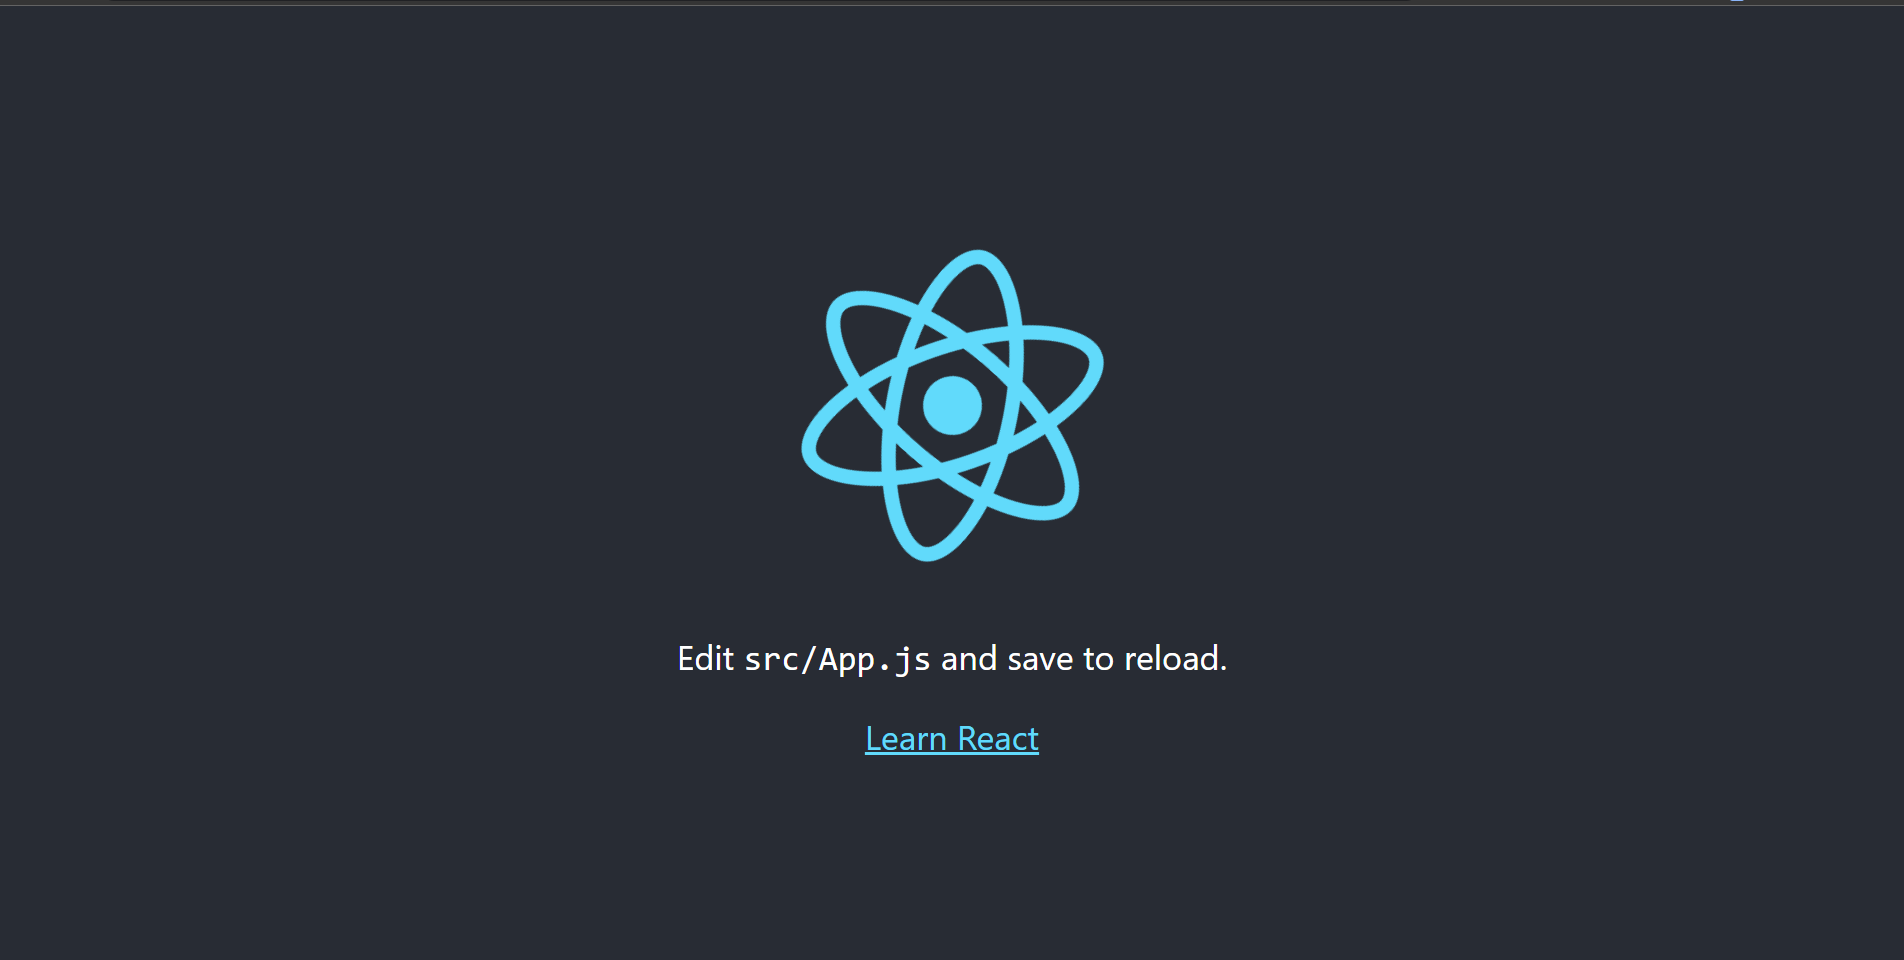
One might be surprised that the React Application is already showing some content even though we didn’t code anything.
This is because React.js by default creates one App.js component that displays a Help Message in case users don’t understand where to code.
To verify this, can open app.js, and there we will see the HTML corresponding to the page we just saw
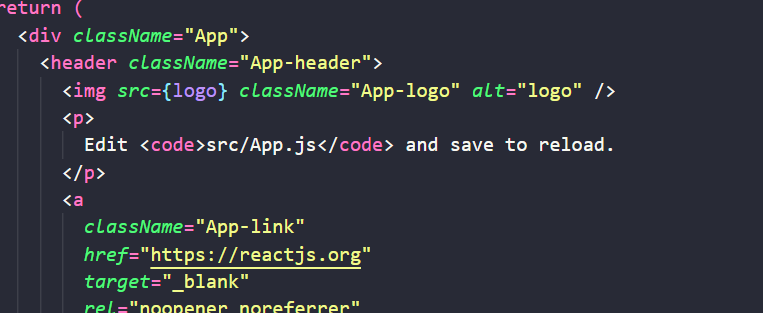
Since the main focus here is learning, we would advise clearing the App.js file so that we can build the App from scratch to get a deeper understanding
Setting up the Components for the React.js Application
Looking at the final webpage ( without the animations ) try to divide the application into components and list them out in your head. This exercise will help you in quickly building any required layout as React.js mainly works on components
For this particular application, the required components are
- NavBar – Navigation bar at the top of the page
- HomePage – Since the pages on the final app are simple, we can code the entire page in a single component
- Page1
- Page2
- Page3
It’s usually considered good practice to use only one file for each react component. So, let’s go ahead and create a new file for each of the components discussed above
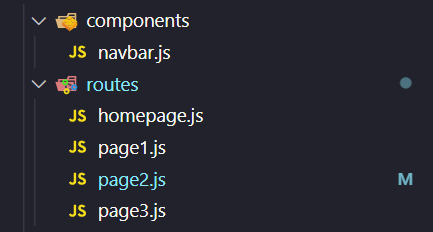
Let’s start writing code for each component discussed.
For now, we will only write the Basic HTML for each component, and later on, it shall be expanded to fit our needs.
NavBar Component
import { Link } from "react-router-dom";

function NavBar() {
  return (
    <div className="navbar">
      <div className="nav-title">Page Transition Demo</div>
      <div className="nav-options">
        <div className="nav-option">
          <Link to="/">Home</Link>
        </div>
        <div className="nav-option">
          <Link to="/page1"> Page 1</Link>
        </div>
        <div className="nav-option">
          <Link to="/page2"> Page 2 </Link>
        </div>
        <div className="nav-option">
          <Link to="/page3"> Page 3</Link>
        </div>
      </div>
    </div>
  );
}

export default NavBar;- Most of the HTML above should be pretty simple to understand, the only new thing you might notice is the <Link> tag
- This is provided by React Router as an alternative to the default <a> tag provided by HTML.
- It’s done so that React Router can have control over how the pages are switched, therefore allowing for Page Transitions to take place
- Moving on to the HTML, we simply have 2 sections: 1) Page Title and 2) Options Section
- The Options <Link>’s to all the 4 pages of the React.js application
HomePage Component
import NavBar from "../components/navbar";

function HomePage() {
  return (
    <div
      className="homepage">
      <NavBar></NavBar>
      <div className="page-body">
        <div className="page-title">HomePage</div>
        <div className="page-description">
          This is the homepage for the React Transition demo
        </div>
      </div>
    </div>
  );
}

export default HomePage;- To keep things simple, there won’t be a lot of content in all of the individual page components
- All of the Page Components will mainly have 3 things
- NavBar at the top
- Page Title at the center
- Page Description is also at the center
Similarly, we implement 3 new components: Page1, Page2, and Page3 with the code below
Page1 Component
import NavBar from "../components/navbar";
function Page1() {
  return (
    <div className="page1">
      <NavBar></NavBar>
      <div className="page-body">
        <div className="page-title">Page #1</div>
        <div className="page-description">
          This is the page number 1 of the React.js Transition demo
        </div>
      </div>
    </div>
  );
}

export default Page1;
Page2 Component
import NavBar from "../components/navbar";

function Page2() {
  return (
    <div className="page2">
      <NavBar></NavBar>
      <div className="page-body">
        <div className="page-title">Page #2</div>
        <div className="page-description">
          This is the page number 2 of the React.js Transition demo
        </div>
      </div>
    </div>
  );
}

export default Page2;
Page3 Component
import NavBar from "../components/navbar";
function Page3() {
  return (
    <div className="page3">
      <NavBar></NavBar>
      <div className="page-body">
        <div className="page-title">Page #3</div>
        <div className="page-description">
          This is the page number 3 of the React.js Transition demo
        </div>
      </div>
    </div>
  );
}

export default Page3;
Now the application should be completely functional but without any styling or transitions.
Part 3: Adding Styling to the Non-Animated Pages
To make the app look good & presentable, it’s time to style it using CSS. All React.js applications have an index.css file that we can use for styling.
The index.css styling file is also called the Global Stylesheet of the application, meaning CSS written here is applied to all the components by default
We won’t be going through the CSS as it is not the main objective of this tutorial. However, for people who are interested in making their website look exactly like the final product shown above, they can use the CSS below
* {
  margin: 0;
  padding: 0;
  font-family: "Segoe UI", Tahoma, Geneva, Verdana, sans-serif;
  color: white;
}

.navbar {
  display: flex;
  justify-content: space-between;
  padding: 10px;
  font-weight: bold;
  font-size: 25px;
}
.nav-options {
  display: flex;
}
.nav-option {
  padding: 4px;
}
a {
  text-decoration: none;
  font-weight: lighter;
  font-size: 16px;
  display: flex;
}
.homepage {
  background-color: lightblue;
}
.page1 {
  background-color: lightcoral;
}
.page2 {
  background-color: lightgreen;
}
.page3 {
  background-color: lightgrey;
}
.page-body {
  height: 100vh;
  display: flex;
  flex-direction: column;
  justify-content: center;
  align-items: center;
}
.page-title {
  font-weight: bolder;
  font-size: 40px;
}
.page-description {
  font-weight: lighter;
}
Part 4: Linking the pages together using React.js Router
After building individual components for individual pages, it’s finally time to link them together and allow the user to navigate through these pages.
To do that, we use a Plugin called React Router.
React Router essentially accomplishes 2 crucial things:
- Creating Routes for Page Components and giving them a name ( for eg, creating a route /page1 for the Page1 Component )
- Rendering the Correct Component whenever a route is requested ( for eg, rendering the HomePage Component when someone visits the / route )
Let’s start by integrating the React Router plugin into the React.js Application. To do that,
Open the App.js file and add the following code
import { BrowserRouter, Route, Routes } from "react-router-dom";
import HomePage from "./routes/homepage";
import Page1 from "./routes/page1";
import Page2 from "./routes/page2";
import Page3 from "./routes/page3";
function App() {
  return (
    <BrowserRouter>
      <Routes>
        <Route path="/" element={<HomePage />}></Route>
        <Route path="/page1" element={<Page1 />}></Route>
        <Route path="/page2" element={<Page2 />}></Route>
        <Route path="/page3" element={<Page3 />}></Route>
      </Routes>
    </BrowserRouter>
  );
}

export default App;- Firstly, we import all the requirements from the react-router package to use them in the app.js file
- Then, we import all of the required Page Components to add them to the router
- Inside the App function, instead of returning the default component that we saw earlier, we will now render a new BrowserRouter component.
- This BrowserRouter component will be responsible for Rendering the Required Components whenever a known route is visited
- The last step is to add the routes and map them to their respective page components using the <Route> functionality that react-router provides
And that’s it! After making these simple changes, React Router should now be set up in the application and you should be able to visit all of the pages by clicking the options on the Navigation Bar
But there are still no Animated Page Transitions in the application, that’s exactly what we will be looking at in the next section
Part 5: Animating the React pages using Framer Motion
Now that we can successfully navigate from one page to another using react-router, it’s finally time to develop Page Transitions between these routes
The way that Page Transitions work in Framer Motions is
- Firstly, we wrap all the Page Components which require animation in a <motion.div> container. Anything inside a <motion.div> container will support animation.
Note: You can also have 2 <motion.div> elements in a single page, ( even if one is wrapped inside another ). This is done when 2 simultaneous transitions are required.
- To perform animation in a <motion.div> we need to add three properties
- Initial
- Animate
- Exit
Each of these properties describes 3 stages of the animation
- Initial – Initial look of the page as soon as it is loaded
- Animate – The animation that takes place after the initial property is loaded
- Exit – The animation that takes place when the Page is switched or is not being displayed anymore
Let’s now work on the 4-page transitions that we discussed earlier
Fade In – Fade Out Transition
import NavBar from "../components/navbar";
import { motion } from "framer-motion";
function Page1() {
  return (
    <motion.div
      className="page1"
      initial={{ opacity: 0 }}
      animate={{ opacity: 1 }}
      exit={{ opacity: 0 }}
    >
      <NavBar></NavBar>
      <div className="page-body">
        <div className="page-title">Page #1</div>
        <div className="page-description">
          This is the page number 1 of the React.js Transition demo
        </div>
      </div>
    </motion.div>
  );
}

export default Page1;- This is probably one, of the simplest transitions when compared to the remaining 4. The only thing we are doing here is changing exciting capacity from 0 to 1 whenever the user changes to a new route.
- If you’ve never heard of opacity. It can be understood as the “transparency” of the element. Having an opacity of 0 means that the element is completely transparent. Whereas a value of 1 signifies that the element is completely opaque.
- Having these properties in initial, animate, and exit will allow the opacity to gradually change from 0 to 1 giving it a smooth animation.
- As for the exiting property, the opacity is simply changed back to 0. To provide a smooth exit effect.
Content Dropping Animation
import NavBar from "../components/navbar";
import { motion } from "framer-motion";
function Page1() {
  return (
    <div className="page1">
      <NavBar></NavBar>
      <motion.div
        className="page-body"
        initial={{
          y: -150,
        }}
        animate={{
          y: 0,
        }}

      >
        <div className="page-title">Page #1</div>
        <div className="page-description">
          This is the page number 1 of the React.js Transition demo
        </div>
      </motion.div>
    </div>
  );
}

export default Page1;- This might be a little different from other animations as we are using <motion.div> to wrap only the content instead of wrapping the entire page component.
- This is because the Content Drop Animation needs to be performed on the content itself, and not on the entire page.
- To create a drop effect, we need to use the y property provided by the framer motion
- Y & X are two properties that signify how far-off the element is from its initial position on the x and y axes respectively
- A value of y = 0 means that the element is placed exactly where it should be, whereas a value of y = -150 means that the element is 150 pixels above it is in its actual position
- Transitioning from y = -150 to y = 0 makes it feel like the element is dropping from 150px above Hence, giving a cool page transition
Slide Animation
import NavBar from "../components/navbar";
import { motion } from "framer-motion";
function Page1() {
  return (
    <motion.div
      className="page1"
      initial={{
        width: "0%",
      }}
      animate={{
        width: "100%",
      }}
      exit={{
        width: "0%",
      }}
      transition={{
        duration: 0.2,
      }}
    >
      <NavBar></NavBar>
      <motion.div
        className="page-body"
        initial={{
          y: -150,
        }}
        animate={{
          y: 0,
        }}
      >
        <div className="page-title">Page #1</div>
        <div className="page-description">
          This is the page number 1 of the React.js Transition demo
        </div>
      </motion.div>
    </motion.div>
  );
}

export default Page1;- To make things interesting, this time – we will be combining 2 transitions.
- The final transition will consist of a slide transition + drop transition both happening at the same time. This combination will create a really exciting effect
- To do that, we make two < motions.div>’s – one wrapping the entire body, and the other wrapping the content
- The outer <motion.div> is responsible for the sliding effect, it does so by animating the width from 0 to 100% as soon as the user changes routes
- As for the <motion.div> present inside, it’ll contain the same transition discussed above for the drop effect.
- The slide animation might feel a little slower than the usual animations. A good thing to know would be that we can set custom duration for any animation by using the transition: duration property provided by framer motion.
- In our case, 0.2 seconds should be a pretty smooth and fast duration for the slide animation.
Flip Animation
import NavBar from "../components/navbar";
import { motion } from "framer-motion";
function Page1() {
  return (
    <motion.div
      className="page1"
      initial={{
        scaleX: 0,
      }}
      animate={{
        scaleX: 1,
      }}
      exit={{
        scale: 0,
      }}
      transition={{
        duration: 0.2,
      }}
    >
      <NavBar></NavBar>
      <motion.div
        className="page-body"
        initial={{
          y: -150,
        }}
        animate={{
          y: 0,
        }}
      >
        <div className="page-title">Page #1</div>
        <div className="page-description">
          This is the page number 1 of the React.js Transition demo
        </div>
      </motion.div>
    </motion.div>
  );
}

export default Page1;- This one requires a bit more thinking to build than the other transitions above, the first obvious thing would be to create two <motion.div>’s. The outer one for Flip Animation and the inner <motion.div> would be responsible for the drop effect
- For the Flip Effect to take place, we use the ScaleX & ScaleY properties. ScaleX takes the element and Scales it down to the size specified. This distorts the element and mimics the look of a spinning element.
- ScaleX can be used for flipping the page along the x-axis whereas used for flipping the page along the y-axis
- The part for the drop-animations stays the same as before.
Note:
If exit transitions don’t seem to work on your website, you need to add the following “fix”
- Create a new component RoutesWithAnimation and add the following code inside it
import { AnimatePresence } from "framer-motion";
import { useLocation, Routes, Route } from "react-router-dom";
import HomePage from "../routes/homepage";
import Page1 from "../routes/page1";
import Page2 from "../routes/page2";
import Page3 from "../routes/page3";
export default function RoutesWithAnimation() {
  let location = useLocation();
  return (
    <AnimatePresence exitBeforeEnter>
      <Routes location={location} key={location.pathname}>
        <Route path="/" element={<HomePage />}></Route>
        <Route path="/page1" element={<Page1 />}></Route>
        <Route path="/page2" element={<Page2 />}></Route>
        <Route path="/page3" element={<Page3 />}></Route>
      </Routes>
    </AnimatePresence>
  );
}
The only noticeable difference from the previous code is that we are now providing location ( website path ) data to the Routes component.
This helps Framer Motion to keep track of the current location and execute all of the required transitions without any problem.
- To replace the Routes that we created earlier with the new RoutesWithAnimation Component, simply replace the code inside app.js with the RoutesWithAnimation tag.
import "./App.css";
import { BrowserRouter } from "react-router-dom";
import RoutesWithAnimation from "./components/routes_with_animation";
function App() {
  return (
    <BrowserRouter>
      <RoutesWithAnimation></RoutesWithAnimation>
    </BrowserRouter>
  );
}

export default App;
All the exit transitions should be functional now!
Conclusion
Congrats on coming this far and finishing all the page transitions discussed. However, there are still a lot more cool animations that you can make with Framer Motion. A good idea would be to visit their official documentation and learn more about various other animations that Framer Motion supports. Hopefully, this was a good starting point for your journey of learning more about animated page transitions. If you enjoyed reading this article, do share it with your friends!
