HTML Templating Using Mustache.js – TUTORIAL

“Mustache.js is a Minimal and Logic-Less templating engine. That can be used not only for HTML Templates, but also for javascript, source code, or any piece of text”
Don’t worry if you don’t know what Templating is, or what Logic Less or HTML Templating means, as we’ll try to understand everything in a Step-by-Step manner
Table of Contents
What are Templates?
Let’s say you want to make 100 Report Cards, with marks of the 100 Students, and you are given the marks in the following format
marks = [
{
  name: "Derek",
  maths: 90,
  physics: 92,
  chemistry: 94,
  total: 276
},
{
  name: "Jason",
  maths: 86,
  ...
}
];
And you are asked to make the Report Card in The Following format
| Hello Derek, This is your Report Card: You Score 90 in Maths, 92 in Physics, and 94 in Chemistry Your Total is 276 |
Now imagine doing that for all 100 students, that would certainly be a tedious task.
If you look closely, you will notice that in all of our Report Cards we are wasting so much time by typing tons of Repetitive Text.
To Solve this, we have something called Templates. Any template takes 2 things, the Basic Structure of the template ( Here, the structure would be the stuff we are Repeatedly Typing ) and The Unique data ( Which would be the Marks ) and combines those to give our Final Output within a few seconds.
Why and How to Learn Mustache.js?
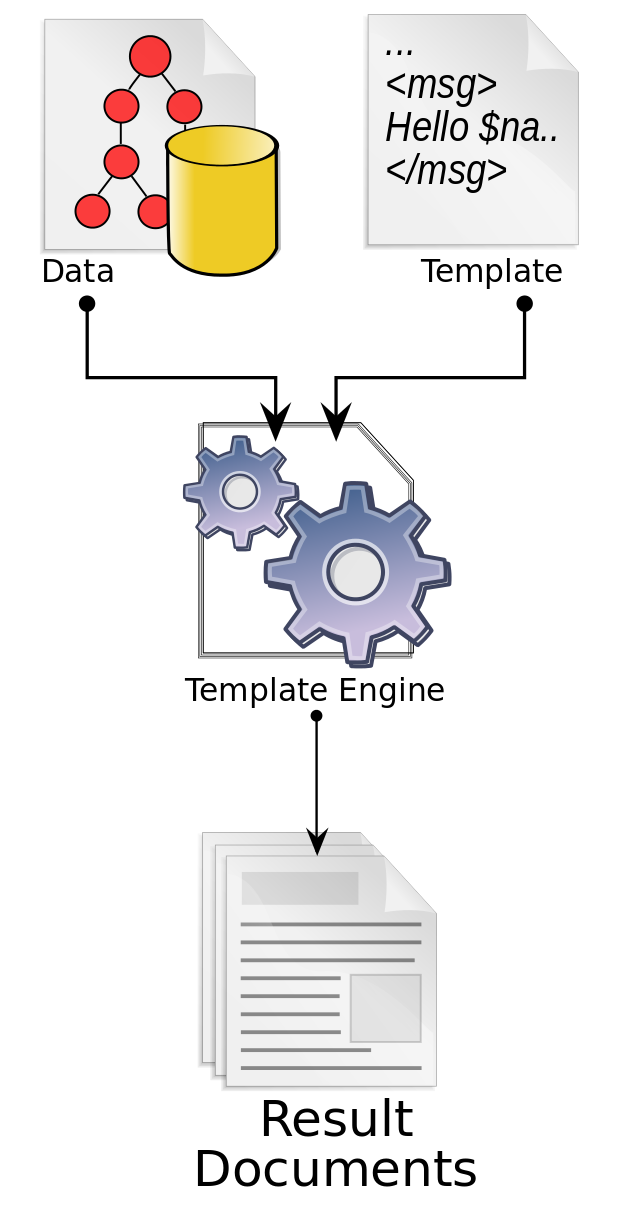
There are many templating engines in the market ( eg. Handlebars, EJS, doT, etc ) but what makes Mustache.js stand out among them all is that it runs on any piece of text and that it is Logic-Less ( we’ll get into discussing what that means later ) and also it’s among the most popular Templating engines.
Those are the reasons why we’ll be using Mustache.js today in this tutorial.
To learn anything, not just Mustache.js, the best way is to make a small project or to “Learn By Doing”. So today in this tutorial we’ll be building 100 Report Cards with the marks of 100 Students. ( Not by manually writing each Card, but by using Mustache.js )
Part 1: Getting The Required Tools
To get started on our report cards, we’ll need the following tools
IDE (Optional)
Since we’ll be writing JavaScript code to use Mustache.js we need a Code Editor or an IDE ( Integrated Development Environment ). If you don’t know what an IDE is, it’s a program that provides features such as Syntax Highlighting, Error Detection, and much more. There are many popular IDEs on the market ( Sublime text, Atom, Notepad++, etc ) But for our purposes, we’ll be using Visual Studio Code, which has the most features and is a good choice for both beginners and advanced users
Browser
As we’ll be making all of the report cards as an HTML Website, we would need a browser to view them
Part 2: Basic Setup and Installing Mustache.js
Before installing Mustache.js let’s create a directory for our Project ( say ReportCardProject ) and add the following 2 files in it
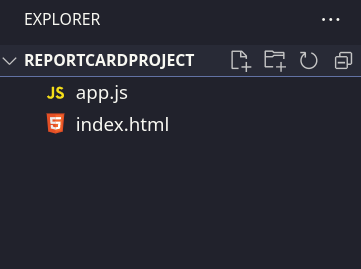
- index.html
This is the main part of our website which is visible to the user. If we want to visit our website, we do so by simply Right-clicking the index.html file and selecting Open With Google Chrome or any browser of your choice
- app.js
This is the JavaScript part of our website, here we’ll be writing the code which is responsible for templating, and from here we will be generating the Templated HTML and pushing it so that it’s visible on the website.
Let’s Start by setting up our HTML Page
<!DOCTYPE html>
<html lang="en">
  <head>
    <meta charset="UTF-8" />
    <meta http-equiv="X-UA-Compatible" content="IE=edge" />
    <meta name="viewport" content="width=device-width, initial-scale=1.0" />
    <title>Report Cards - 2022 Batch</title>
  </head>

  <body>
    <h1>Report Cards Of Students</h1>
    <div id="report"></div>
  </body>
</html>
Let’s try to break down what’s happening above
- Firstly you might notice that there are 3 sections to our website, one is the <head> and the second is <body>, inside the head, we have information that is not shown on the website, such as the page title, and some other Metadata
- The actual visible part of the website is inside the <body> tag, notice that we already added a heading called Report Cards of Students
- Below it, we have a <div> element with an id of the report, the HTML for this will be empty for now, as we will access this element in our JavaScript code, and edit the HTML from there itself
To see your website, simply right-click on it and Open it With your browser
You should get the following page
Now to add the Mustache.js script we have to make use of the <script> tag
To install Mustache.js, there are 2 ways
Downloading Mustache.js as a local file
- Go to the official website of Mustache.js or download it from here
- You will now get a Mustache.js file, and place it inside our project folder ( ReportCardProject )
- To link that file to our HTML simply add the following code
<script src="/mustache.js"></script>Using a CDN (Content Delivery Network)
- This option is particularly useful, if you’re making the website in a storage-restricted environment, and don’t have enough space to download the script yourself or you want to decrease the load on your server
- By using a Content Delivery Network, or CDN we essentially Outsource the script so that it is available on some other website and we don’t have to download it
- One such platform is cdnjs
To Download the scripts from CDNjs, simply search for Mustache.js and you should get the following page
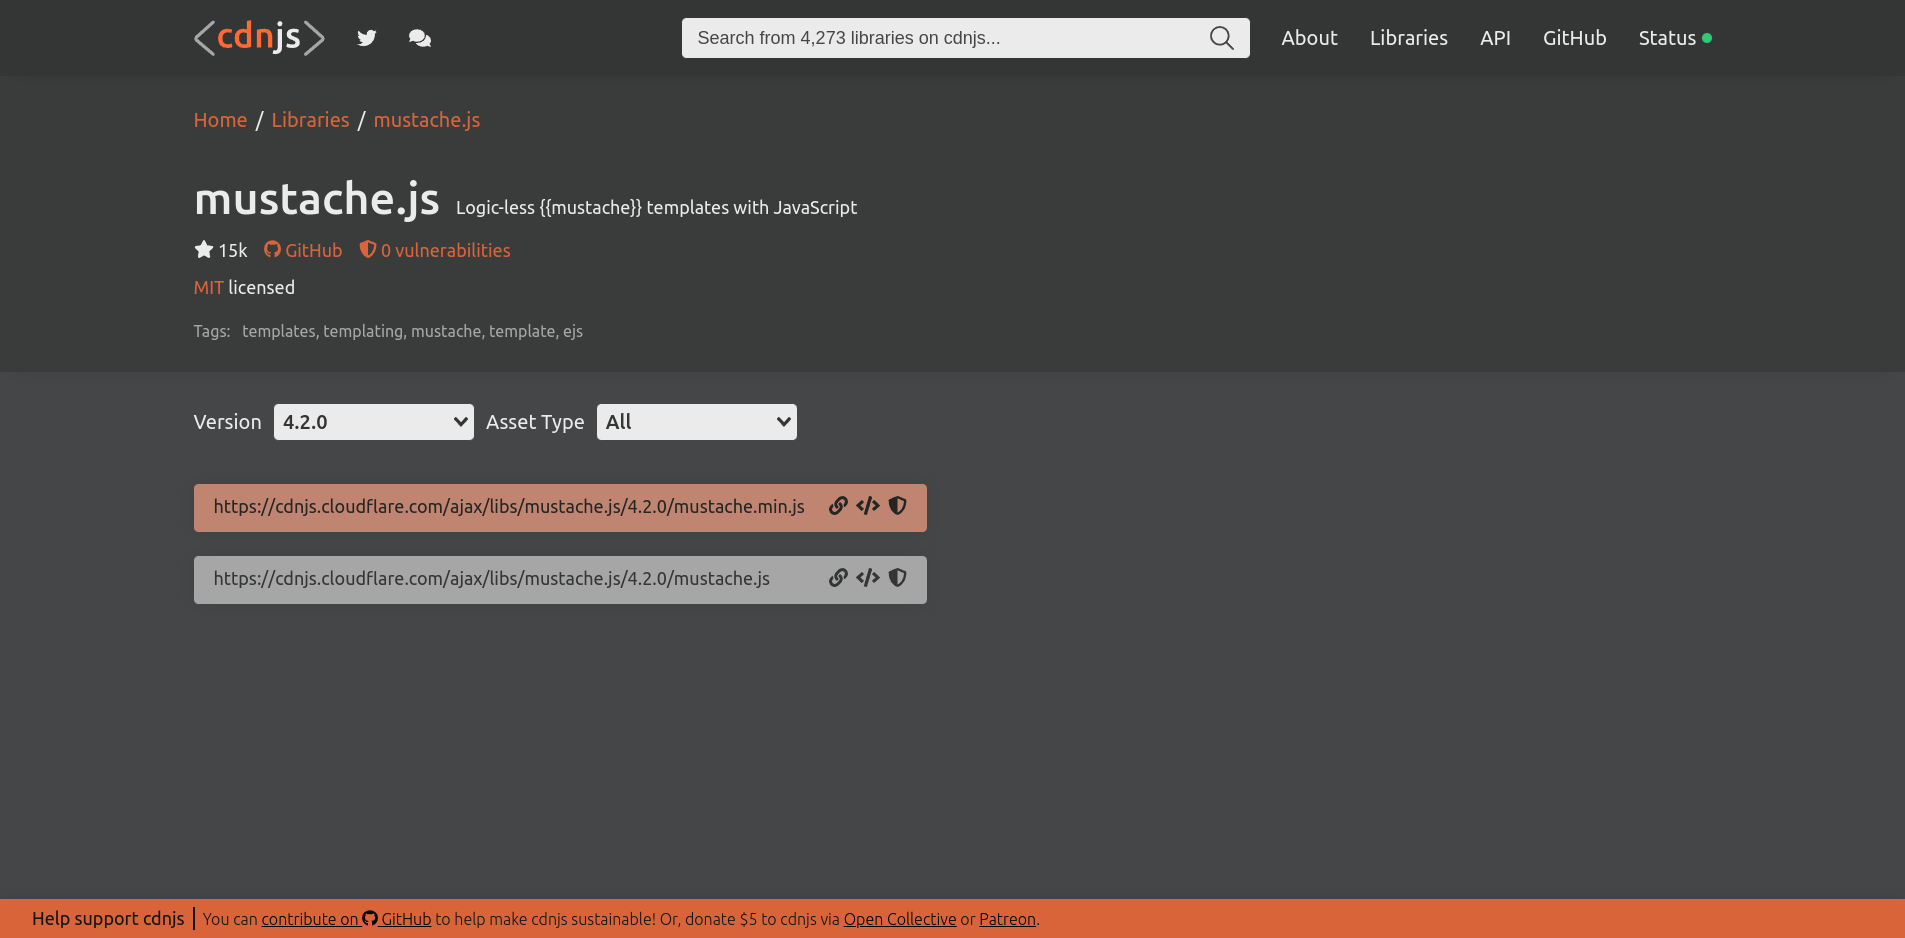
Click on the button Copy Script Tag to directly get the necessary <script> tag to use for this page
The Script Tag should look something like this
<script src="https://cdnjs.cloudflare.com/ajax/libs/mustache.js/4.2.0/mustache.min.js" integrity="sha512-CswfmQmJj8DXhm29Qc5eLk5//2EW1CaI6de+RmRhSrWrXRhkBQ3795tuwJvT6DK6EF4IVqJIRmBg8EokL6c87g==" crossorigin="anonymous" referrerpolicy="no-referrer"></script>Tip: Always place the scripts at the end of the <body> tag as it will allow the page content to load before our heavy scripts, to improve the load time of our website
After adding our Mustache.js script, the only thing we’re left with is to also add our local app.js file
To do that, simply add the following <script> tag below the Mustache.js (this order must be followed because to use Mustache.js in our app.js we have to make sure that it loads before the app.js )
<script src="/app.js"></script>
Now that we have all of the files set up and ready to go, let’s move on to the next section!
Part 3: Mustache.js Variables
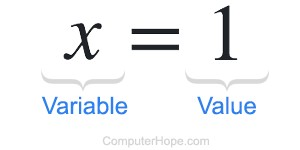
Variables are the fundamental part of any Mustache.js template. As we already discussed, there are two parts to a template, the Structure, and the Data.
The way variables work in Mustache.js is they are firstly declared inside the Data and then they are used inside Structure by enclosing the variable name with 2 curly braces {{}}. Let’s have a look at an example
Data
{
currentYear: 2022
}
Structure
Right now, the year is {{currentYear}}
After processing it, Mustache.js should render the following output
Right now, the year is 2022
Implementing Variables
Let’s have a look at the report card we need
| Hello Derek, This is your Report Card: You Score 90 in Maths, 92 in Physics, and 94 in Chemistry Your Total is 276 |
Try to take a minute or two and list out all of the variables that you think we’ll require.
Yep, that’s right! We’ll need 5 Variables to make our Template, they are
- Name
- Marks in Maths
- Marks in Physics
- Marks in Chemistry
- Total Marks
Now based on the variables, try to write the structure part on your own, remember that to access a Mustache.js variable, we have to wrap it inside 2 curly braces
Hopefully, after trying hard you’ve come up with the following structure
| Hello {{name}}, This is your Report Card: You Score {{maths}} in Maths, {{physics}} in Physics, and {{chemistry}} in Chemistry Your Total is {{total}} |
Let’s now store the above Structure inside a variable in our app.js file
let Structure = `
Hello {{name}},
This is your Report Card:
You Score {{maths}} in Maths, {{physics}} in Physics, and {{chemistry}} in Chemistry
Your Total is {{total}}
`;Tip: To declare strings having multiple lines in JavaScript, wrap them inside two BackTicks (“)
Now similarly create the Data object, which has all 5 variables.
let data = {
  name: "Derek",
  maths: 90,
  physics: 92,
  chemistry: 94,
  total: 276,
};
Now we combine both of these and make our final templated string, using Mustache. render(structure, data);
let templatedString = Mustache.render(Structure, data);Let’s now try to insert this templatedString in our HTML.
To do first let’s put the <div id=”report”> element in a variable so that we can edit its HTML
let reportSection = document.getElementById("report");Then we simply change its HTML to our Templated String
reportSection.innerHTML = templatedString;Now if you load the website, you should see the templated Text as follows

For now, this doesn’t look that good, because in our Structure we didn’t use any HTML Tags, let’s try to change it so that it looks a little more appealing
let Structure = `
<h2>Hello {{name}}, </h2>
This is your Report Card: </h2>
You Score {{maths}} in Maths, {{physics}} in Physics, and {{chemistry}} in Chemistry
<h3>Your Total is {{total}}</h3>
`;
After changing the structure, as shown above, you’ll notice that our report card looks a little bit better

Part 4: Mustache.js Sections

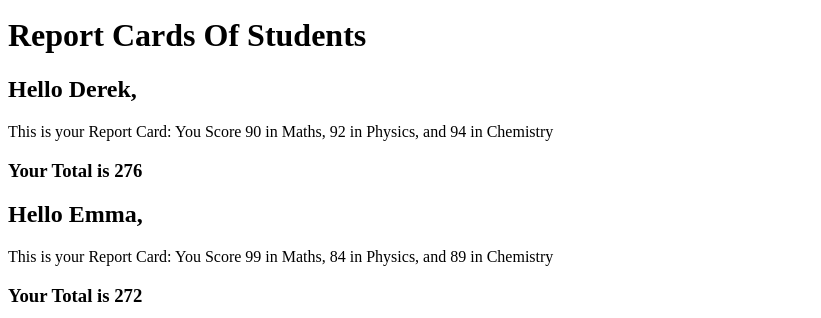
We were successful to create 1 Report Card Using Mustache.js but as we discussed above, we want to make 100 Report Cards
The first idea that might come to your mind is – To use For loops and loop over all of the 100 objects and render HTML for each of them. Although it’s not a bad idea, it would increase the code which we have to write and make it harder to read and understand.
That’s where Mustache.js shines! Mustache.js is a Logic-Less Templating language, which means we can’t and won’t need to write control statements such as if/else, for/while, etc in our code. That reduces the complexity of our code and saves a lot of time!
To do the above, we have to create a Mustache.js section, a Section can be thought of as an alternative to the traditional For loop as it renders the data inside itself one or more times depending on the data received
To create a section we have to wrap the code inside the following:
{{#section}}
// code here
{{/section}}
Confused? Let’s look at an example
Data
{
section1: [{year: 2020},{year:2021},{year:2023}]
}
Structure
{{#section1}}
The current year is {{year}}
{{/section1}}
Combining both of these, you’ll get the following rendered string
The current year is 2020
The current year is 2021
The current year is 2022
Implementing Sections
Hopefully, the above example gave you some clarity on how Sections work. In our case, to generate 100 Report Cards We first have to make a section of ReportCards and inside that section, we will render all of the report cards
To do that, we have to first change the Data variable from an Object to an Array of Objects in which each Object has the details of the report card
We can do that by writing the following code
let data = {
  ReportCards: [
    //student 1 details
    {
      name: "Derek",
      maths: 90,
      physics: 92,
      chemistry: 94,
      total: 276,
    },
    //student 2 details
    {
      name: "Emma",
      maths: 99,
      physics: 84,
      chemistry: 89,
      total: 272,
    },
    ...
  ],
};
Now the only thing we have to change inside Structure is to wrap the existing code so that it is inside the ReportCards section
let Structure = `
{{#ReportCards}}
<h2>Hello {{name}}, </h2>
This is your Report Card: </h2>
You Score {{maths}} in Maths, {{physics}} in Physics, and {{chemistry}} in Chemistry
<h3>Your Total is {{total}}</h3>
{{/ReportCards}}
`;
Now if you save and reopen your website you should see multiple report cards

The best part about this is that we were able to apply these changes by only writing a few lines of code. Whereas if we were to use traditional for loops it would’ve surely increased the length and the complexity of our code
Part 5: Mustache.js Conditional and Inverted Sections
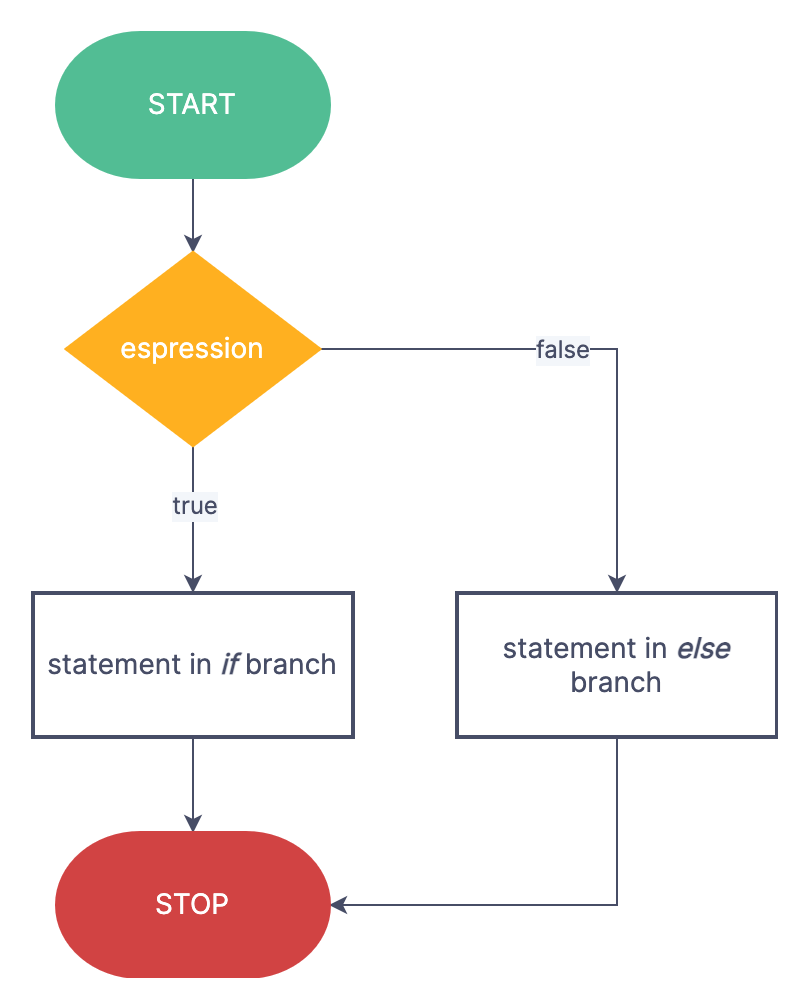
Previously we used Sections to render a block of code multiple times, but that’s not their only purpose! We can also use a Section to render stuff conditionally which in a way replaces the if else statement.
By default whenever the value of a section is false or is falsy ( 0, null, empty array, undefined, etc ) that section is not rendered
Given this information, you can now guess what an Inverted Section is.
Yep! You’re right an Inverted Section is a section that is only rendered when the value of a section is false or faulty
Let’s try to think about where we might need conditional rendering in our project. One good idea would be to include whether the student has passed/failed the exam based on his total marks
We can do that by adding a new property in our data called passed which indicates whether the student has passed or not
let data = {
  ReportCards: [
    //student 1 details
    {
      name: "Derek",
      maths: 90,
      physics: 92,
      chemistry: 94,
      total: 276,
      passed: true,
    },
    //student 2 details
    {
      name: "Emma",
      maths: 99,
      physics: 84,
      chemistry: 89,
      total: 272,
      passed: true,
    },
   //student 3 details
    {
      name: "Brian",
      maths: 32,
      physics: 31,
      chemistry: 20,
      total: 63,
      passed: false,
    },
  ],
  ...
};
Then we can change our structure to conditionally render “You have Passed” or “You have Failed” depending on the passed property
{{#passed}}
Congratulations! You have Passed
{{/passed}}

{{^passed}}
You have FAILED
{{/passed}}
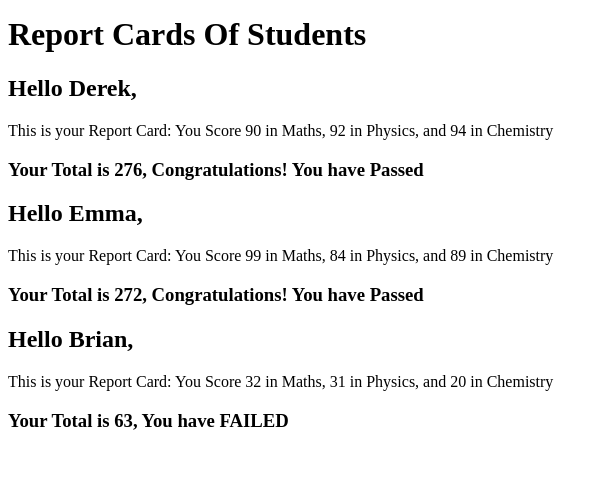
Rerun the website, and voila you have the student pass/fail status now!
Part 6: Mustache.js Functions
As you might have noticed, for every student we have to manually calculate the Total and Passed. But we can ideally replace those with functions that calculate the data for us ( for eg. instead of calculating the total ourselves, we can make a function that adds maths + physics + chemistry and returns the sum for us )
The best part about Mustache.js Functions is that we only have to make the changes inside data and the structure stays the same. That’s because Mustache.js treats variables and functions equally
We can implement Mustache.js functions as follows
let data = {
  ReportCards: [
    //student 1 details
    {
      name: "Derek",
      maths: 90,
      physics: 92,
      chemistry: 94,
      total() {
        return this.maths + this.physics + this.chemistry;
      },
      passed() {
        return this.total() > 100;
      },
    },
    //student 2 details
    {
      name: "Emma",
      maths: 99,
      physics: 84,
....
If you rerun the website, you’ll notice that there are NO changes in the output and everything runs fine. But our code just got a whole lot better and more readable.
Conclusion
Congratulations on coming this far and finishing the tutorial. I hope this tutorial made you realize how truly powerful Mustache.js is. There’s still a whole lot for you to learn and explore, I recommend you try out other templating engines and see what works for you the best, Another good practice project which I would suggest would be to make a few Customised Birthday Invitations and Email them in HTML format to all of your friends & family. If you learned something new and valuable today, do share this article!
