Building a REST API using Jersey & JAX RS – TUTORIAL
Representational State Transfer or REST is an API Design Style/Architecture that works by Exchanging Resources between the database and the client. In this way, the REST API acts like a “middle-man”. There are quite a lot of tools and frameworks available in multiple languages to build a REST API. The most popular ones are – Express ( JavaScript ), Laravel ( PHP ), Flask ( Python ), and several more.
Just like there is an API Framework for all of these languages, there’s one for Java too, and this is where the focus will be for today: to build a REST API using Jersey & JAX RS ( API Developing frameworks for Java ). So let’s get started!
Table of Contents
Tech Stack for Building an API using Java
Before moving ahead, it’s always better to have a good understanding of the tools & frameworks that we’ll be using for the REST API.
JAX RS
JAX RS is a specification/set of annotations developed by Java EE that specifies how developers should build the API Framework. It’s important to understand that JAX RS is not a framework but a standard specification upon which many API frameworks in Java are built. For example, Java API Frameworks such as RESTEasy, Jersey, and RESTlet are all dependent on JAX – RS.
The best part about having a Common Specification for all Frameworks is that even if you’ve mastered one of them – it would be the same as learning them all.
Jersey
As we’ve discussed, Jersey is just an Implementation of the JAX RS specification. In fact, Jersey is considered by a lot of people to be the purest JAX RS implementation. That’s why it is a good starting point for beginners who are willing to learn API Development in Java.
Apache Tomcat
After building the API we have to “host” it on a server. This can be done on multiple platforms such as Jetty Web Server, Apache Tomcat, Oracle WebLogic, etc. But for this tutorial, we will be using Apache Tomcat as the server for the API as it is not only easy to set up but also is very beginner friendly.
What will we build in the Tutorial?
Since this is mainly a tutorial, we’ll be learning the frameworks by building a simple API that will help us to understand the concepts better.
The API that we’ll work on will be a City Temperature API, and will mainly have 3 endpoints
- GetCities: Returns a list of all the Cities for which the temperature is available
- GetAverageTemperature: Returns the Average temperature for all cities
- GetTemp: Takes in a City and returns the temperature for that particular city only
Now that we have a basic idea of what the API is, let’s dive in!
Part 1: Installing the Necessary tools for the Java API
Before moving further, let’s install the tools that are required to build the API
Eclipse Java EE IDE
If you don’t know what an IDE ( Integrated Development Environment ) is, then know that it’s basically an Advanced Code Editor with features such as – Syntax Highlighting, Project Management, Error Detection, and a lot more. There are multiple IDE’s available on the market like Visual Studio Code, Sublime Text, Atom, IntelliJ IDEA, etc. But for this tutorial, we’ll be using Eclipse’s Java EE IDE, as it is specifically made for Java EE projects ( such as the Java API that we are building )
To install Eclipse Java EE IDE:
- Visit the official website of the Eclipse here: https://www.eclipse.org/downloads/packages/
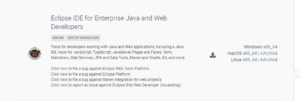
- Scroll down to find the option Eclipse IDE for Enterprise Java & Web Developers as shown below
- Choose your platform from the given options, and click on Download
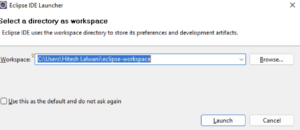
- After installation, click on Launch Eclipse, and you should be greeted with the following screen asking you to choose the Eclipse Workspace, this can be any directory where you want to store the projects
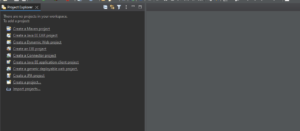
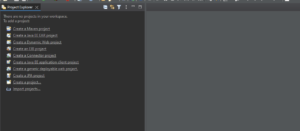
- After selecting the Workspace Directory you should be greeted with the following screen which is: The Home Page of Eclipse IDE
For now, the installation of IDE is sufficient to get started, do not worry about the installation of frameworks ( Jersey ) as they can be installed easily in the IDE itself using something called Maven ( which will be discussed later ).
Part 2: Creating the Java API Project
Setting up The Java API Project
Now that all the tools have been installed, it is time to create the project in Eclipse
To create a Java API Project:
- Open Eclipse IDE, and you should be presented with the following options to Create A New Project
- We have already discussed that we’ll be using Maven for this project, and if you don’t know what Maven is, it’s a Project Management tool that automatically installs and updates the dependencies for any Java Project. If you’ve worked with Node.js before, then you will see that it is similar to NPM ( Node Package Manager )
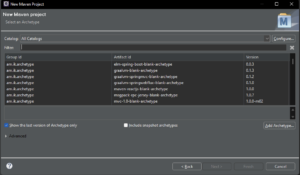
- So, now click on Create a Maven Project and you’ll be presented with the following screen asking you to choose an Archetype for the project
- Archetypes are basically Starter Templates for a project. ( Let’s say you want to build a Spring Boot application, instead of downloading all of the Dependencies and Managing Them Manually, you can simply start off with a Sample Starter Template that has all of the dependencies taken care of. )
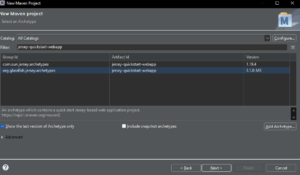
- Since we are building a Jersey API, the Archetype for this project would be jersey-quickstart-webapp. Installing would take care of almost all of the setup parts.
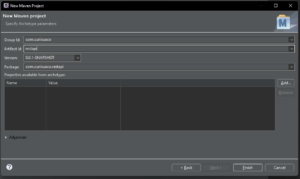
- After selecting the Archetype it’s time now to Fill in the Details of your project. Details such as Group ID, Artifact ID, and Version
- If you’ve never heard of Package Names, they are essentially Unique Identifiers for applications. They consist of 2 parts: Group ID and Artifact ID, where the Group ID refers to the Group/Company behind the App, and the Artifact ID is specific to the application you’re building.
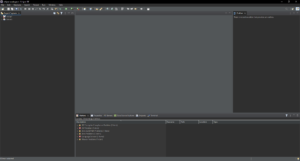
- Now, the Project should be created and you should be presented with the following screen
Installing Tomcat Server for the Java API
- For now, most of the setup is finished, and the only thing remaining is to create the Tomcat server that we have talked about.
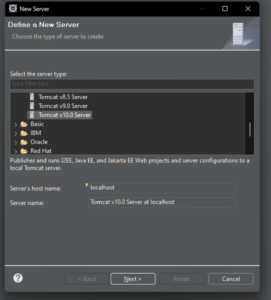
- To create a Tomcat server, click on the Server tab in the bottom pane of Eclipse IDE and then, click on Create a new server you will then be prompted with the following screen
- Select the Latest Version of Tomcat ( v10 as of writing this article ) and then, click on Download & Install to install Tomcat
Running the Jersey API
- Now that we have completed the setup for the API, it’s time for us to Test Whether it’s running or not
- To run a project in Eclipse click on the green Run As button and select the Tomcat server which we created previously
- If everything has gone all right, then you should be able to see the following webpage automatically loaded onto the browser.
Part 3: Understanding the File Structure Of a Jersey Project
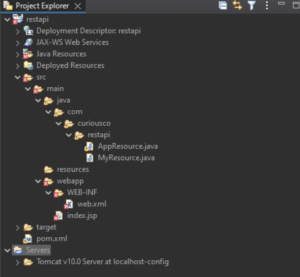
Before getting started with writing the code, it’s a good idea to Understand The File Structure of the project as it will help us in knowing the purpose of each file which will further help in easily pointing out bugs in the code. Moreover, this information will be useful for All new Jersey Projects that you create
As soon as you look at the Project Structure, it might seem overwhelming at first. But do not worry as we will be discussing each part in a Step by Step order.
The POM.xml file
Project Object Model or POM is specific to any Maven Project. It is an XML file that contains all of the information about the project, such as Project Name, Plugins, Dependencies, and a lot more. If you’ve worked with a Node.js project before, POM.xml is similar to the package.json file in a Node.js project.
The SRC folder
Exactly what the name says, it contains the SouRCe code for the API project, for now, this folder only has MyResource.java file which was added by the Starter Template. However, we won’t be working with this file. For this project, we’ll create a new file AppResource.java which will contain all of the Code for the API that we’ll be building
The src folder also contains a webapp folder that contains an index.jsp file. If you don’t know what JSP is, it’s essentially a Java Server Page. This index.jsp is responsible for the Jersey RESTful Web Application! A message that we saw while running the app.
The Java Resources & Deployed Resources Folder
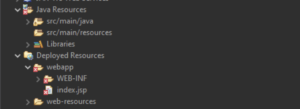
These folders are mostly just shortcuts to a few folders inside src/ such as src/main/java and src/main/resources. Similarly, the Deployed Resources folder also contains shortcuts to the webapp folder.
They are not actual folders inside the project directory, they are just created by eclipse to navigate through the files & folders easily.
The Servers Folder
This is yet another shortcut created by eclipse to help us locate all of the servers installed for this particular project
Part 4: Working on the Jersey API Routes
After understanding the project structure, it’s finally time to get started by writing some code.
As discussed we’ll be working on 3 routes
- GetCities: Returns a list of all the Cities for which the temperature is available
- GetAverageTemperature: Returns the Average temperature for all cities
- GetTemp: Takes in a City and returns the temperature for that particular city only
Before getting into the routes let’s first try to display a simple Welcome To The API message, whenever someone visits the homepage ( / ) of the API
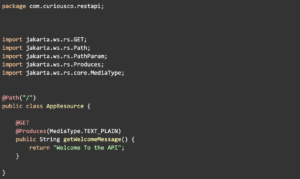
To do that, we simply need to add the following code in the AppResource.java folder that we had created earlier
Let’s try to understand the code above by breaking it down into multiple steps:
- Declaring the Package: In any .java file, we first start by declaring the package that this file belongs to. Doing so helps in grouping all the related classes in an application.
- Adding Import Statements: Since we are using features from other frameworks we need to import them into the Java file by adding import statements. However, as we are using an advanced IDE such as Eclipse we don’t need to worry about doing it ourselves as Eclipse will do it automatically for us.
- Creating the AppResouce Class: Since everything in Java is a class, we’ll be using Classes here too. The way this will work is we create an AppResource class having multiple methods where each method will represent a Jersey Route
Let’s now look at the code that is responsible for Handling the Homepage ( / ) route:
- Firstly, outside the Class, we declare the route of the homepage by adding the @Path(“”) decorator. This decorator is part of the JAX RS specification. Hence, adding this line will automatically import JAX RS to the app.
- Then, we create a method called getWelcomeMessage() that returns a String “Welcome to the API”
- For Jersey to be able to handle this request, we need to add additional information about the request being made.
- To do that, we declare that the request is an HTTP GET request by using the @GET decorator and that the response type is plain text using the @Produces(MediaType.TEXT_PLAIN) decorator
And that’s it! We’ve implemented the first route. It’s time now to test the route by running the server. If you have done everything correctly, you should be expecting the following output
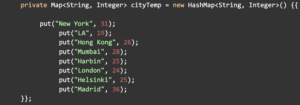
Now it’s time to make some dummy data for the API. We do so by adding the following code inside the AppResource class
In the real world, however, we’ll be getting the data from a Database like MySQL, PostgreSQL, or MongoDB. But covering Databases is not in the scope of this article. Hence, we’ll store the Dummy data in a Java HashMap.
If you have never heard of Java HashMap you can learn more about them here.
Let us now begin working on the 3 routes discussed:
/getCities
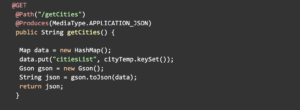
- Firstly, we declare that this is a GET Request on the PATH /getCities and the Response Type is JSON using @Get, @Path, and @Produces decorators respectively
- Then we start by storing the response in a new Map called data
- Inside the data map, we add a parameter citiesList which contains a String Collection of all the Cities
- To get all the Cities from a map as a List of Strings we use the cityTemp.keySet() method
- Then, we convert the data HashMap into JSON using a Java Library called GSON
To add GSON to your project, simply add the following code in the POM.xml file
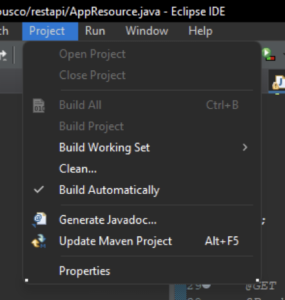
Then, we need to update maven by clicking on the Project button as shown below
- After converting the Map to JSON we simply return the JSON String using the return; keyword
If everything was implemented correctly you should get the following output on visiting the route.
/getAverageTemperature
- The first 3 lines of this code, should be pretty obvious by now as they simply declare the request type, response type, and the Route Path
- Inside the getAverageTemp() method we use a standard loop to calculate the sum of temperatures of all cities
- Then, we divide this sum of temperatures by the length/number of cities present. Thus, receiving the average temperature
- After getting the avg temperature, we store it in the data map as a property averageTemp
- We then convert the Map to a JSON string by using the GSON package, after which we simply return the JSON.
Visiting the route you should get an average temperature of 26.75 as shown below
/getTemperature/{city}
This route is a bit different from the other routes that we just discussed.
The difference is that we need to Pass the City Name to this route, whereas we did not need to pass any data to the routes we discussed above.
To pass additional data to this route we simply add the City Name at the end of the route (For eg, /getTemperature/Mumbai)
- The first three lines are pretty much the same as the previous routes, but there is a slight change in the @Path decorator. Since we don’t know the name of the city that will be passed in the route, we can wrap it inside curly brackets {} to indicate that the city variable is dynamic in the route
- We then get the city that the user passed using a @PathParam(“city”) decorator
- Now, we create a new Map called Data that will have the temperature of the City asked.
- We then, get the temperature of the city using .get() method provided by a Java HashMap and store this value inside the data map
- The last thing left to do is, to convert the Data Map to JSON using gson.toJson() method
- We then simply return the JSON as a response
You can now try the API by passing a sample city as shown below
Congratulations
Congrats on coming this far and completing the journey to build your very first Java JAX RS API! There still is a lot more to learn and explore about Jersey as we just explored the surface in this tutorial. A good idea to learn more would be to Visit Their Documentation and try to implement other HTTP Request types such as POST, PUT, DELETE, and a lot more. You can even try to learn about implementing HTTP Status codes such as 200 OK, 404 NOT FOUND, etc using JAX RS. If you found this valuable and learned something new today, do share it with your friends!


