Building Apps With React, BootStrap, Nodejs & PostgreSQL – TUTORIAL
Today we’ll be combining the power of popular front-end frameworks along with a robust backend, to build a Full Stack Web Application. We’ll be covering everything from making the API for our app using Node.js & the Database using PostgreSQL to making the UI using React & Bootstrap. There’ll be loads of concepts to discuss and learn about, so let’s get started!
Table of Contents
Tech Stack for the Tutorial
To build the full-stack application, we’ll be using the following technologies & frameworks
React.js
React.js is a front-end framework used for building “Single Page Applications”, it simplifies the build process by dividing the entire application into manageable pieces called Components, these components can store data & pass data among each other.
A collection of these Components is what makes up the react.js application
Bootstrap
Bootstrap is a Frontend Toolkit that helps us in quickly build UI components for web applications. Bootstrap has Pre-Built components such as Card, Button, Input, Dropdown, Modal, Toast, Tooltip, Carousel, and a lot more! These components can easily be included in our application with a few lines of code
It can be used with almost any framework ( such as React.js, Vue.js, Angular ) or can even be used with plain HTML/CSS/JS websites
PostgreSQL

No full-stack application is complete without a Database. There are many types of databases available in the market such as MongoDB, MySQL, etc. But in this tutorial, we’ll be using PostgreSQL as it is relatively popular, open source, and a good starting point for beginners
Node.js
Since we can’t directly connect to the database from the React.js frontend we’ll need an API to act as a middleman between the frontend and the database
To build the API for the application, we’ll be using Node.js & Express as they are easy to understand and code, along with having high performance.
What will we build in the Tutorial?
In this tutorial, we’ll be building a Mobile Store full-stack application, with the following features
- A database that has details of all of the Mobile phones in the store
- An API that connects to this database and provides results to any search query
- A React front end that allows the user to enter a search query and retrieve the data from API
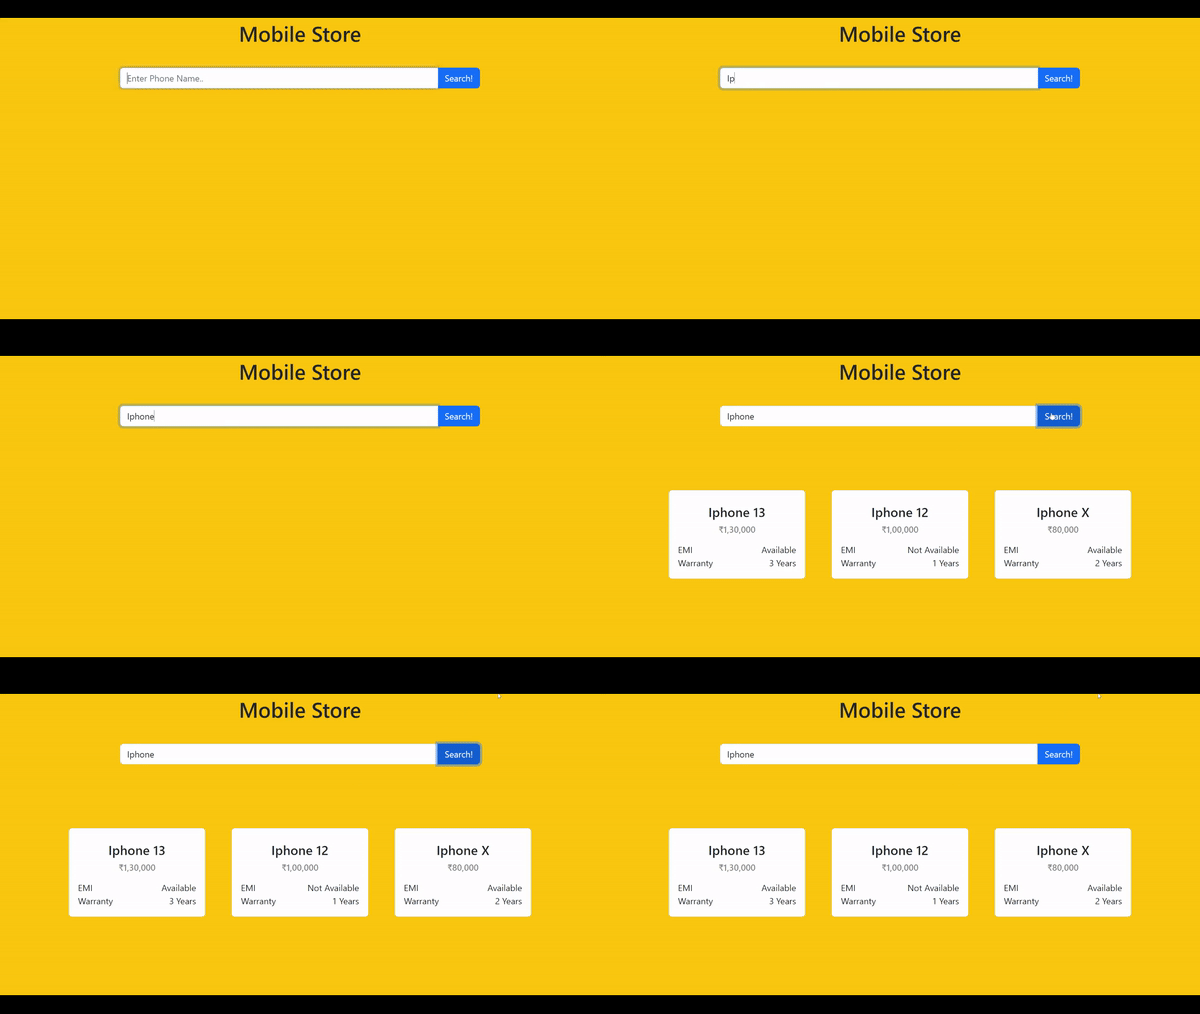
Now that you have an idea of what we’ll be building let’s get started!
The order that we’ll be following is
- Setting up the database
- Working on the API
- Building the front-end
Part 1: Setting up the PostgreSQL Database
To work on the Postgres database we first have to install it on the computer, since most of the people will be using windows, I’ll focus primarily on windows installation, but Linux/macOS users can follow along as the procedure is very similar
- Firstly visit the official website of PostgreSQL https://www.postgresql.org/
- Depending on your platform choose the appropriate installer and follow the on-screen instructions
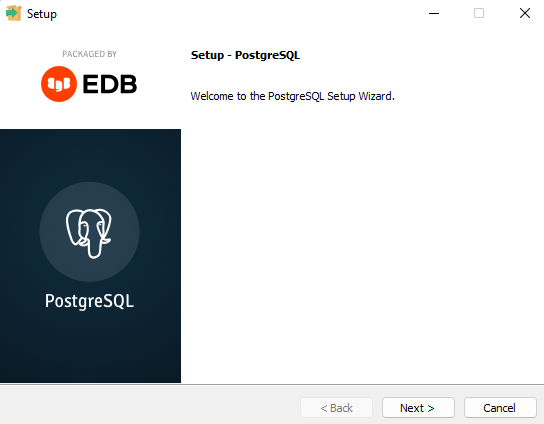
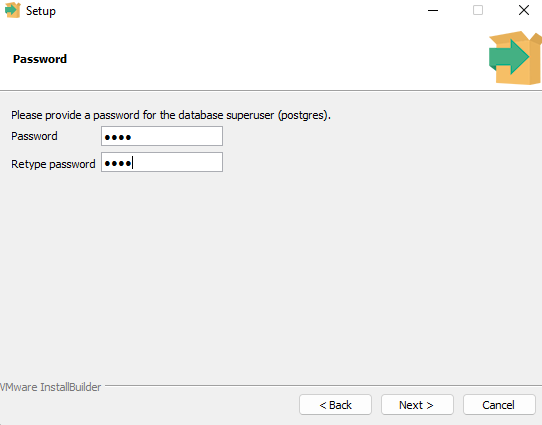
- After a few clicks, you’ll be prompted for the Database Password. Be sure to use something strong here as having access to the Database Password means having access to the entire database
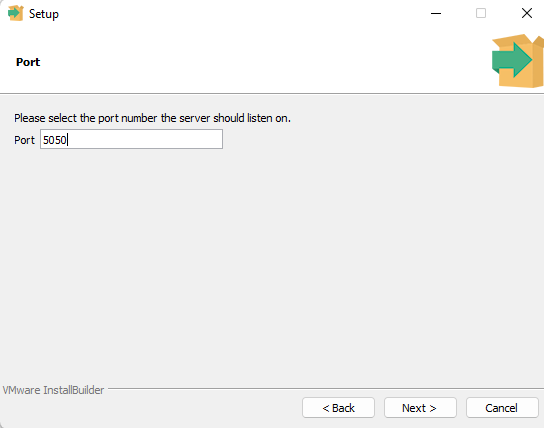
- Choose a PORT NUMBER for the database, if you don’t know what Port Numbers are, a simple way to think of them is that there are multiple Services on a Server( in our case Server is the computer ). And to access a particular service ( for eg. Database) we need to provide an identifying number, this number is called the PORT NUMBER, for this database, we’ll be using port 5050, but you can use any number you prefer
- The installation procedure should now begin, it can take anywhere from 5-10 minutes depending on your internet connection
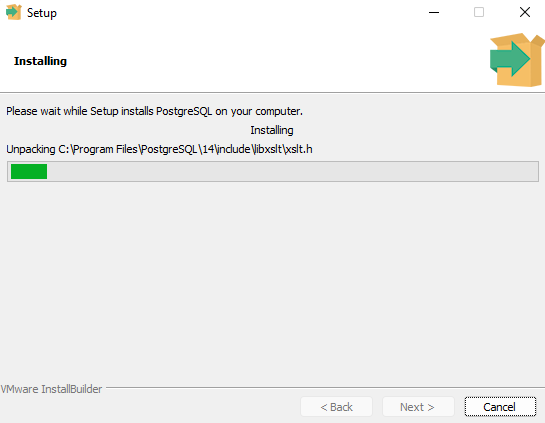
Now that we are done with installing the database, we need a program to Visualise the database, there are many Database Visualisation Tools or Database “Explorer” tools available in the market, but for our purpose, we’ll be using a popular tool called pgAdmin
To install pgAdmin we have to go through the following steps
- Visit their official website: https://www.pgadmin.org/ and download the relevant installer for your operating system
- Follow the on-screen instructions for the installer
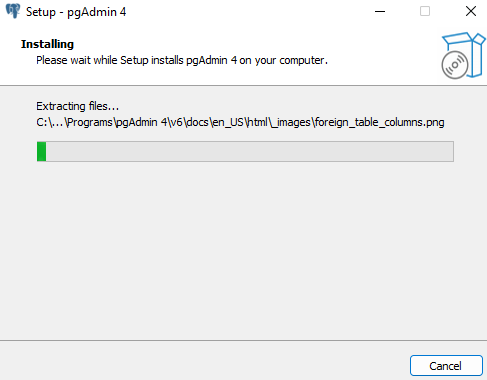
- Set a master password for your pgAdmin installation ( this need not be the same as the Database Password )

- Click on the Register a new server button to connect to the localhost:5050 server that we setup while installing PostgreSQL
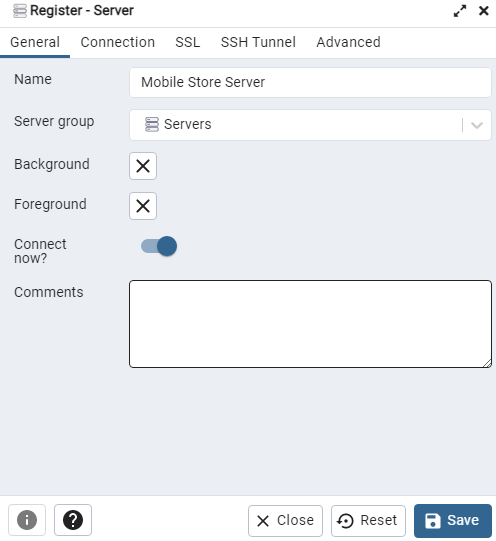
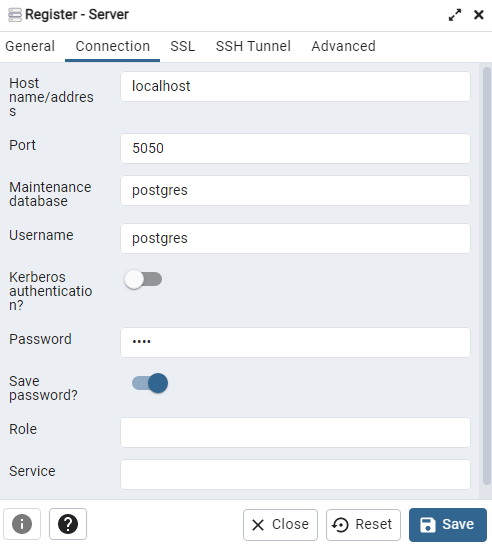
- Go to the Connection tab, and input the Address ( localhost ), Username (Postgres), and Database Password. Then click on “Save” to save the database connection
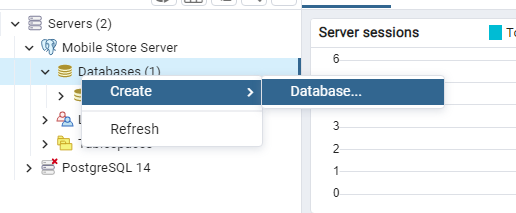
- Every Postgres server has a default Database that stores internal details of the server and is not meant to be modified by us, so for the MobileStore application, we’ll have to create a new database called MobileStore
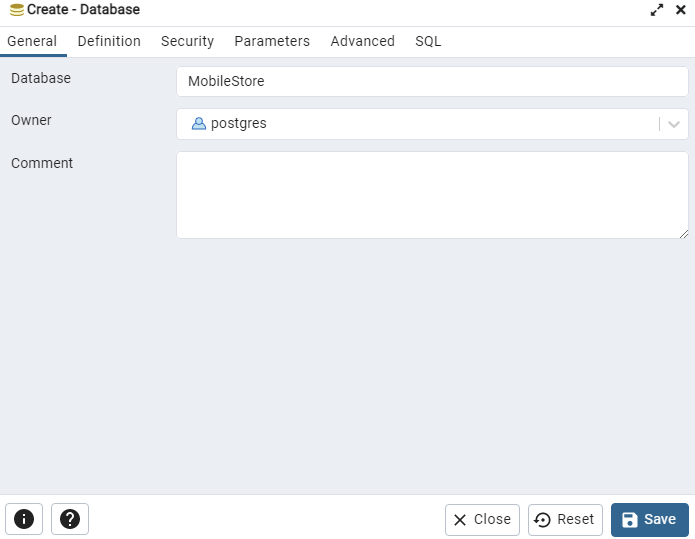
- In the general tab, insert the name you’d like to give to the database, let’s say “MobileStore”
- Now that a new database called MobileStore is created, to store data in it, we have to create a Table. The way data is stored in PostgreSQL ( or any SQL database ) is using Tables that have Rows and Columns
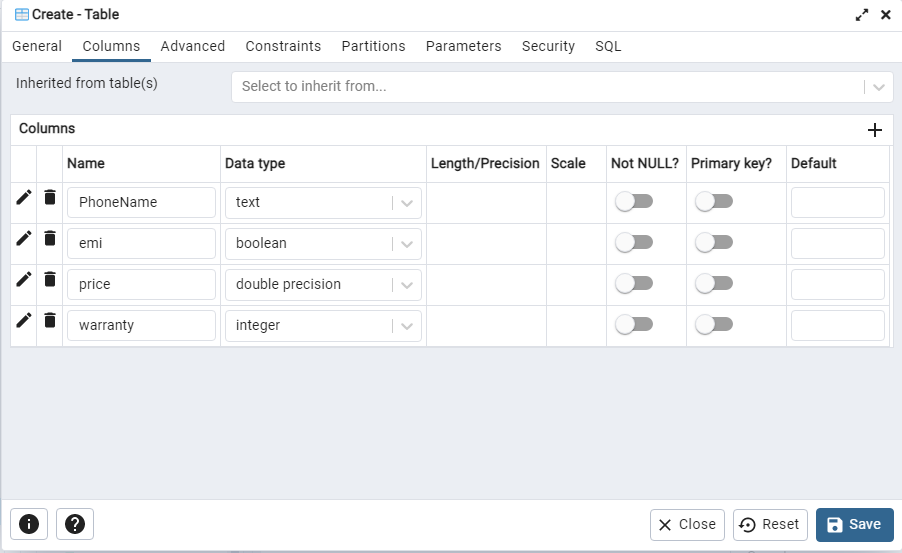
- In the newly created table, we’ll have 4 columns, called PhoneName, EMI, Price, Warranty
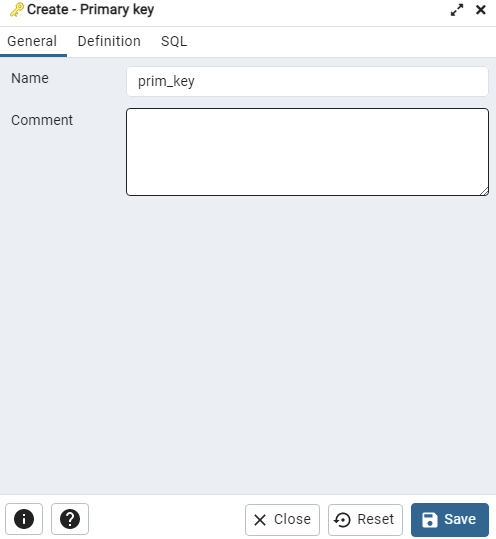
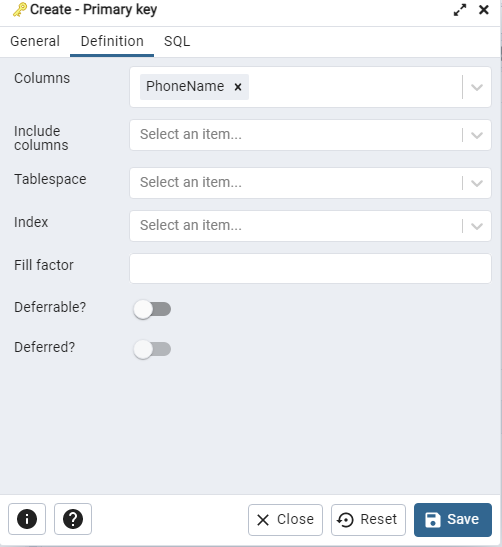
- Now to make sure that the database works fast, we’ll have to add a PrimaryKey, which represents the “Primary Column” of the Table, since we’ll be searching for phones mainly using their name, let’s put PhoneName as the primary column and hence set the Primary Key
- To test if everything works properly, start by adding a new Entry/Row to the table

Part 2: Working on the Node.js API
To get started on the API we first have to install Node.js and Node Package Manager
To install Node.js
- Visit their official website https://www.nodejs.org and download the installer for the Latest Stable Version ( 16.16.0 LTS ) as of writing this article
- Follow the on-screen instructions to finish the installation of Node.js
Now that we have installed Node.js it’s time to create a Node Project for the API
To create a Node.js project navigate to the directory where you want to create the project ( say mobile_store_api ) and run the following command
npm initYou will then be prompted to enter the details of your project as follows

Fill in the required fields such as Name, Version, and Description of your project and you should be good to go!
Before moving ahead we’ll need to install 2 important packages for this project, Express, and Postgres ( we will be discussing them shortly )
For now though, to install these 2 packages using NPM run the following command
npm install express pgUnderstanding the File Structure Of a Node.js Project
After setting up the project, you will now notice that some new files and folders are created.
Let’s have a close look at them, and try to understand what the purpose of each of these files and folders is so that we have a better understanding while working on Node.js projects
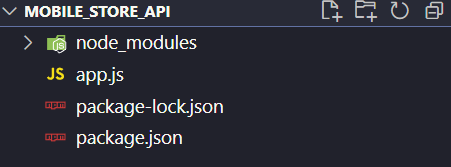
- Package.json & package-lock.json: These files are responsible for storing the details of packages installed using Node Package Manager ( NPM )
- Node_modules: This is an internally managed folder by NPM that stores all the packages that we installed, it’s generally recommended to not touch this folder and modify its contents
- App.js: Every node.js project has an EntryPoint, which is the first Javascript file that is run on a project. To keep it simple, we’ll just be using one file app.js that has all of the code inside it
Starting the Express Server
Let’s start working on the code, by initializing the API using Express.js
const express = require("express");
const app = express();
const API_PORT = 3000;


app.get("/", (req, res) => {
  res.send("Welcome to the API");
});

app.listen(API_PORT, () => {
  console.log("API Started");
});
If you’ve never heard of Express.js, it is a Node.js Framework that helps us in quickly build API’s using the pre-defined functionality that it provides
Let’s try to understand the Code above step-by-step
- Firstly, we include/import express in the app.js file using the require() function that Node.js provides us
- Then, we create a new express app by calling the function express() and storing the result inside a variable called app
- The way express works are we have to “explain it/ teach it” how to deal with all sorts of requests that can be performed, in the next line we “teach” express how to handle the homepage request ( / route ) by adding an app.get() function
- app.get() takes in two parameters, the route to be handled and a callback function that is called as soon as someone visits that route
- This callback function in turn provides us with 2 parameters, request, and response that provide request data and a way to send responses respectively
- In this case, we will be sending a simple “Welcome to the API” response to the user visiting the home ( / ) route
- Then, to start the express app, we have to call the app.listen(PORT, callback) function
- app.listen() also takes 2 parameters, the PORT NUMBER ( recall the discussion about PORT NUMBERS a few sections ago ) and a Callback Function that is executed after the API Server is started
Connecting to the Postgres Database Using Express
To connect to the database, we simply add the following code
const DATABASE_PORT = 5050;
const Pool = require("pg").Pool;
const pool = new Pool({
  user: "postgres",
  host: "localhost",
  database: "MobileStore",
  password: "1234",
  port: DATABASE_PORT,
});
Instead of having a Connection to a database, in Postgres we usually have a Pool Of Connections. This structure is helpful if you have multiple connections to multiple databases.
Let’s have a step-by-step breakdown of the code above
- Firstly we create a variable called DATABASE_PORT that contain the port number of the database ( Recall Setting up Postgres section )
- Then to import/include the Postgres package in the app.js file, we simply use require() function provided by Node.js
- We then create a new Pool and provide details such as user, hosting address, database name, password, and database port
- If the details were right you should now have a Pool of connections, which for now is the one connection to the only database that we have
Getting Query Results From the Postgres Database
Now that the Pool of connections to the database has been set up, we can start by creating a function that returns the results to a particular searchQuery to the API
const getSearchQueryResults = (searchQuery, response) => {
  pool.query(
    `SELECT * FROM "StoreTable" WHERE "PhoneName" LIKE '%${searchQuery}%'`,
    (err, res) => {
      response.send(res.rows);
    }
  );
};
Let us again try to understand the code by breaking it into multiple steps
- The function getSearchQueryResults takes 2 parameters, the searchQuery represents the text of the query, and response object is used to send the response to the user using response.send() method
- Then, we make a standard SQL query that returns all the Rows/Entries that have the term searchQuery in it
- Understanding an SQL Query should be pretty easy as it can be broken down as English Phrases. If you try to understand the above SQL Query as English you can break it down as “Select the rows from the StoreTable where PhoneName column has the text searchQuery in it”
- After the SQL Query is performed, we can send the response using the res.send() function
Creating the Express.js Route /searchMobile
The only thing left now is to create a new express route that calls/executes the getSearchQueryResults function above as soon as the user visits that particular route
app.get("/searchMobile", (req, res) => {
  var queryParams = req.query;
  var searchQuery = queryParams["query"];

  getSearchQueryResults(searchQuery, res);
});
As always, let’s go through the above code step-by-step
- If you look closely at the route you might have a question. If the route only contains /searchMobile how will the searchQuery be passed. And the answer to that is using Query Parameters. If you’ve never heard of QueryParameters they are a simple way to pass data to a website route
To pass data to a route and add Query Parameters to it, add the additional data at the end of the URL
For eg: https://localhost:3000/searchMobile?query=Iphone
- The Query Parameters passed to a route can be accessed by using req.query where req is the request object provided as a parameter to the callback function
- After getting the Query Parameter we pass the search query & the response object to the getSearchQueryResults function which will handle the query and send the response to us
Congrats! We are now Done with implementing the API. You can try it out by adding a few entries to the Postgres database and querying them using the API to test if everything’s working the way we want it to.
Part 3: Creating the React & Bootstrap FrontEnd
Now that we are done with the backend it’s time to design the Front-end of the application, to do that we’ll be using two frameworks namely React & BootStrap
Assuming you’ve already installed Node.js and NPM from the previous sections, you can create a React.js project by running the following command
npx create-react-app <app name>In our case, the command would be
npx create-react-app mobile_store
You should now notice a new folder called mobile_store with lots of files and folders in it, let’s take a look at them
Understanding the file structure of a React.js Project
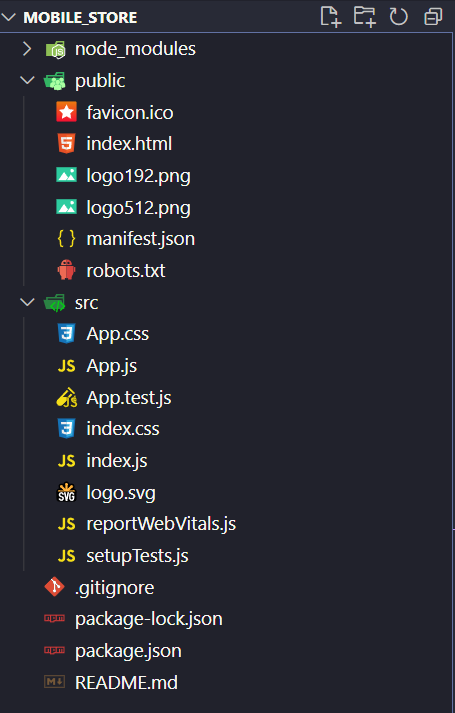
Most of the files such as package.json & node_modules are common to all nodejs projects, they handle the packages/plugins installed by NPM ( Node Package Manager )
Let’s now have a look at react-specific files & folders
- The public folder: As the name suggests, this folder contains all of the files such as images, and videos, that are meant to be directly accessed by the public
- The src folder: This folder contains the Source Code of a React Application, this is not accessed by the public as this source code is compiled to standard HTML/CSS/Javascript that can be hosted on a normal web server
Adding BootStrap to the React Application
To add Bootstrap to the react application, we have to follow the given process
- Visit the official website of Bootstrap https://getbootstrap.com/ and go to the section Include Via CDN
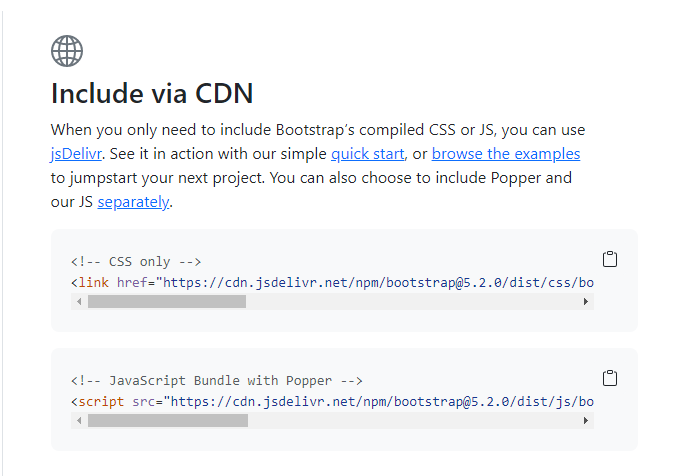
- Since we’ll be using Bootstrap only for the CSS / Styling of the application, let’s copy the CSS Only <link> tag and paste it inside the index.html file in the public/ folder
<!-- CSS only -->
    <link
      href="https://cdn.jsdelivr.net/npm/[email protected]/dist/css/bootstrap.min.css"
      rel="stylesheet"
      integrity="sha384-gH2yIJqKdNHPEq0n4Mqa/HGKIhSkIHeL5AyhkYV8i59U5AR6csBvApHHNl/vI1Bx"
      crossorigin="anonymous"
    />
Creating the UI For the React.js Application
As we discussed, a React Application is made up of small manageable parts called Components. However, for simplicity, we’ll only be working with a single component called the App Component. This component is already created for us inside the src/ folder
Before moving ahead, let’s clear up the App.js & App.css files to get a better understanding of the code from scratch
Start by adding the following code
function App() {


  return (
    <div>

    </div>
  );
}

export default App;
The above code simply creates an App Component and returns an empty <div>
Note: To those wondering how the above code has HTML tags inside JavaScript, it’s not exactly HTML but something called JSX ( JavaScript XML ) That allows writing React.js HTML Code inside Javascript. To learn more about JSX click here.
Looking at the final product, let’s add the following JSX that creates the Headings and Input Bar
 <div
        className="d-flex justify-content-center align-items-center flex-column h1"
        style={{
          height: "10vh",
        }}
      >
        Mobile Store
      </div>
      <div
        className="d-flex justify-content-center align-items-center flex-column"
        style={{
          height: "20vh",
        }}
      >
        <div
          className="input-group mb-3"
          style={{
            width: "60vw",
          }}
        >
          <input
            type="text"
            className="form-control"
            placeholder="Enter Phone Name.."
            onChange={(e) => {
              setQuery(e.target.value);
            }}
          />
          <button
            className="btn btn-primary "
            type="button"
            id="button-addon2"
            onClick={() => clickHandler()}
          >
            Search!
          </button>
        </div>
      </div>
Most of the code above should seem pretty familiar. You might notice something new such as setQuery(), or clickHandler(), let’s discuss them below:
React components have something called State in them, it stores the current state of the component.
To understand the State better, a good exercise would be to figure out what data needs to be stored on the component. Think about it for a while before moving ahead.
And you’re right! We’ll primarily need to store 2 things
- The SearchQuery being typed by the user
- The Results returned from the API Server
To add these variables to the state of the App Component we need to use the useState hook, to learn more about it and about React Hooks in general, visit the following website https://reactjs.org/docs/hooks-intro.html
let [results, setResults] = useState([]);
let [query, setQuery] = useState("");
Let’s now work on displaying the results of the searchQuery
Normally, on a successful request, the API sends data in the following format
[{"PhoneName":"Iphone 13","emi":true,"price":130000,"warranty":3},{"PhoneName":"Iphone 12","emi":false,"price":100000,"warranty":1},{"PhoneName":"Iphone X","emi":true,"price":80000,"warranty":2}]Let’s map the received JSON data into readable HTML using Javascript’s map() function as shown below
 <div
        id="results"
        className="d-flex justify-content-center container mt-5"
      >
        {results.map((e) => {
          return (
            <div className="card p-3 bg-white" style={{ width: "250px" }}>
              <div className="about-product text-center mt-2">
                <div>
                  <h4>{e.PhoneName}</h4>
                  <h6 className="mt-0 text-black-50">
                    ₹{e.price.toLocaleString("en-IN")}
                  </h6>
                </div>
              </div>
              <div className="stats mt-2">
                <div className="d-flex justify-content-between p-price">
                  <span>EMI </span>
                  <span>{e.emi ? "Available" : "Not Available"}</span>
                </div>
                <div className="d-flex justify-content-between p-price">
                  <span>Warranty</span>
                  <span>{e.warranty} Years</span>
                </div>
              </div>
            </div>
          );
        })}
      </div>
The only thing left now is to handle a User Click, that sends the request to the API and updates the results array using the setResults() hook.
const clickHandler = async () => {
    var queryResult = await fetch(
      `http://localhost:3000/searchMobile?query=${query}`,

    );
    queryResult = await queryResult.json();
    setResults(queryResult);
  };
An important thing to notice here would be how we are passing additional data ( searchQuery ) using QueryParameters and then converting the retrieved data to JSON format using the .json() method provided by the API response
After adding this clickHandler() the front-end of the application should now be complete! You can try it out by making a few queries and see if everything works as expected
Conclusion
This sure was a long journey, from Creating the Database to making the API and then working on the front-end. Hopefully, this gave you a basic understanding of how full-stack apps are usually built and gave you ideas to build even more of them. A good step ahead would be to explore more technology stacks such as the MERN/MEAN Stack and learn more about them. If you learned something today and liked the article, do share it with your friends!
